Hallways often feel like pass-through zones, but you can turn them into a stylish part of your home with smart panelling choices. This article shows a range of looks—from classic wainscoting to bold geometric and ceiling-to-floor options—so you can pick hallway panelling ideas that match your space and style.
You will learn practical panelling ideas and simple ways to change the look, feel, and function of your hallway without a full remodel. Expect tips on materials, finishes, lighting, and easy installation points that help you plan a project that fits your budget and layout.
Table of Contents
- 1 1) Classic raised-panel wainscoting (dado height)
- 2 2) Full-height shiplap with contrasting paint
- 3 3) Beadboard half-panels with picture rail
- 4 4) Vertical slat panelling in stained oak
- 5 5) Geometric recessed panels (modern grid)
- 6 6) Board-and-batten panelling painted two-tone
- 7 7) Tongue-and-groove ceiling-to-floor panelling
- 8 8) Chevron wood panelling feature wall
- 9 9) MDF moulded panelling with decorative trim
- 10 10) Half-height beadboard with gallery rail and hooks
- 11 Choosing Materials and Finishes
- 12 Installation Considerations
- 13 Enhancing Lighting and Space Perception
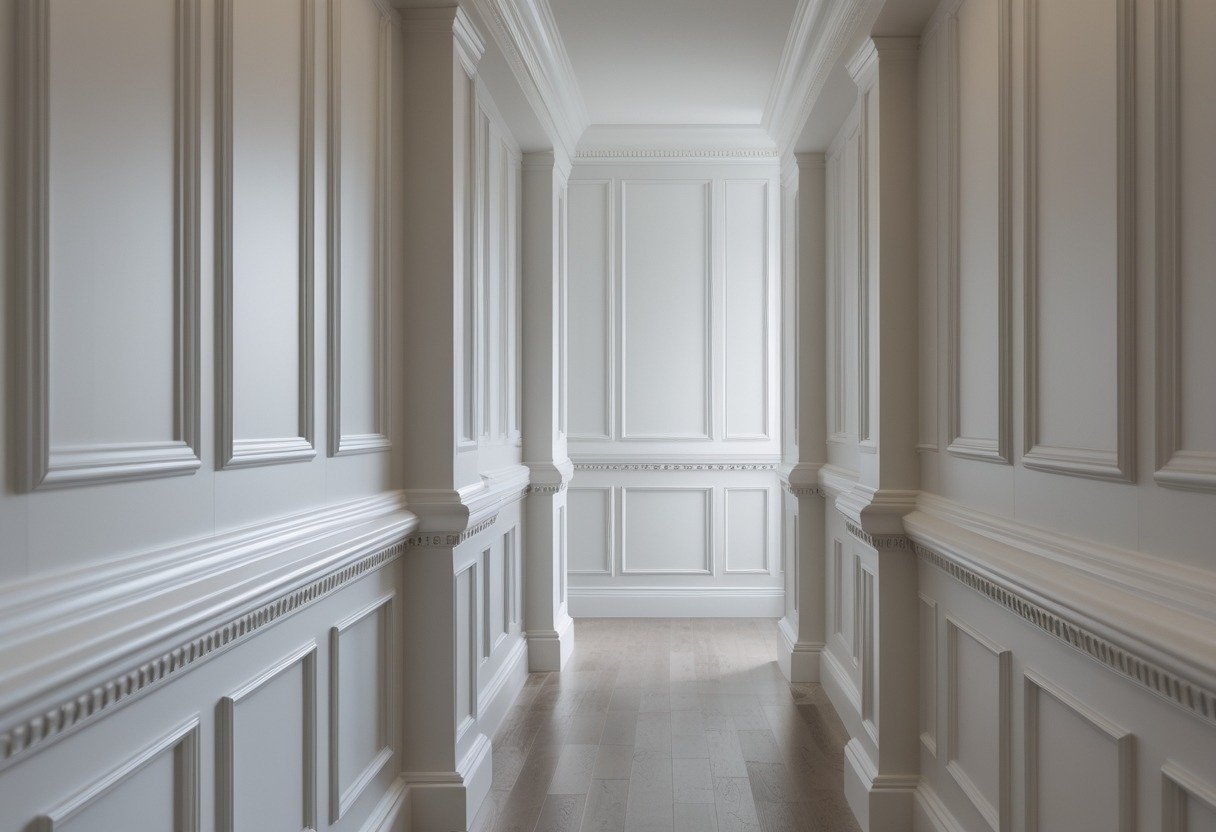
1) Classic raised-panel wainscoting (dado height)
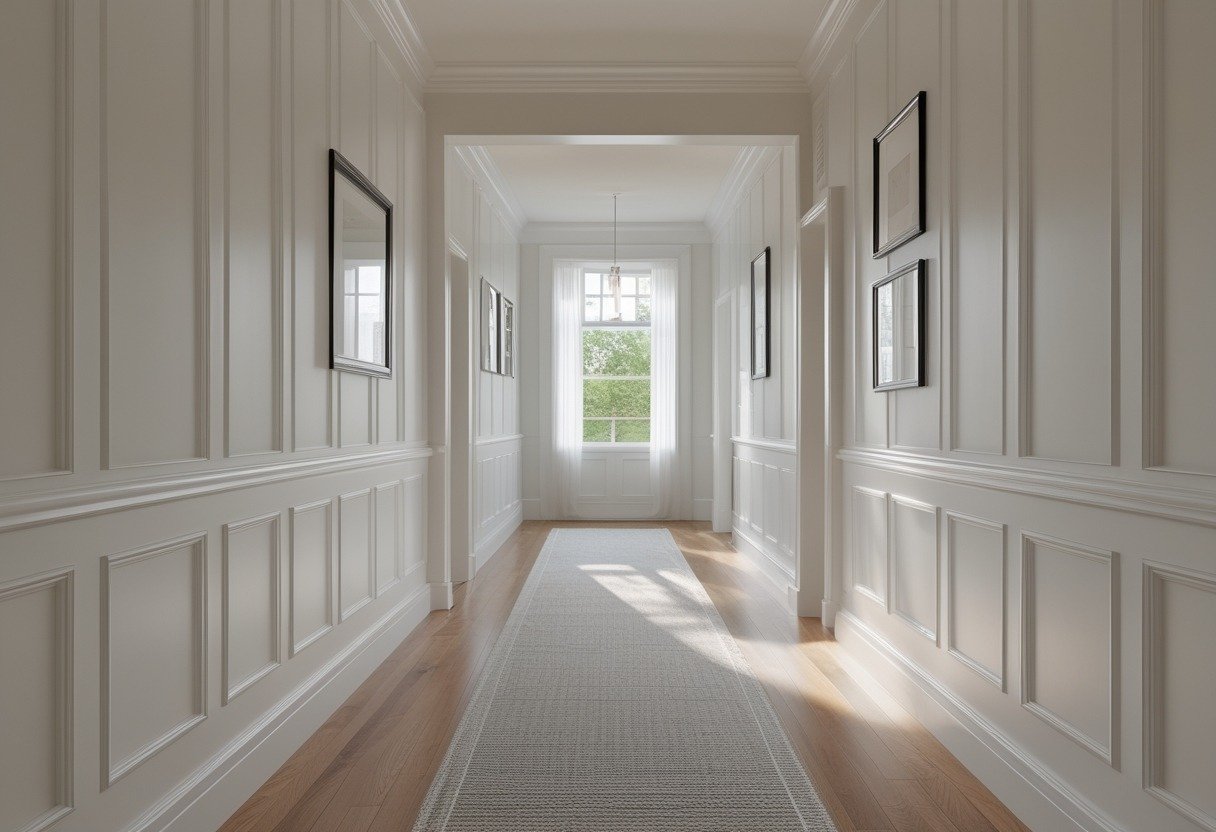
You can add classic raised-panel wainscoting at standard dado height to give your hallway a formal, timeless look.
Panels sit between a base rail and a dado rail, creating depth without covering the whole wall.
Keep paint tones neutral for a traditional feel, or pick a contrasting color on the upper wall for visual interest.
This style works well in older homes and modern spaces that need a touch of formality.
2) Full-height shiplap with contrasting paint
You can cover the entire hallway wall with horizontal shiplap to add texture and a clean line. Paint the shiplap a contrasting color to the trim or ceiling to make the boards stand out.
This treatment works in narrow or long halls because the lines guide the eye and add depth. Choose a durable paint for high-traffic areas to keep the finish looking fresh.
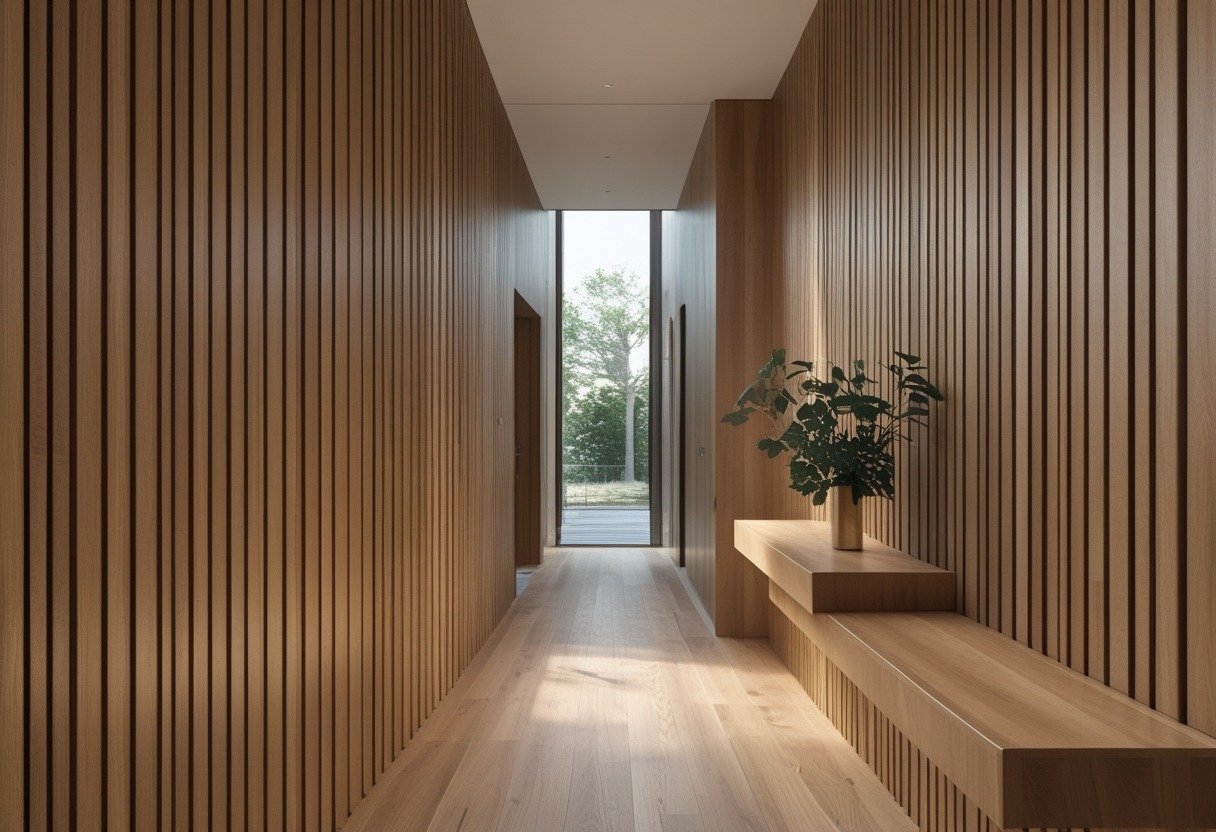
3) Beadboard half-panels with picture rail

You can add beadboard to the lower half of your hallway to protect walls and add texture. It works well in narrow spaces and hides scuffs from daily traffic.
Install a picture rail above the beadboard so you can hang art without damaging walls. Paint the beadboard a contrasting color for a clean, classic look that stays low maintenance.
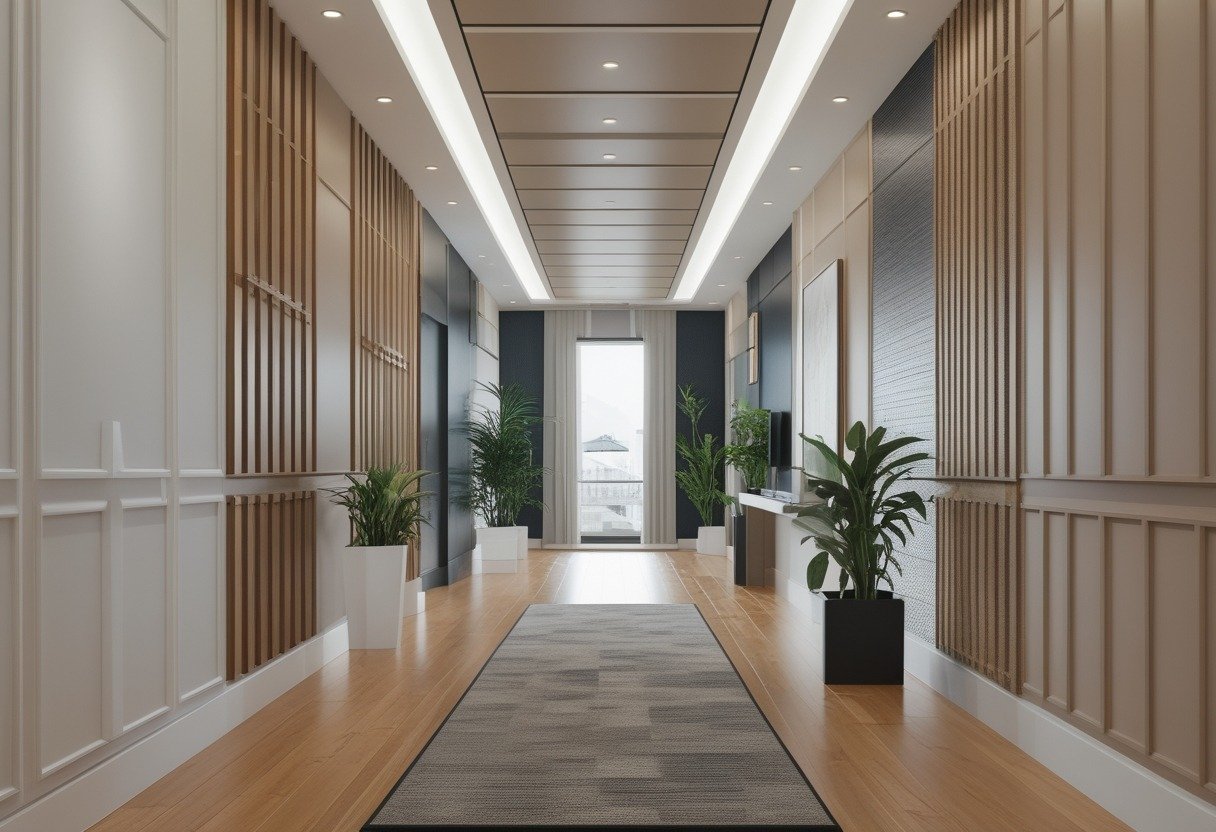
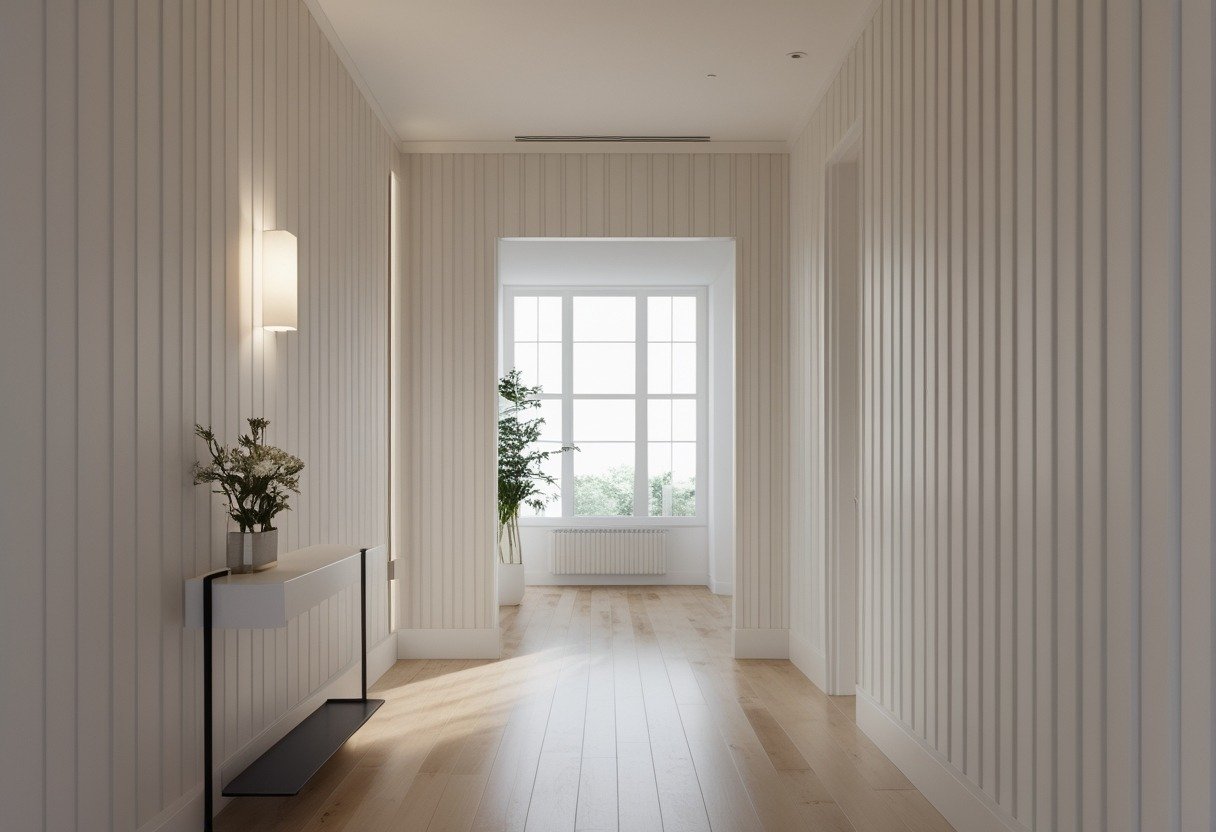
4) Vertical slat panelling in stained oak
Choose stained oak slats to add warmth and a clean rhythm to your hallway. The vertical lines draw the eye upward and make narrow spaces feel taller.
Match the stain to other wood tones in your home for a cohesive look. You can leave narrow gaps between slats for a modern, airy feel or place them closer for a richer texture.
Stained oak hides wear well and suits both traditional and modern styles. Install pre-finished panels for faster results and more consistent color.
5) Geometric recessed panels (modern grid)
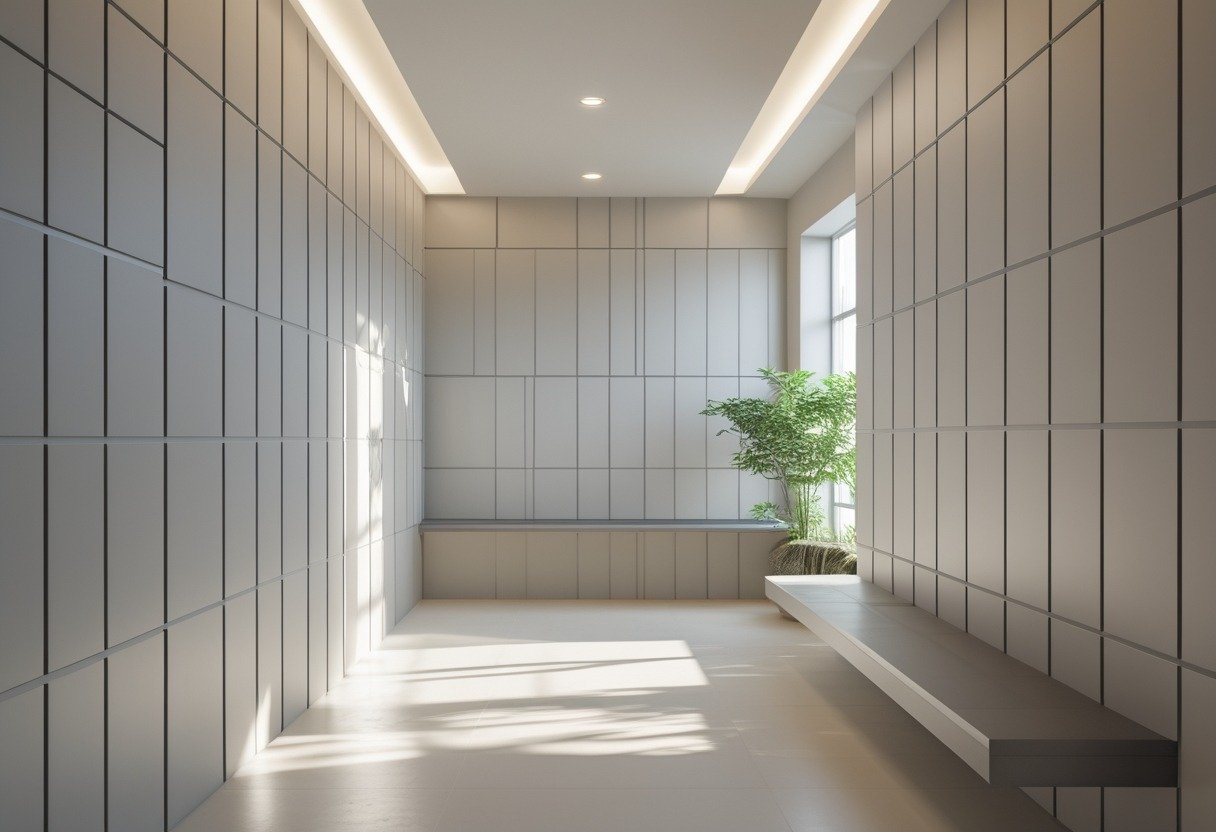
Geometric recessed panels create a clean, modern grid that gives your hallway structure and rhythm. You can use square or rectangular recesses to make the space feel ordered and intentional.
Choose a subtle contrast in paint or a matching tone for a sleek look. Lighting over the panels adds depth and highlights the geometric pattern for a refined finish.
6) Board-and-batten panelling painted two-tone
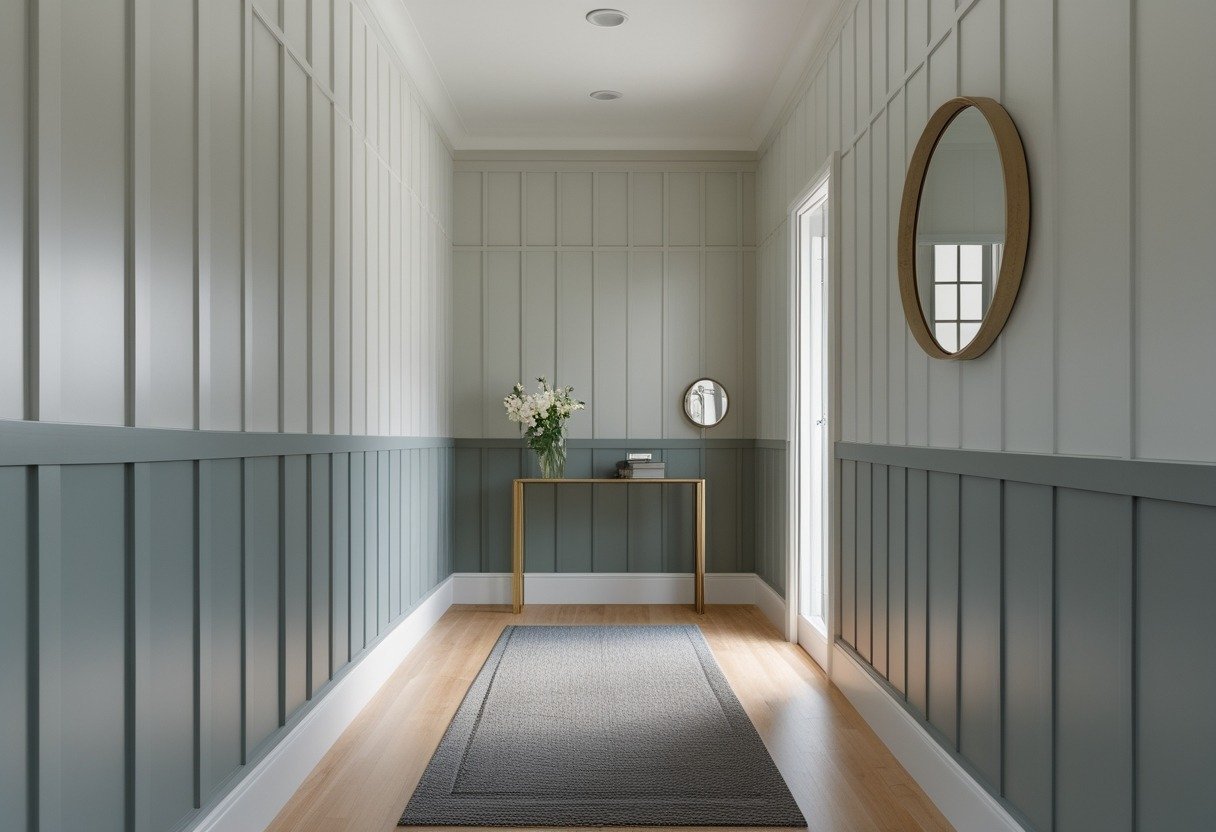
You can make a narrow hallway feel taller by painting the lower board-and-batten section a darker color and leaving the upper wall light.
This adds contrast and keeps the space from feeling heavy.
Choose durable, washable paint for the lower portion since it sees more scuffs.
Use a thin cap trim or a clean paint line to separate the two colors for a neat, finished look.
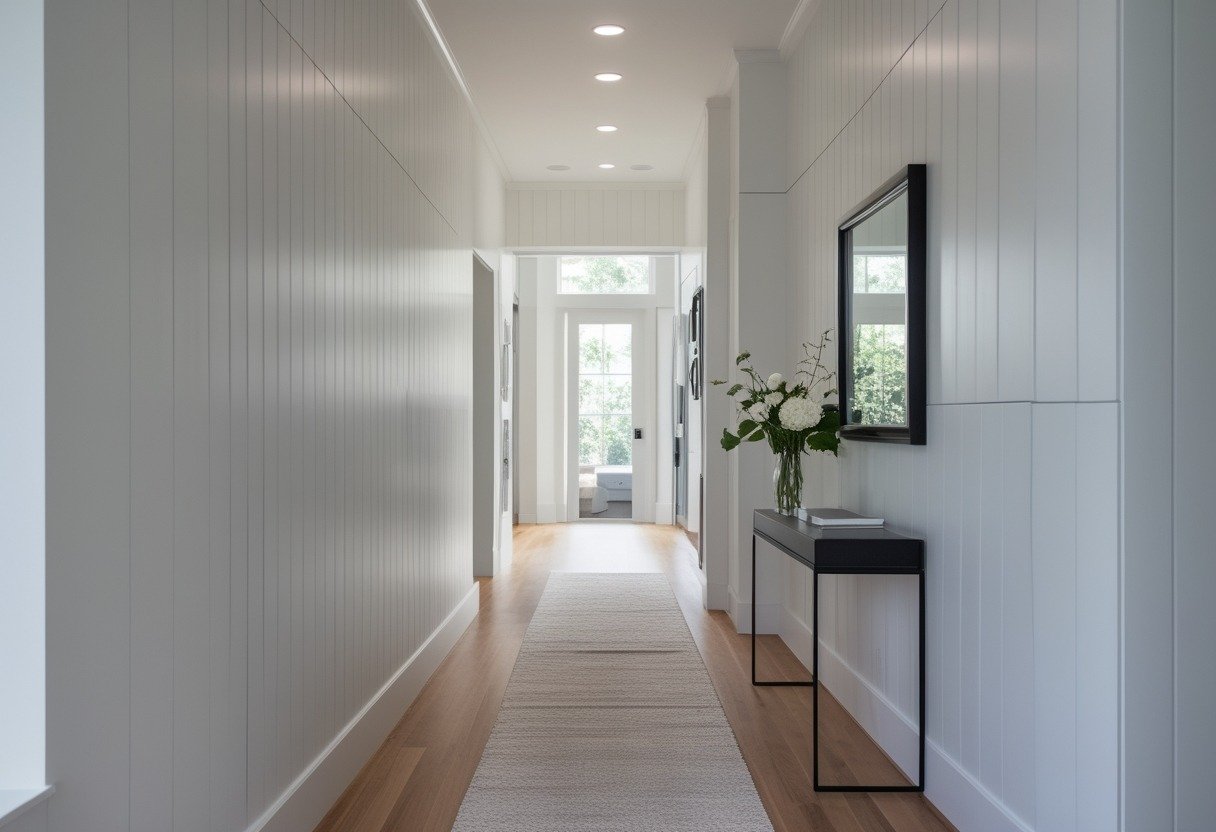
7) Tongue-and-groove ceiling-to-floor panelling
You can run tongue-and-groove boards from floor to ceiling to create a clean, continuous look that adds height and texture. This approach works in narrow halls because the vertical lines draw the eye upward and make the space feel taller.
Choose natural wood for warmth or paint the boards for a modern, crisp finish. Installation is straightforward and panels fit tightly, giving a neat, durable surface that hides minor wall imperfections.
8) Chevron wood panelling feature wall
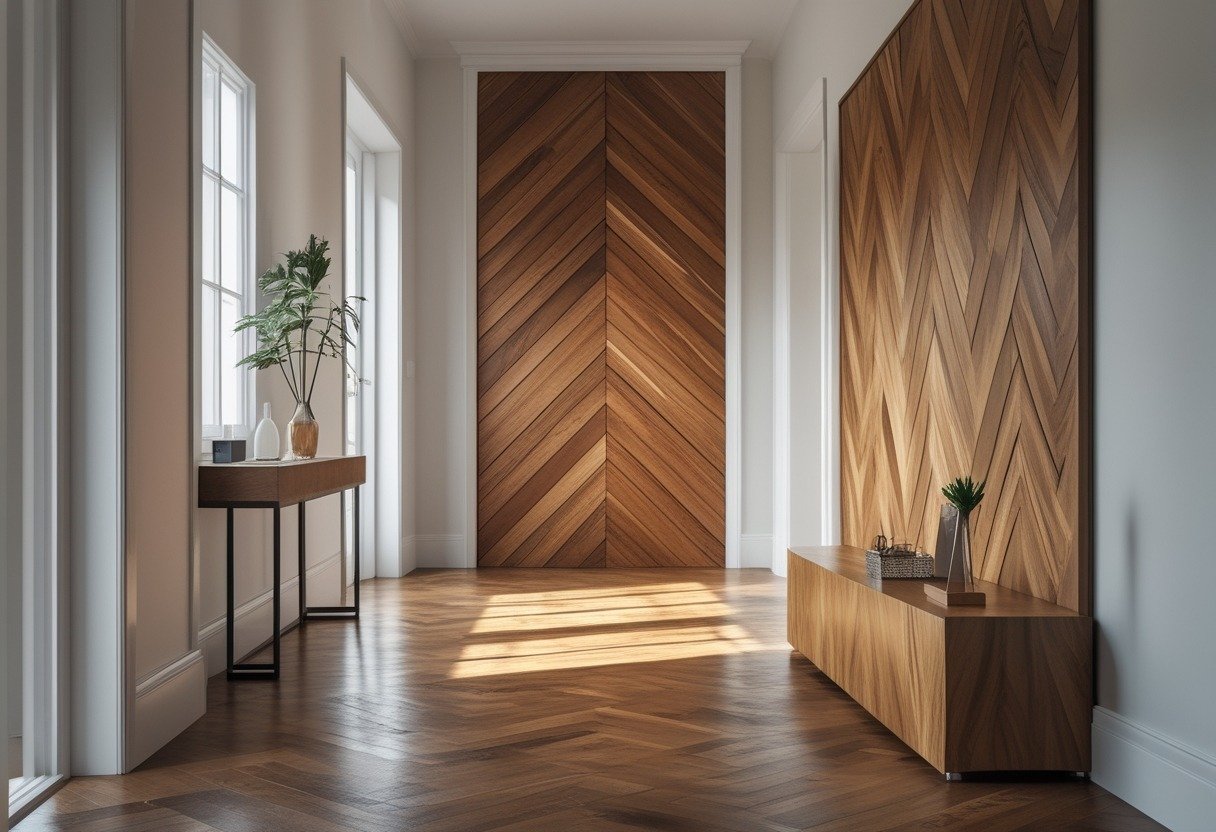
You can make a hallway feel lively with a chevron wood panelling feature wall. The V-shaped pattern adds movement and draws the eye down the corridor.
Choose real wood or faux panels for easier installation and lower cost. Lighter tones brighten narrow spaces, while darker wood adds depth and a cozy feel.
Keep surrounding walls simple so the chevron remains the focal point. Add subtle lighting to highlight the pattern without overwhelming the space.
9) MDF moulded panelling with decorative trim
MDF moulded panelling gives your hallway a clean, tailored look without high cost. You can fit pre-cut panels quickly, which saves time and keeps edges neat.
Add decorative trim to highlight chair rails, picture rails, or frames around panels. Paint both the panelling and trim in the same color for a subtle effect, or choose contrasting colors for more drama.
10) Half-height beadboard with gallery rail and hooks
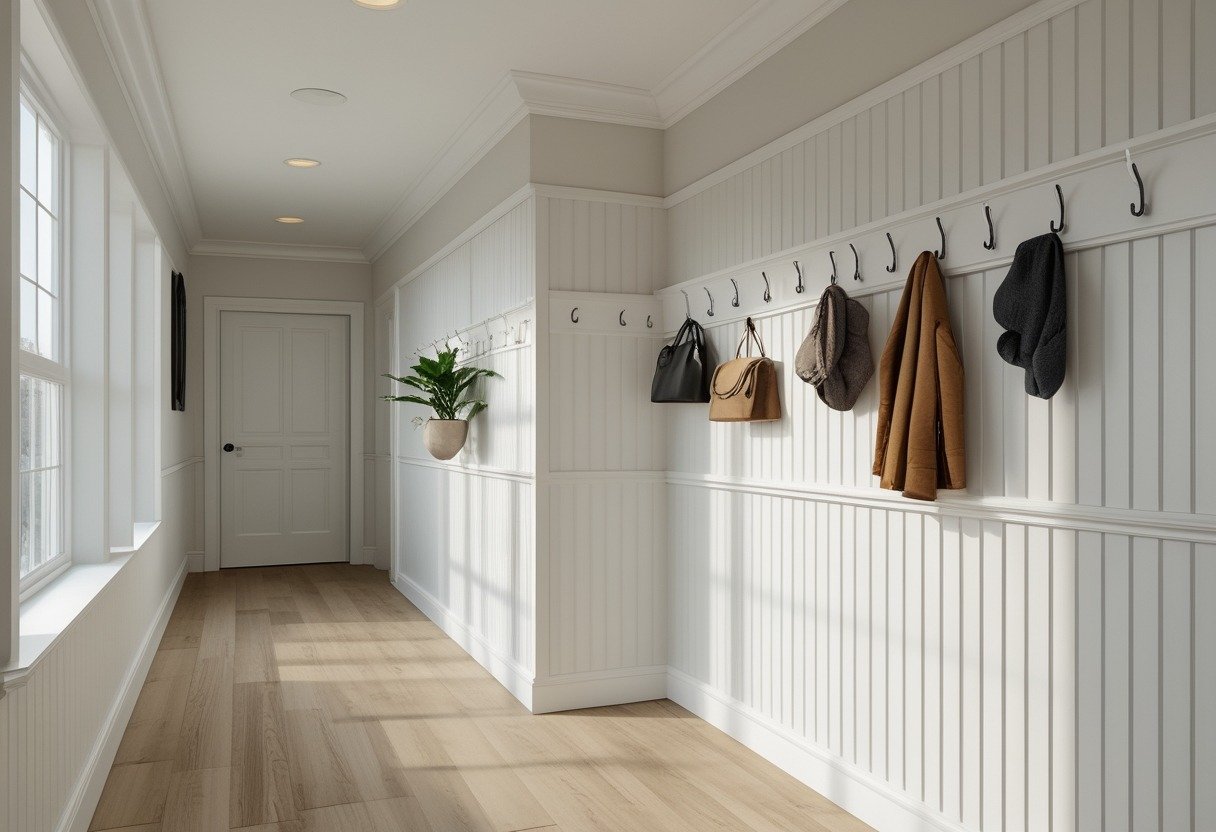
You can protect hallway walls and add charm with half-height beadboard topped by a gallery rail. Paint the beadboard a contrasting color to highlight frames and create a simple, tidy look.
Install hooks under the rail for coats, bags, or keys so the space stays practical. This combo works well in busy homes and keeps scuffs lower on the wall where they’re easier to manage.
Choosing Materials and Finishes
Pick materials based on foot traffic, moisture, and the look you want. Decide if you need durable hardwood for heavy use, moisture-resistant options for entryways, or low-VOC choices for better indoor air quality.
Popular Wood Types
Oak and maple are top choices for hallways because they resist wear and denting. Oak shows grain and takes stain well; choose white oak for a warm, slightly gray tone or red oak for a richer, pinker hue. Maple gives a smoother, cleaner look with tight grain that suits modern styles.
Pine and fir work if you want a softer, more rustic feel and plan to paint or accept dents. They cost less but need more maintenance in high-traffic spots. Both solid wood and engineered wood are available; engineered planks handle humidity better and still look like real wood.
Paint and Stain Options
Solid paint covers the paneling for a crisp, uniform look and helps hide imperfections. Use semi-gloss or satin for hallway panels since they resist scuffs and clean easily. For two-tone styles, paint the lower panels a darker color to hide marks and the upper wall a lighter color to keep the space bright.
Stain highlights wood grain and works best on oak, walnut, and ash. Choose a water-based stain for faster drying and lower odor, or an oil-based stain for deeper penetration and richer color. Always test samples on the actual paneling before finishing the whole hallway.
Eco-Friendly Alternatives
Bamboo panels offer fast-grown, strong boards that look like hardwood and resist moisture. They suit modern and Asian-inspired designs. Cork is another green choice that adds sound dampening and a soft surface; seal it well to protect from scuffs.
Look for FSC-certified wood to ensure sustainable harvesting. Low-VOC or zero-VOC paints and finishes cut down off-gassing and help indoor air quality. Reclaimed wood gives unique character and reduces demand for new lumber; check for nails, rot, or insect damage before installing.
Installation Considerations
Plan surface prep, tools, and exact measurements before you buy materials. Proper prep and careful measuring save time and prevent costly mistakes.
Preparation and Wall Treatment
Start by checking walls for moisture, cracks, and loose paint. Use a moisture meter where damp is possible. Repair cracks with filler, sand smooth, and remove loose paint. If plaster is soft or crumbling, replace sections or install backer board.
Prime the wall with a bonding primer if paint is glossy or if you’re installing MDF. For raw wood panelling, a moisture-resistant primer helps prevent swelling. Ensure studs are exposed or located with a stud finder for secure fixing.
Gather fasteners suited to your substrate: screws for studs, masonry anchors for brick, and construction adhesive plus brad nails for drywall. Keep a level, laser or chalk line, and a mallet handy. Mask adjacent floors and trim to protect finishes.
Measuring and Planning Tips
Measure the hall length and height, then calculate panel widths and spacing. Divide the wall height by your desired panel count to get consistent proportions. Adjust dimensions to avoid narrow slivers at ends; aim for equal or visually balanced margins.
Sketch a scaled elevation before cutting. Mark stud locations on the sketch and on the wall. Plan electrical outlet and switch cutouts; measure their center points and transfer them to each panel.
Order 10–15% extra material for waste and mistakes. Label each panel and record its final location. Dry-fit panels on the floor to verify layout, then cut and finish edges before final installation.
Enhancing Lighting and Space Perception
Use light, color, and reflective surfaces to make a narrow hallway feel wider and brighter. Small changes to paneling, paint, and fittings can boost natural light and trick the eye into seeing more space.
Maximizing Natural Light
Place paneling no higher than chair-rail level (about 36–42 inches) to keep wall space above free for windows or light. If you have a sidelights or transom, paint the paneling a slightly darker tone than the trim so the glass reads brighter by contrast.
Choose materials that reflect light: gloss or semi-gloss paint on the panel faces and a satin finish on rails bounce daylight farther. If you install full-height paneling, leave a 2–3 inch gap at the top for a narrow picture rail or mirror strip to capture light from windows or doors.
Add narrow mirrored panels or a slim horizontal mirror within the paneling run to reflect a view of the window back into the hall. Keep mirror sizes modest — one long strip or a few small inset mirrors prevents glare but multiplies light.
Using Color to Expand Hallways
Use a light, warm neutral on the walls above paneling to open the space visually. Whites with a touch of warmth (low blue) keep the hall from feeling cold while still appearing airy.
Paint vertical grooves or battens in a slightly lighter shade than the flat panels to draw the eye upward. This creates the illusion of height without changing structure. For two-tone schemes, keep the darker color on the lower third to ground the space and a paler shade above to lift it.
Avoid high-contrast stripes across the width of the hall; they narrow the view. Instead, use subtle tonal variation or a single pale color with textured paneling to add depth while preserving a sense of width.