Remember that neighbor who goes absolutely bonkers with Christmas decorations every year? The one whose electric bill probably rivals NASA’s monthly budget? Yeah, I used to judge them too.
Then I bought my first house and suddenly found myself at Home Depot at 7 AM on Black Friday, fighting over the last inflatable Santa. Funny how things change, right?
Look, transforming your outdoor space into a Christmas wonderland doesn’t mean you need to recreate the North Pole in your front yard (unless you want to – no judgment here). These ten ideas strike that perfect balance between festive and tasteful, impressive and actually doable.
Plus, I’ve tested most of these myself, so I can tell you exactly what works and what’ll have you cursing at tangled lights in 20-degree weather.
Whether you’re the type who starts planning in July or someone scrambling on December 20th, these outdoor Christmas decor ideas will make your house the one everyone slows down to admire. And isn’t that really what we’re all after? That little moment of neighborhood Christmas fame?
Winter Wonderland Pathway
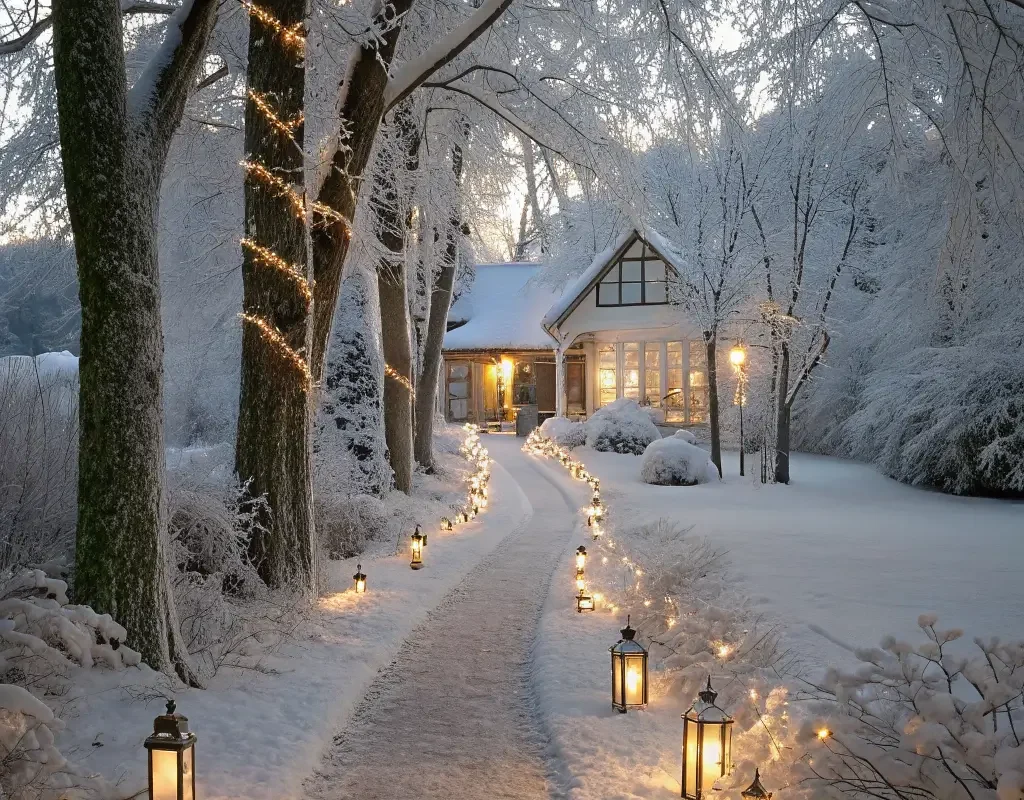
Creating a magical pathway to your front door sets the entire mood for your holiday display. I discovered this completely by accident when I ran out of places to put lights and just started lining my walkway. Now it’s the first thing I set up every year because the impact-to-effort ratio is absolutely insane.
Start with simple pathway lights – those solar-powered stakes work great and won’t jack up your electricity bill. Space them about 3-4 feet apart on both sides of your walkway. Here’s where it gets fun: wrap each stake with white lights and add some artificial snow spray for that fresh powder look.
Materials You’ll Need:
- Solar pathway lights (8-12 depending on walkway length)
- White LED string lights (100 count per 4 stakes)
- Artificial snow spray
- White ribbon or tulle
- Battery-operated timer (trust me on this one)
The real magic happens when you add luminarias between the stakes. Just get white paper bags, fill them with sand, and drop in battery-operated candles. Classic, cheap, and they won’t blow away when that winter wind kicks up. I learned that lesson the hard way when my neighbor found my previous luminarias three houses down.
Want to level up? Create mini snow mounds along the edges using white sheets or quilt batting. Stake them down well and sprinkle with iridescent glitter. When your pathway lights hit them at night, they sparkle like actual snow. Pure magic without the shoveling.
Festive Front Porch Makeover

Your front porch is basically your home’s smile during the holidays. Make it count! Mine went from sad and forgotten to Instagram-worthy with just a weekend of work and about $150. Not bad for something that lasts the entire season, IMO.
Start with the basics: garland around your door frame. Get the thick, quality stuff – none of that thin, see-through nonsense that looks like Charlie Brown’s Christmas tree had a worse year than usual. Weave battery-operated lights through it (outlets on porches are apparently optional according to builders).
The Essential Porch Elements:
- Pre-lit garland (12-15 feet minimum)
- Outdoor ribbon (weather-resistant is key)
- Command hooks (so many Command hooks)
- Potted evergreens or winter arrangements
- Festive doormat
- Lanterns with battery candles
Place matching potted arrangements on either side of your door. I use large planters filled with evergreen branches, red dogwood stems, and those sparkly picks from the craft store. Add a festive doormat – something cheeky like “Probably on the Naughty List” if you’re feeling bold.
Here’s my secret weapon: vintage sleds. Hit up thrift stores or garage sales and lean them against your porch walls. Add a ribbon, maybe some greenery, and boom – instant rustic charm. People always ask where I bought my “decorative sleds.” Twenty bucks at an estate sale, thank you very much.
Don’t forget vertical space! Hang large ornaments from your porch ceiling using fishing line. They’ll spin and catch light beautifully. Just make sure they’re shatterproof unless you enjoy sweeping up ornament shrapnel.
Sparkling Christmas Light Tunnel
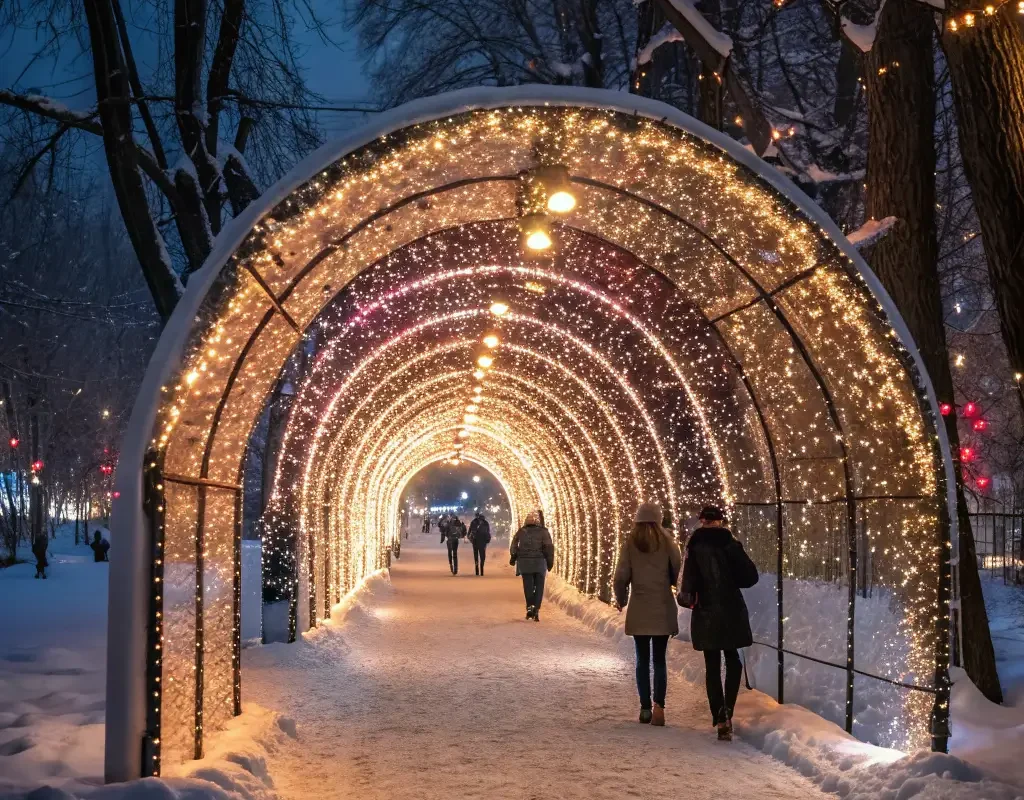
Ever walked through a professional light display and thought, “I need this in my life”? Well, you can totally create your own light tunnel without remortgaging your house. My kids’ friends literally beg to come over just to run through ours. No joke – I’m basically the cool parent now 🙂
The trick is using PVC pipe arches as your frame. They’re cheap, lightweight, and store flat for next year. You’ll need about 6-8 arches depending on how long you want your tunnel.
Building Your Light Tunnel:
- 1-inch PVC pipe (10-foot lengths work best)
- PVC connectors
- Rebar stakes for anchoring
- Net lights or string lights (minimum 600 per arch)
- Zip ties (buy in bulk – you’ll need them)
- Extension cords with outdoor rating
Create arches by bending PVC pipes and securing them with rebar stakes pounded into the ground. Space them about 3 feet apart. Now here’s where people mess up – don’t just throw lights over them randomly. Start from the bottom and wrap upward in a spiral pattern. This creates depth and prevents that flat, boring look.
Mix light colors if you’re feeling adventurous. White lights with random pops of blue look like stars. All warm white feels cozy and elegant. Whatever you choose, connect everything to a timer because nobody wants to trudge outside at midnight to turn off lights.
Pro tip: Add a fog machine at the entrance on party nights. The lights through the fog create this ethereal effect that’ll have your guests pulling out their phones immediately.
Also Read: 10 Creative Bedroom Christmas Decor Ideas and Cozy Charm
DIY Holiday Lanterns
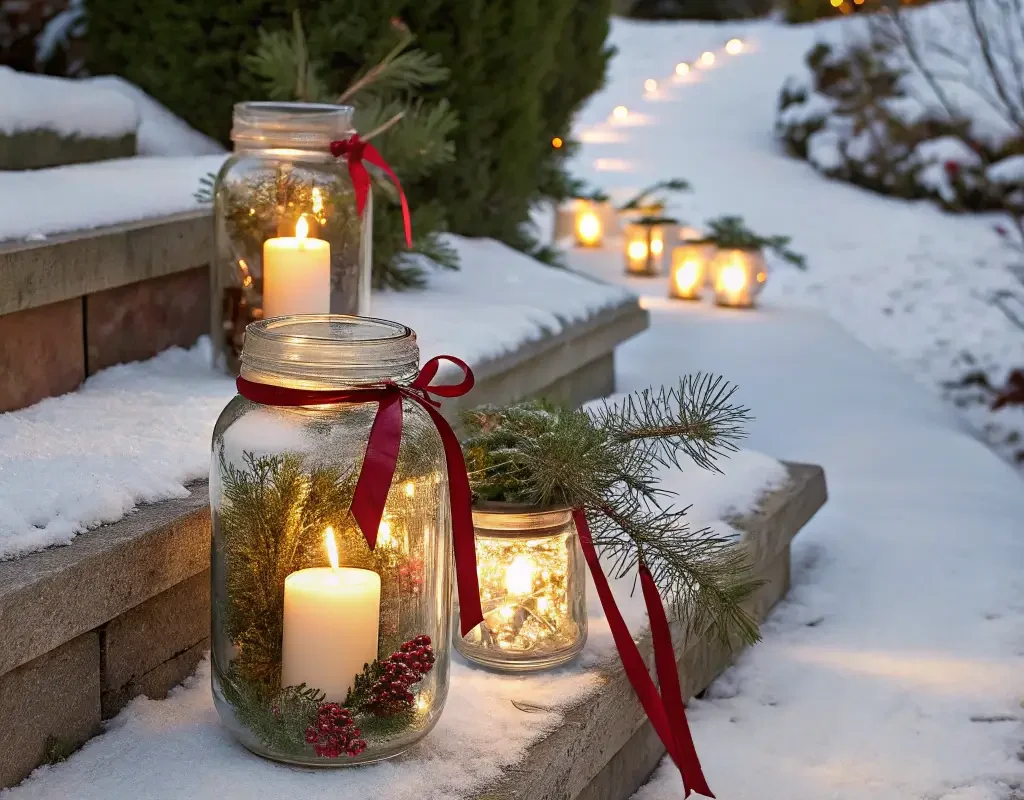
Store-bought holiday lanterns cost a fortune for what’s essentially a box with lights in it. Make your own for a fraction of the price, and they’ll actually look better because you customized them. Win-win situation right there.
Grab some wooden lanterns from the craft store when they go on sale (usually 50% off before Thanksgiving if you’re strategic). The beauty of DIY holiday lanterns is you can match them perfectly to your decor theme.
Lantern Transformation Supplies:
- Basic wooden or metal lanterns (various sizes)
- Battery-operated fairy lights
- Artificial snow
- Mini ornaments
- Evergreen sprigs
- Hot glue gun
- Metallic spray paint (optional)
Fill each lantern with different scenes. My favorite combo: fake snow base, mini bottle brush trees, and tiny deer figurines with fairy lights woven throughout. Looks like those expensive department store displays for about $10 per lantern.
For a modern twist, spray paint lanterns metallic gold or copper first. Then fill with white branches and cool-toned blue lights. The contrast between warm metals and cool lights creates this sophisticated vibe that photographs beautifully.
Line them up your front steps, cluster them by your door, or hang them from shepherd’s hooks along your walkway. They work literally everywhere and survive weather better than most decorations since everything’s protected inside.
Cozy Outdoor Fire Pit Setup
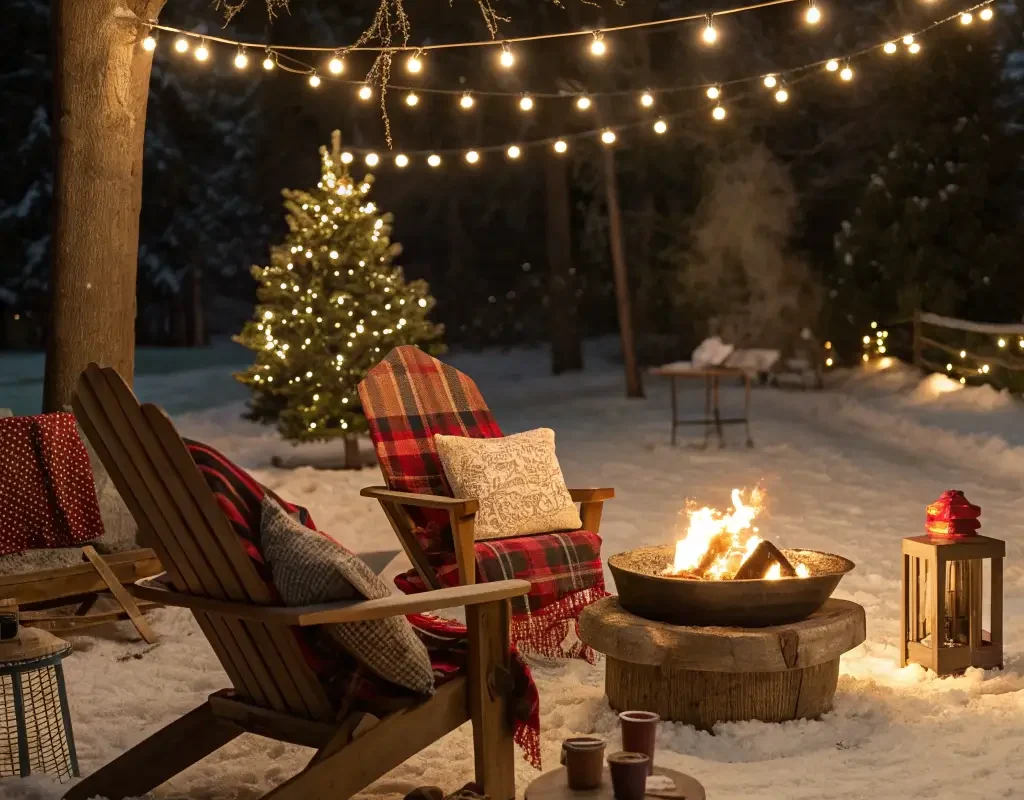
Who says outdoor entertaining stops when it gets cold? Some of my best holiday memories happened around our fire pit with hot cocoa and terrible singing. Transform your fire pit area into a cozy Christmas gathering spot that’ll have people actually wanting to hang outside.
First, define the space with string lights overhead. Create a canopy effect by stringing them from your house to poles or trees in a tent-like pattern. This instantly makes the area feel intimate and special, not just “the backyard with a fire pit.”
Creating the Perfect Holiday Fire Pit Area:
- Outdoor string lights (minimum 100 feet)
- Weather-resistant cushions and blankets
- Firewood storage solution
- S’mores station setup
- Outdoor heater (if you’re feeling fancy)
- Weatherproof storage ottoman
Add cozy seating with weather-resistant cushions in festive plaids or deep reds and greens. Throw in some faux fur blankets (the outdoor-rated ones that won’t get destroyed by moisture). Set up a cute station with s’mores supplies, hot cocoa fixings, and maybe some adult beverage options.
Here’s what really makes it special: create “reindeer food” packets for kids to throw in the fire. Mix oatmeal with edible glitter – it sparkles when it hits the flames and kids go absolutely wild for it. Safe, cheap, and magical.
Don’t forget ambiance lighting beyond the overhead strings. Place battery-operated lanterns around the seating area and maybe add some light-up presents or a small decorated tree nearby. The goal? Making it so cozy that people forget they’re freezing their butts off.
Candy Cane Garden Stakes
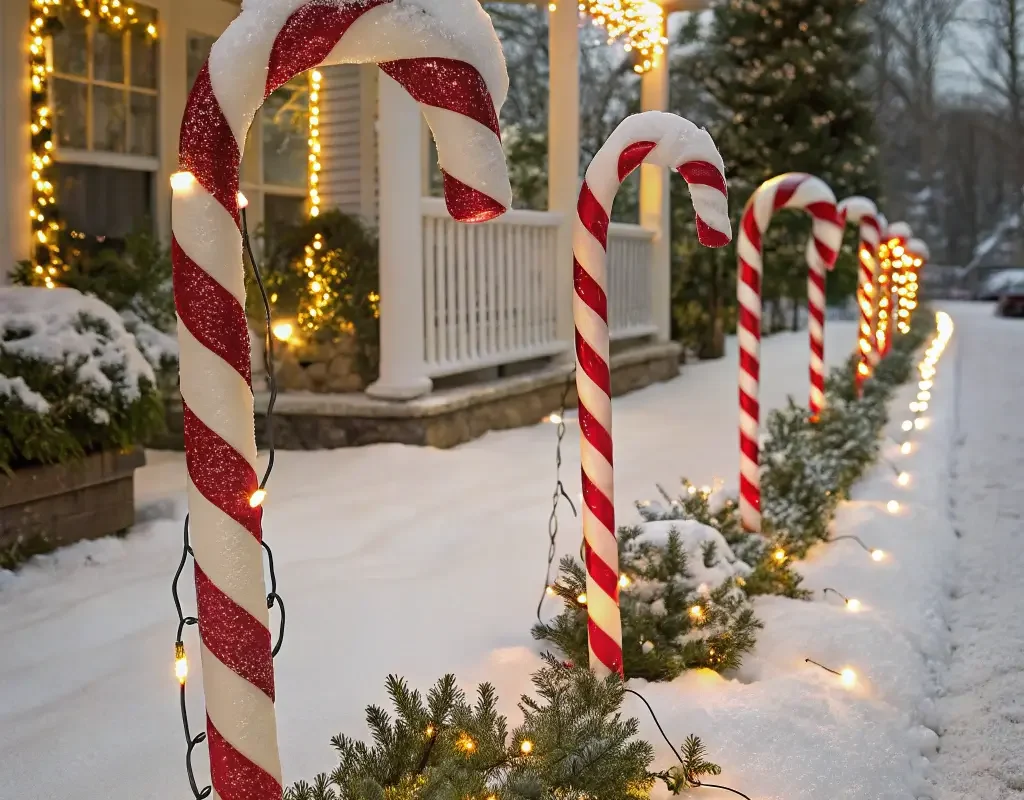
These might be the easiest decoration on this list, but they pack a serious festive punch. Last year, my mail carrier actually stopped to tell me how cheerful they made her route. If that’s not a win, I don’t know what is.
You can buy pre-made ones, sure, but making your own lets you customize size and spacing perfectly for your yard. Plus, DIY versions cost about 75% less than store-bought.
DIY Candy Cane Stakes Materials:
- 1/2 inch PVC pipe (10-foot sections)
- Red and white electrical tape
- PVC pipe caps
- Clear sealant spray
- Solar light toppers (optional but awesome)
Cut PVC into 3-foot sections and create the candy cane curve by heating the top 8 inches with a heat gun (or very carefully over your stove). Wrap alternating red and white tape in a spiral pattern. Seal with clear spray to protect the tape from weather.
Line your driveway, create borders for garden beds, or use them to define pathways. The uniform repetition creates this professional display look that suggests you really have your life together (even if you don’t).
Want to get fancy? Drill holes in the tops and insert solar lights. They’ll glow at night like magical candy cane lanterns. Or tie ribbons between them to create a festive fence effect. The possibilities are literally endless and each stake costs maybe $3 to make.
Also Read: 12 Elegant Pink Red and Green Christmas Ideas and Gift Wrap Hacks
Snowy Pinecone Garland

Natural elements make the best decorations because they don’t scream “I raided the dollar store” (even though you probably did). Pinecone garlands bring that rustic elegance everyone’s after, and they’re basically free if you have pine trees nearby.
I started making these after watching my kids collect approximately 847 pinecones one autumn. Instead of throwing them away, we turned them into gorgeous garlands that people assume came from some fancy boutique.
Crafting Your Pinecone Garland:
- Large pinecones (25-30 per 6-foot garland)
- Heavy twine or wire
- White spray paint
- Artificial snow spray
- Iridescent glitter
- Hot glue gun
- Battery-operated micro lights
Spray pinecones white, then immediately dust with artificial snow while wet. The texture difference between the white paint and snow creates incredible depth. Add touches of iridescent glitter for sparkle – but don’t go overboard unless you want your yard looking like a craft store exploded.
Thread them onto heavy twine, alternating directions for visual interest. Weave battery-operated micro lights through the garland for nighttime magic. These work brilliantly draped along fence tops, wrapped around porch columns, or framing doorways.
Budget hack: Mix in painted styrofoam balls between pinecones to extend your garland without needing a forest’s worth of pinecones. Nobody can tell the difference from more than two feet away :/
Whimsical Reindeer Display

Every yard needs at least one statement piece, and a reindeer display delivers that “wow factor” without the complexity of animated decorations. I’ve tried both store-bought and DIY versions, and honestly? The DIY ones get more compliments.
Skip those wire-frame reindeer that look skeletal and sad. Instead, create substantial reindeer using tomato cages and branches. Sounds weird, but the result is surprisingly professional.
Building Your Reindeer Herd:
- Tomato cages (1 per reindeer body)
- Sturdy branches for legs and antlers
- Brown outdoor fabric or burlap
- Twine or wire
- LED light strings
- Red ornament for Rudolph’s nose
- Weather-resistant spray adhesive
Flip tomato cage upside down for the body, attach branch legs with wire, and wrap everything in brown fabric. Create a head from bundled branches and add spectacular antlers (the bigger, the better – go big or go home).
Position your herd like they’re actually grazing or playing. One looking up, one with its head down, maybe a baby following mom. This dynamic positioning makes them feel alive rather than just decorations plunked on your lawn.
Wrap them in warm white lights for a magical glow, and obviously make one Rudolph with a red nose. Set them near trees or bushes so they look like they’re emerging from the forest. The effect at dusk is absolutely stunning.
Colorful Outdoor Ornament Trees
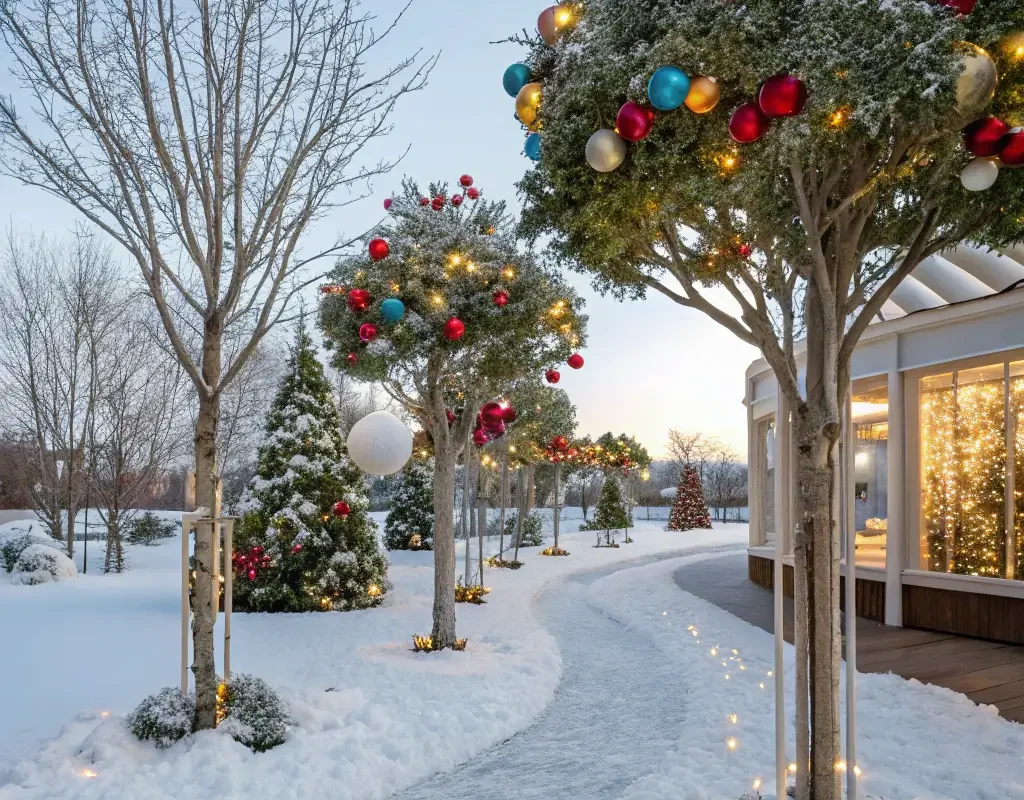
Not everyone has perfect evergreens in their yard, but that doesn’t mean you can’t have outdoor Christmas trees. Create ornament trees using whatever you’ve got – bare branches, tomato cages, even that dead bush you’ve been meaning to remove.
I discovered this trick when our front yard maple lost all its leaves earlier than expected. Instead of having a sad stick in my yard, I turned it into the most colorful Christmas tree on the block.
Outdoor Ornament Tree Essentials:
- Shatterproof ornaments (various sizes)
- Outdoor-rated hooks or wire
- Weatherproof ribbon
- LED spotlights
- Fishing line for hanging
- Tree collar or decorative base
Start with oversized ornaments at the bottom and gradually use smaller ones toward the top. This creates proper visual weight and prevents your tree from looking top-heavy. Mix matte and shiny finishes for depth.
Here’s the game-changer: use fishing line to hang ornaments at varying lengths from branches. They’ll move with the breeze, creating this dynamic, living display. Add ribbon cascading from top to bottom for extra movement and color.
Light from below with LED spotlights to make ornaments glow at night. The shadows and reflections create this incredible light show on your house. FYI, clear ornaments filled with tinsel or small lights look absolutely magical when lit from below.
Also Read: 15 Simple Wood Christmas Trees DIY Ideas for Holiday Magic
Elegant Wreath Wall Arrangement
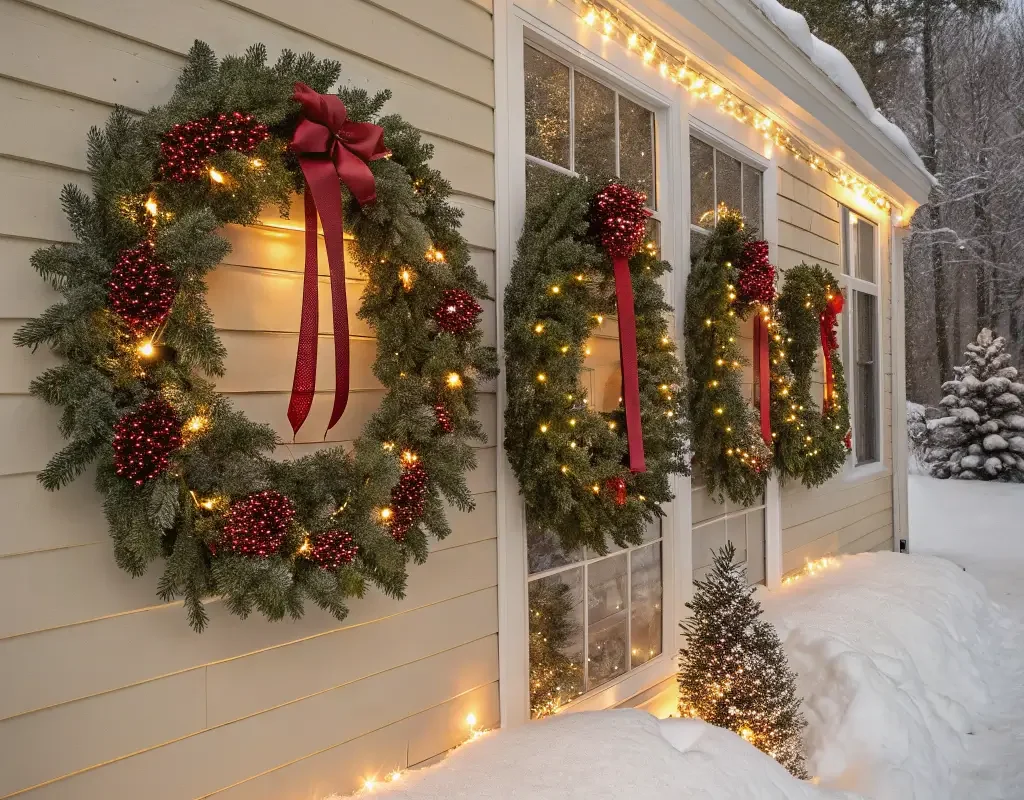
One wreath on your door? Cute. A whole wall of coordinated wreaths? That’s making a statement. This idea transforms boring garage doors or blank walls into festive focal points that look way more expensive than they actually are.
I started doing this after seeing it at a fancy hotel and thinking, “I could totally pull that off.” Spoiler alert: you absolutely can, and it’s easier than you’d think.
Creating Your Wreath Wall:
- Multiple wreaths (odd numbers work best)
- Variety of sizes (24″, 18″, and 12″ diameter)
- Matching ribbon or coordinating colors
- Outdoor Command strips (the heavy-duty ones)
- Battery-operated lights for each wreath
- Weatherproofing spray
Arrange wreaths in an asymmetrical pattern – think constellation, not grid. The organic arrangement feels more natural and interesting than perfectly aligned rows. Mix sizes and overlap slightly for depth.
Choose a cohesive color scheme but vary textures. Maybe one wreath is all pinecones, another heavy on berries, and another focusing on metallic elements. They relate but aren’t matchy-matchy.
The secret to making this look expensive? Consistent lighting. Every wreath needs the same type of lights (all warm white or all multicolor). This unifies the display even with different wreath styles. Use battery packs with timers so they all turn on together – manual coordination is a nightmare, trust me.
Bringing It All Together
Here’s the thing about outdoor Christmas decorating – you don’t need to do everything at once. Start with one or two ideas that really speak to you and build from there. My display has evolved over five years, and honestly, the gradual buildup made it more special than if I’d gone all-out from day one.
The best decorations tell a story about who lives inside that house. Maybe you’re the whimsical reindeer family or the elegant wreath wall people. Perhaps you’re all about that cozy fire pit life or creating magical pathways. Whatever you choose, make it yours.
Remember that perfect is boring. That slightly crooked candy cane? Character. The garland that’s fuller on one side? Rustic charm. The reindeer that looks like it’s had one too many eggnogs? Comedy gold. These imperfections make your display memorable and human.
Most importantly, don’t let decorating become a stress fest. Put on some Christmas music, grab some hot cocoa (maybe add some Bailey’s – I won’t judge), and enjoy the process. The neighbors might think you’re crazy when they see you outside at 10 PM adjusting lights for the fifteenth time, but they’ll also slow down every evening to admire your work.
Your outdoor Christmas display should make you smile every time you come home. If it does that, you’ve absolutely nailed it. Everything else – the compliments, the Instagram likes, the kids asking for photos – that’s just the cherry on top of your holiday sundae.
Now get out there and make your outdoor space so festive that even the Grinch would crack a smile. And when you’re standing back admiring your handiwork with frozen fingers and a satisfied grin, remember – you’ve officially joined the ranks of those neighbors everyone secretly loves. Welcome to the club. We meet at Home Depot’s holiday clearance section on December 26th.