You know that feeling when you walk into your laundry room and immediately want to back right out? Yeah, me too.
Last week, I literally tripped over a bottle of fabric softener that had somehow migrated from its shelf to the floor. That’s when I realized my laundry room needed a serious intervention.
Look, I get it – laundry rooms usually get the short end of the stick when it comes to home organization. We focus on our Instagram-worthy kitchens and Pinterest-perfect bedrooms while our laundry spaces turn into chaotic dumping grounds for everything from orphaned socks to mystery cleaning products we bought three years ago.
But here’s the thing: organizing your laundry room doesn’t have to be complicated or expensive.
After spending way too many weekends researching and testing different storage solutions (and yes, making some spectacular mistakes along the way), I’ve discovered ten game-changing ideas that actually work. And the best part? You don’t need to be a DIY wizard or blow your budget to make these happen.
Table of Contents
- 1 Floating Shelves for Detergent Storage
- 2 Rolling Cart Laundry Organizer
- 3 Over-the-Door Hanging Baskets
- 4 DIY Pegboard Supply Wall
- 5 Stackable Laundry Bins System
- 6 Hidden Cabinets Behind Sliding Doors
- 7 Fold-Down Ironing Station
- 8 Vertical Wall-Mounted Drying Rack
- 9 Magnetic Spice Jars for Small Items
- 10 Laundry Room Storage Ladder Shelf
- 11 Bringing It All Together
Floating Shelves for Detergent Storage
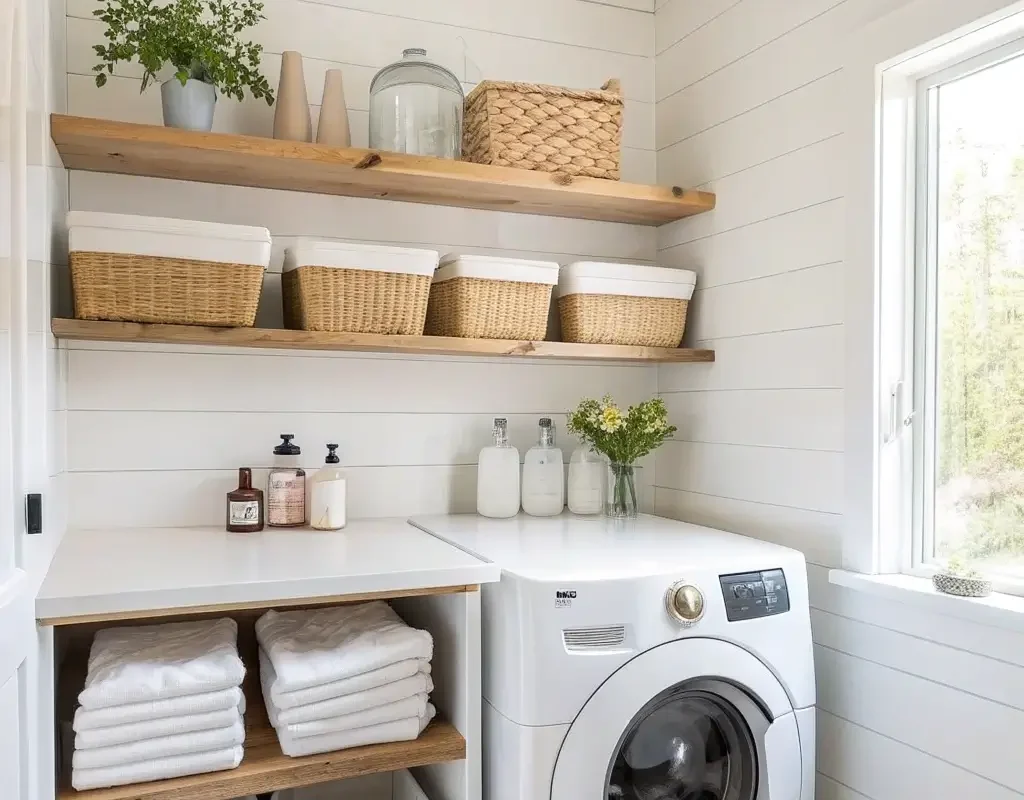
Let’s kick things off with my personal favorite – floating shelves. I installed three of these bad boys above my washer last month, and honestly, it’s like I discovered extra square footage I didn’t know existed.
Here’s what makes floating shelves absolutely brilliant for laundry rooms: they keep everything at eye level and within arm’s reach. No more bending down to dig through cabinets or stretching on tiptoes to reach that detergent on the high shelf. Everything sits right there, looking pretty and staying accessible.
Why Floating Shelves Rock
The installation process surprised me with how simple it was. I expected to spend an entire afternoon cursing at my drill, but the whole project took about 45 minutes. You just need to find the studs (get your mind out of the gutter), mark your spots, and drill those brackets in place.
What really sells me on floating shelves is their versatility. You can arrange them however you want:
- Stagger them for a modern, asymmetrical look
- Line them up perfectly if you’re a neat freak like my sister
- Mix shelf sizes to accommodate different bottle heights
- Add decorative baskets on top for smaller items
I keep my everyday detergents on the lowest shelf, stain removers and special treatments on the middle one, and decorative storage boxes with dryer sheets and pods up top. The visual impact alone makes the room feel twice as organized.
Pro Tips for Floating Shelf Success
Choose shelves that can handle some weight – trust me on this one. My first attempt involved some flimsy decorative shelves that started sagging after two weeks. Industrial-strength brackets make all the difference, especially when you’re storing heavy detergent bottles.
Also, consider the depth of your shelves carefully. Too deep and they’ll bonk you in the head every time you lean over the washer (learned that one the hard way). I found that 10-12 inches works perfectly for most laundry supplies.
Rolling Cart Laundry Organizer
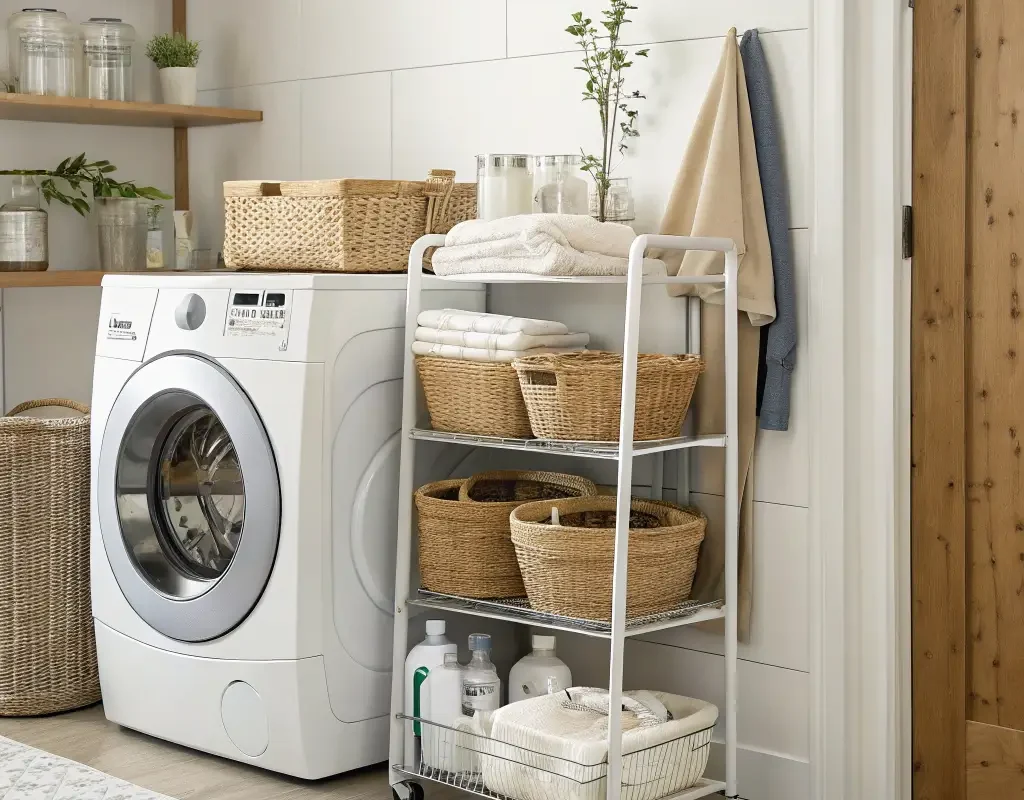
Remember those trendy bar carts everyone was obsessing over a few years ago? Well, turns out they make incredible laundry organizers. Who knew, right?
I snagged a three-tier rolling cart from IKEA (the RÅSKOG if you’re wondering), and it’s become my mobile laundry command center. The mobility factor changes everything – I can roll it next to the washer when I’m sorting, park it by the dryer when folding, or tuck it into a corner when company comes over.
Setting Up Your Rolling Cart
Here’s how I organized mine, though you should definitely customize based on your needs:
Top Tier:
- Stain removal products
- Delicate wash bags
- Lint roller
- Small basket for loose change and pocket treasures
Middle Tier:
- Everyday detergent and fabric softener
- Dryer balls
- Measuring cup for detergent
Bottom Tier:
- Bulk supplies and refills
- Iron and spray starch
- Extra cleaning cloths
The beauty of a rolling cart lies in its adaptability. Having a particularly messy week? Roll it closer to your sorting area. Doing delicates? Move it near your sink for hand-washing items.
Maximizing Your Cart’s Potential
I discovered that adding small adhesive hooks to the sides transforms your cart into a storage powerhouse. Hang mesh bags for collecting socks, clip-on baskets for clothespins, or even a small dustpan for cleaning up detergent spills.
FYI, if you have kids, the rolling cart becomes even more valuable. You can assign each child a section for their special items or sports gear that needs extra attention. My neighbor uses colored bins on each tier – one for each kid – and swears it’s eliminated the “where’s my lucky soccer sock” crisis.
Over-the-Door Hanging Baskets
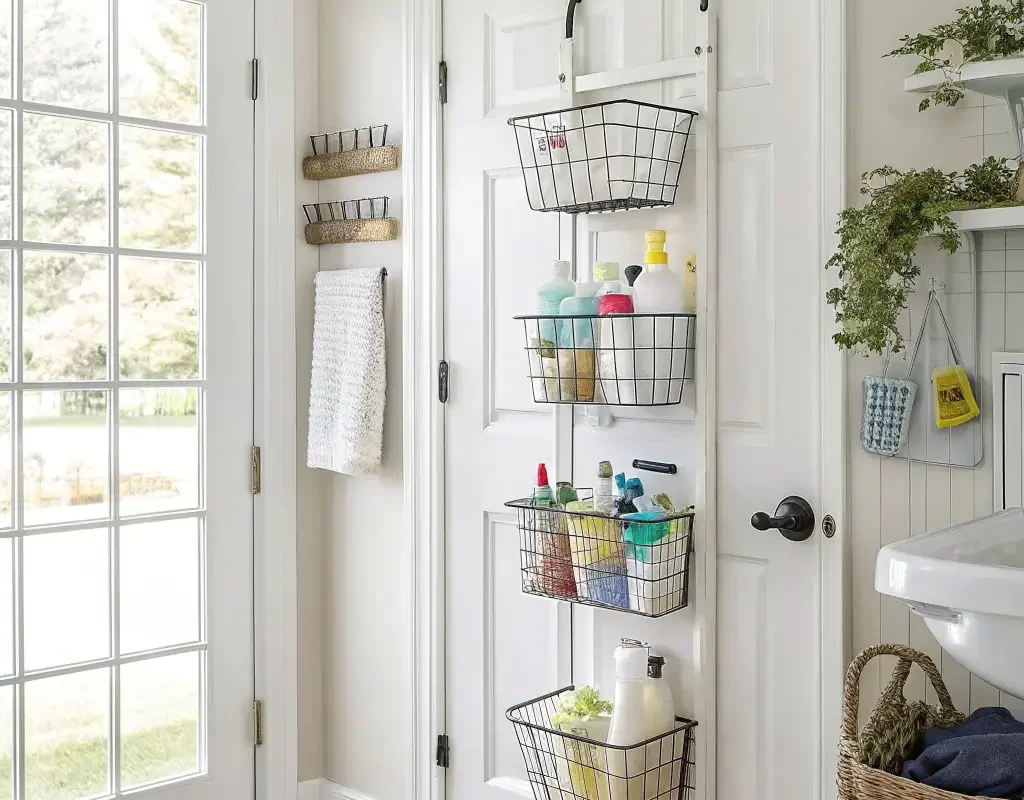
Can we talk about how much unused real estate exists on the back of doors? It’s criminal how we ignore this vertical goldmine!
I installed an over-the-door organizer system last spring, and wow, what a difference. These hanging baskets literally require zero installation – just hook them over your door and you’re done. No drilling, no measuring, no accidentally putting holes in the wrong spot (been there, done that).
Choosing the Right System
Not all over-the-door organizers are created equal. I went through three different ones before finding my holy grail. Here’s what to look for:
- Adjustable baskets that can slide up and down
- Sturdy construction that won’t bend under weight
- Deep baskets that prevent items from falling out
- Coated hooks that won’t scratch your door
My current setup holds everything from wool dryer balls to spare hangers, and I even dedicated one basket to my collection of mesh laundry bags. The key is grouping similar items together so you’re not hunting through six baskets to find what you need.
Creative Basket Organization Ideas
Think beyond just laundry supplies. I use my bottom basket as a temporary holding zone for items that need to go back to other rooms. You know, those random toys, books, and chargers that somehow end up in the laundry? They go in the basket, and I grab them on my way out.
Another genius move: dedicate a basket to “laundry emergency supplies.” Stock it with safety pins, fashion tape, a small sewing kit, and stain wipes. You’ll thank yourself when you discover a rip or stain five minutes before leaving the house.
Also Read: 15 Cozy Laundry Room Wallpaper Ideas for a Warm Touch
DIY Pegboard Supply Wall

Okay, I’ll admit it – when my husband suggested a pegboard for the laundry room, I thought he’d lost it. Pegboards are for garages and workshops, right? Wrong. A pegboard system might be the most customizable storage solution you’ll ever install.
We dedicated one wall to a painted pegboard, and it’s become command central for all our laundry supplies. The best part? You can rearrange everything whenever you want without putting new holes in the wall.
Installing Your Pegboard System
The installation requires a bit more effort than slapping up some shelves, but it’s totally worth it. You’ll need:
- Pegboard panels (get the heavy-duty kind)
- Furring strips to create space behind the board
- Various hooks, baskets, and holders
- Paint if you want to customize the color
I painted mine a soft gray to match our washer and dryer, but I’ve seen people go bold with navy blue or even patterns. One friend created an ombré effect that looks absolutely stunning – though that might be a bit extra for a laundry room 🙂
Pegboard Organization Strategy
Here’s where pegboards really shine – the endless configuration options. My current setup includes:
- Wire baskets for frequently used items
- Large hooks for hanging the iron and ironing board
- Small containers for pins, buttons, and sewing supplies
- Specialized holders for spray bottles
- A magnetic strip for scissors and small metal items
The vertical storage means everything stays visible and accessible. No more digging through drawers or knocking over bottles to reach what’s behind them.
Stackable Laundry Bins System
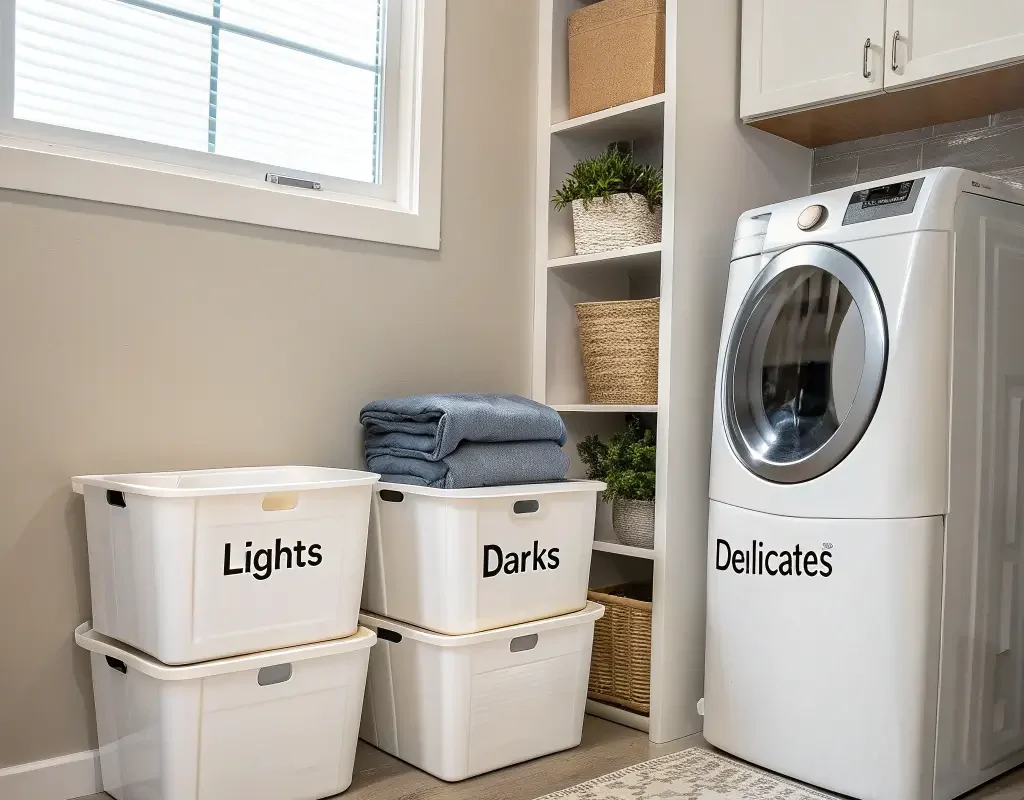
Let me paint you a picture: three weeks ago, my dirty laundry situation involved one massive hamper where everything got tossed together. Whites mixing with reds, delicates crushed under jeans – it was chaos. Enter the stackable bin system, and suddenly I’m actually staying on top of laundry. Miracles do happen!
Stackable bins revolutionize the sorting process by letting you pre-sort as you go. Each bin gets designated for a specific type of laundry, and when one fills up, that’s your cue to run a load.
Setting Up Your Bin System
I went with a four-bin setup:
- Whites and lights
- Darks and jeans
- Delicates and hand-wash items
- Towels and linens
The stackable design means they take up minimal floor space – about the footprint of a single hamper – but quadruple your organization capacity. Some systems even come with wheels on the bottom unit, making it easy to roll the whole tower when needed.
Making the Most of Stackable Bins
Here’s a game-changer tip: label your bins clearly and teach everyone in the house which items go where. I used my label maker (yes, I’m that person), but you could use chalkboard labels for a more rustic look.
For families with kids, assign each child their own bin. This way, their clothes stay separate, making it easier to fold and return items to the right rooms. Plus, it teaches them sorting skills without them even realizing they’re learning.
Consider getting bins with ventilation holes. Trust me, damp towels sitting in an enclosed bin for days create a funk that’ll make you question your life choices. Proper airflow prevents that musty smell from developing.
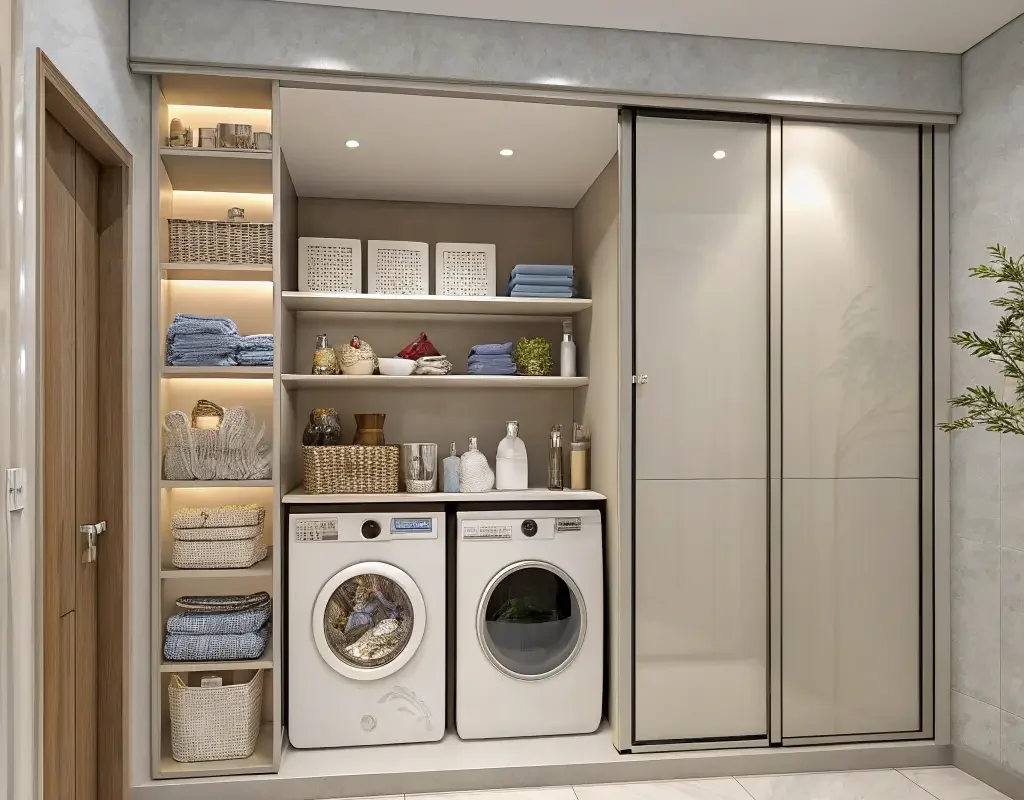
Ever notice how standard cabinet doors in laundry rooms always seem to be in the way? You’re either bonking into them or doing that awkward shimmy to squeeze past. Sliding doors eliminate this problem entirely while giving your space a sleek, modern look.
I replaced my old cabinet doors with sliding barn-door style panels last fall, and the transformation blew my mind. Not only does the room feel bigger, but accessing supplies became infinitely easier.
Planning Your Sliding Door Installation
You’ve got two main options here:
- Retrofit existing cabinets with sliding hardware
- Install new cabinets designed for sliding doors
I went the retrofit route because I’m cheap (I mean, budget-conscious), and it worked beautifully. The hardware kit cost about $50, and installation took a Saturday afternoon. Compare that to completely new cabinets, and you’re saving serious cash.
Organizing Behind Sliding Doors
The beauty of hidden storage lies in its ability to contain chaos. Behind my sliding doors, I keep:
- Bulk supplies bought in those moments of Costco-induced madness
- Seasonal items like wool dryer balls for winter and stain removers for summer grass stains
- The ugly stuff – you know, those effective but aesthetically challenged products
I added small battery-powered LED lights inside (motion-activated ones are amazing), so I can actually see what’s lurking in the back corners. No more buying duplicate products because I couldn’t see what I already had.
Also Read: 15 Charming Dream Laundry Room Ideas for Cozy Vibes
Fold-Down Ironing Station
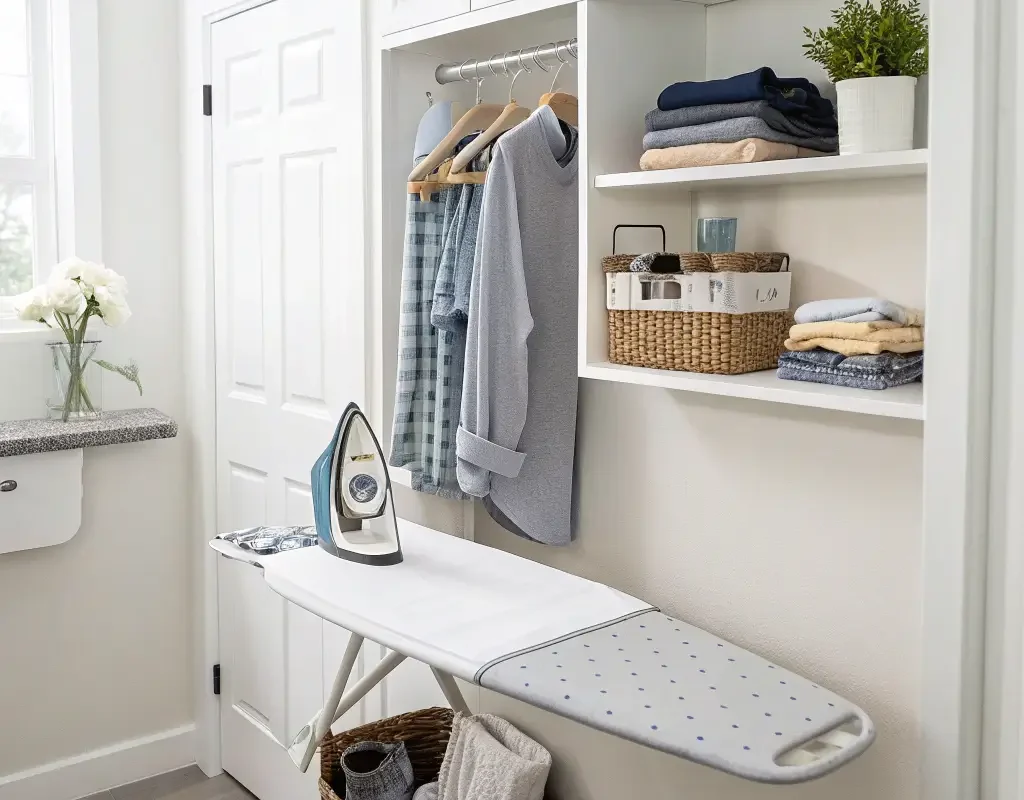
Real talk: how many of us have an ironing board taking up valuable real estate in our laundry rooms? Or worse, dragging it out from behind a door every time we need to press something?
A fold-down ironing station attached to the wall frees up floor space while keeping your ironing setup instantly accessible. When you need it, pull it down. When you don’t, it folds flat against the wall. It’s basically the Murphy bed of ironing boards.
Choosing and Installing Your Fold-Down Station
You can buy pre-made fold-down ironing boards or DIY one if you’re handy. I opted for a pre-made one because, let’s be honest, my DIY skills peaked at painting that pegboard.
Installation considerations:
- Mount at a comfortable height (usually 36-38 inches from the floor)
- Ensure strong wall anchoring – this thing needs to support pressure
- Leave clearance for the board to fold down completely
- Position near an outlet for your iron
Maximizing Your Ironing Station
Here’s where it gets clever. The cabinet that houses my fold-down board also includes:
- A heat-resistant holder for the iron
- Small shelves for spray starch and water
- Hooks for hangers
- A narrow slot for storing the iron’s cord
Some models even include a built-in outlet and lighting. IMO, these extras are worth the investment if you iron regularly. If you’re like me and only iron for special occasions, a basic model works fine.
Vertical Wall-Mounted Drying Rack

Can we have an honest conversation about delicates? We all have those items that absolutely cannot go in the dryer, and they usually end up draped over every available surface. Shower rods, doorknobs, chair backs – been there, done all of that.
A wall-mounted drying rack solves this problem elegantly. When extended, it provides multiple bars for air-drying. When not in use, it folds flat against the wall, practically disappearing.
Types of Wall-Mounted Drying Racks
I tested three different styles before finding my favorite:
- Accordion-style: Expands like an accordion, offers maximum drying space
- Swing-arm style: Individual arms that swing out independently
- Pull-down style: Drops down from the wall like a Murphy bed
The accordion style won for me because it offers the most versatility. I can extend it partially for a few items or fully for a whole load of delicates.
Strategic Placement Tips
Location matters more than you might think. Install your rack:
- Above a utility sink if you have one (drips aren’t an issue)
- Near a window for better air circulation
- Away from high-traffic areas to avoid bumping wet clothes
- At a height where items won’t drag on the floor
I positioned mine above my folding counter, creating a dual-purpose space. Clothes dry overhead while I fold other items below. Efficiency at its finest!
Magnetic Spice Jars for Small Items
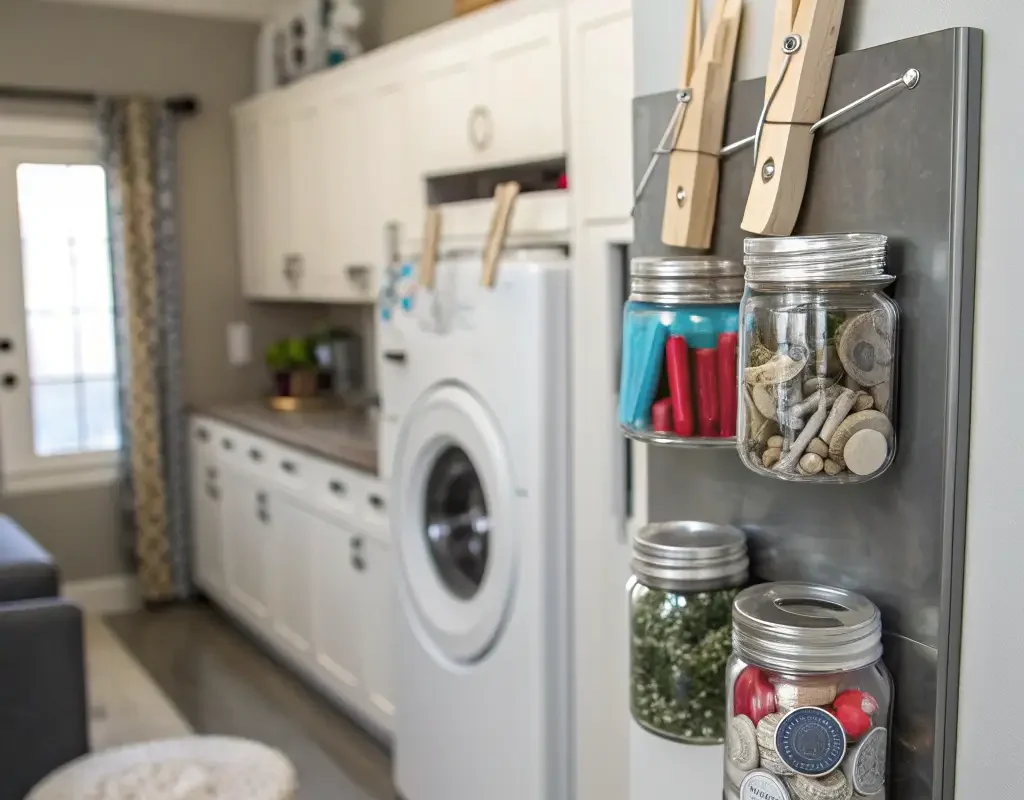
Okay, this one might sound weird, but hear me out. You know those magnetic spice jars people use in kitchens? They’re absolutely perfect for organizing small laundry items.
I mounted a metal strip on my wall and filled magnetic jars with buttons, safety pins, collar stays, and other tiny items that usually disappear into the laundry room abyss. It’s both functional and oddly satisfying to look at.
Setting Up Your Magnetic System
Here’s what you’ll need:
- Metal strip or sheet (galvanized steel works great)
- Magnetic containers with clear lids
- Labels for each container
I arranged mine in two rows of six jars each. The clear lids let me see exactly what’s inside without opening each one. Game-changer for finding that specific button when you’re in a rush.
Creative Uses for Magnetic Storage
Beyond the obvious small items, consider these creative applications:
- Loose change found in pockets
- Hair ties and clips that survive the wash
- Jewelry that accidentally goes through laundry
- Small stain treatment supplies like pens and wipes
- Sewing supplies for quick repairs
The magnetic system also works brilliantly on the side of your washer or dryer if they’re metal. No installation required – just stick and go!
Also Read: 10 Practical Narrow Laundry Room Ideas for Every Home
Laundry Room Storage Ladder Shelf
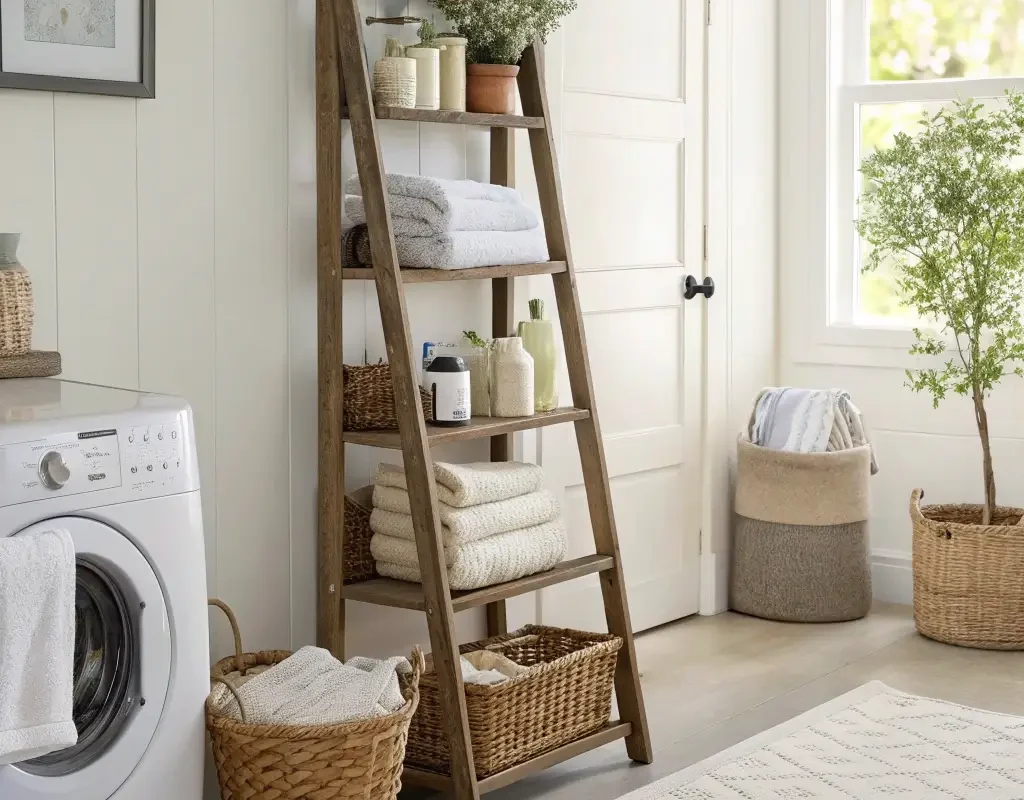
Last but definitely not least, let’s talk about the storage ladder shelf. This trendy piece combines form and function in a way that makes my organization-loving heart sing.
A leaning ladder shelf adds vertical storage without the commitment of wall-mounting. You literally just lean it against the wall and start loading it up. Perfect for renters or commitment-phobes like my brother who changes his mind about furniture placement weekly.
Choosing the Right Ladder Shelf
Not all ladder shelves are created equal. Look for:
- Sturdy construction that won’t wobble
- Appropriate width for your space
- Shelf spacing that accommodates your tallest items
- Anti-slip feet to protect floors and prevent sliding
I went with a five-tier bamboo model that complements my washer’s white finish. The natural wood adds warmth to what could otherwise be a sterile space.
Styling Your Ladder Shelf
Here’s where you can let your personality shine. My ladder shelf setup:
Top shelf: Decorative elements (yes, even laundry rooms deserve pretty things)
Second shelf: Attractive containers with dryer sheets and pods
Middle shelf: Folded towels for a spa-like feel
Fourth shelf: Everyday supplies in matching baskets
Bottom shelf: Large items like detergent refills and cleaning supplies
The graduated shelf sizes naturally create a hierarchy – smaller, lighter items up top, heavier stuff at the bottom. It’s both practical and visually pleasing.
Ladder Shelf Hacks
Want to maximize your ladder shelf’s potential? Try these tricks:
- Add S-hooks to the sides for hanging bags or tools
- Use shelf liners to prevent items from slipping
- Install battery-powered lights under shelves for ambiance
- Mix storage containers with exposed items for visual interest
The best part about a ladder shelf? You can easily move it if your needs change or you want to reconfigure your space.
Bringing It All Together
After implementing these ten storage solutions (okay, maybe not all at once – that would be insane), my laundry room went from disaster zone to organized oasis. The transformation didn’t happen overnight, and I definitely made some mistakes along the way.
The key is starting with one or two solutions that address your biggest pain points. Maybe you’re drowning in detergent bottles – start with floating shelves. Perhaps sorting is your nemesis – grab those stackable bins. Rome wasn’t built in a day, and neither is the perfect laundry room.
What surprises me most is how much these organization systems changed my attitude toward laundry. When everything has a place and that place makes sense, the whole process becomes less of a chore. I actually don’t mind doing laundry now (shocking, I know).
Remember, the best storage solution is the one you’ll actually use. My neighbor installed an elaborate cabinet system that looks amazing but requires her to move three things to reach her detergent. Guess what? She keeps her detergent on the dryer now. Don’t let perfect be the enemy of good – functional beats beautiful every time in a laundry room.
The real victory here isn’t just about organization – it’s about reclaiming your sanity and maybe even finding a little joy in a mundane task. Who knows? With the right storage solutions, you might even start looking forward to laundry day.
Okay, that might be pushing it. But at least you won’t trip over fabric softener bottles anymore