Decorating a home does not always require expensive furniture, professional designers, or a large renovation budget. Some of the most beautiful and meaningful decorative pieces are the ones we create ourselves. That is exactly why I love experimenting with DIY crafts for home decor.
Whenever I make something by hand, even a simple painted vase or a small wall hanging, it immediately adds personality to the room. Handmade decor feels warmer and more personal than something picked quickly from a store. It tells a story, reflects your taste, and gives you the freedom to choose every color, material, texture, and detail.
DIY home decor is also a wonderful way to reuse old items. Glass jars, cardboard boxes, wooden frames, fabric scraps, empty bottles, and unused baskets can all be transformed into stylish decorations. Instead of throwing things away, you can give them a completely new purpose.
In this article, I am sharing 15 DIY crafts for home decor that can help you refresh your living room, bedroom, kitchen, entryway, or home office. These projects include simple ideas for beginners as well as slightly more creative crafts for anyone who enjoys working with paint, fabric, wood, clay, and recycled materials.
You do not need to complete every project. Start with the idea that best matches your space, budget, and personal style. Once you see how satisfying handmade decor can be, you may find yourself planning your next project immediately.
Why DIY Crafts Are Perfect for Home Decoration
Before starting the projects, it is worth understanding why DIY decor has become so popular. The biggest advantage is flexibility. When you create something yourself, you are not limited to the colors or sizes available in stores.
For example, you may find a beautiful wall hanging, but the color does not match your bedroom. You might like a decorative tray, but it is too large for your coffee table. With DIY crafts, you can adjust everything according to your needs.
DIY decorating can also be more affordable. Although some projects require basic supplies, many can be completed with materials you already have at home. You can reuse old fabric, paint leftover from another project, or transform a secondhand item into something modern.
Most importantly, DIY crafts allow your home to feel genuinely yours. Trends may provide inspiration, but handmade decor helps you create a space that reflects your memories, interests, and personality.
1. Create a Textured Canvas Wall Art Piece
Blank walls can make a room feel unfinished, but large artwork is often expensive. One of my favorite affordable solutions is creating textured canvas wall art.
You will need a blank canvas, wall filler or modeling paste, a palette knife, and acrylic paint. If you do not have a palette knife, an old plastic card can work surprisingly well.
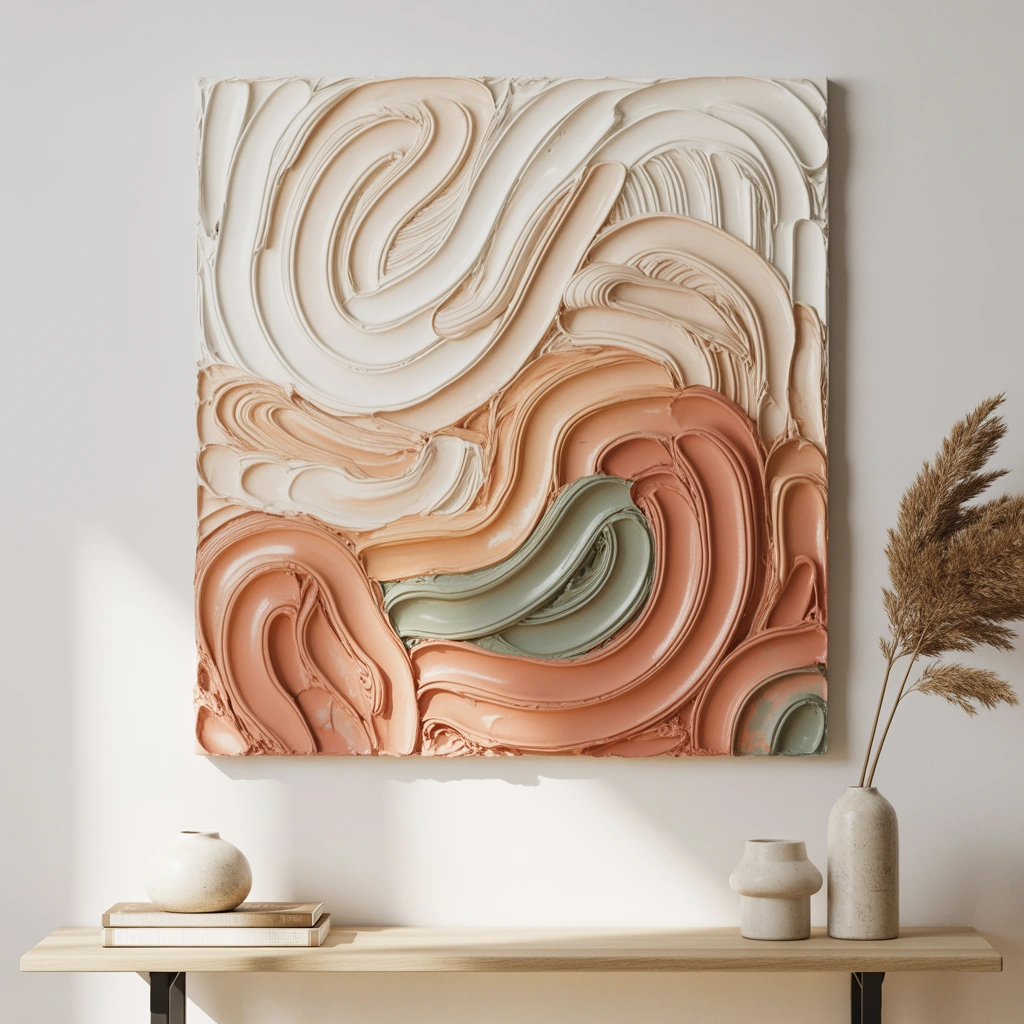
Begin by applying the filler or modeling paste across the canvas. You can create arches, curved lines, waves, leaves, or abstract patterns. Do not worry about making everything perfectly symmetrical. Slight imperfections make the artwork feel handmade and artistic.
Allow the texture to dry completely. Depending on the thickness, this may take several hours or overnight. Once dry, paint the canvas in a neutral shade such as white, beige, cream, terracotta, gray, or soft green.
For a modern look, use one color across the entire canvas. If you prefer something more expressive, add two or three coordinating shades. You can also leave small areas unpainted to highlight the natural texture.
Hang the finished piece above a sofa, bed, console table, or reading chair. Creating multiple smaller canvases in matching colors can also produce a beautiful gallery effect.
2. Make Decorative Vases from Recycled Glass Bottles
Empty glass bottles can easily become elegant decorative vases. I love this project because it is inexpensive, beginner-friendly, and suitable for almost any interior style.
Start by cleaning the bottles and removing the labels. Warm soapy water usually loosens the paper, while a small amount of rubbing alcohol can help remove sticky residue.
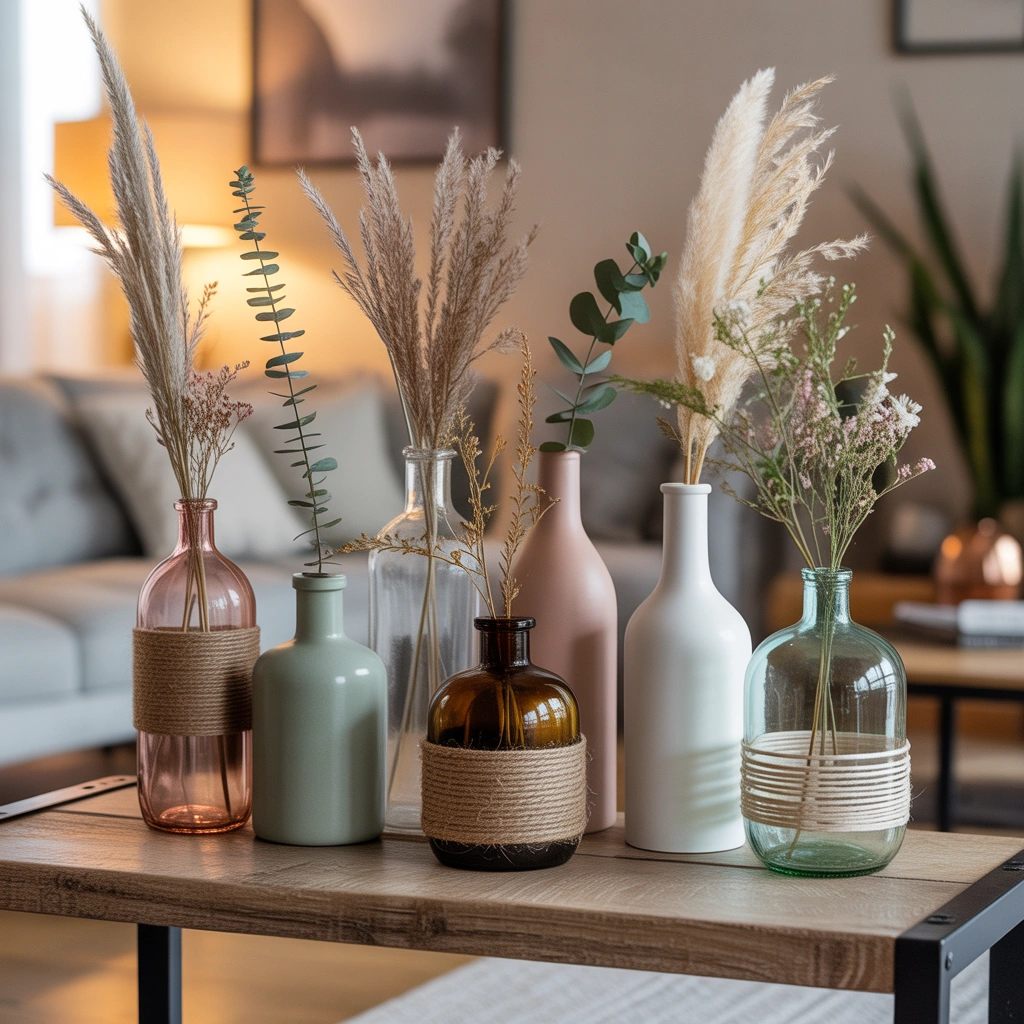
Once the bottles are clean and dry, paint them using acrylic paint, chalk paint, or spray paint. Matte colors often create a more sophisticated finish. White, black, sage green, dusty pink, and warm beige are excellent choices.
For a ceramic-style appearance, mix a small amount of baking soda into acrylic paint. This gives the paint a thicker texture and helps ordinary glass look more like handmade pottery.
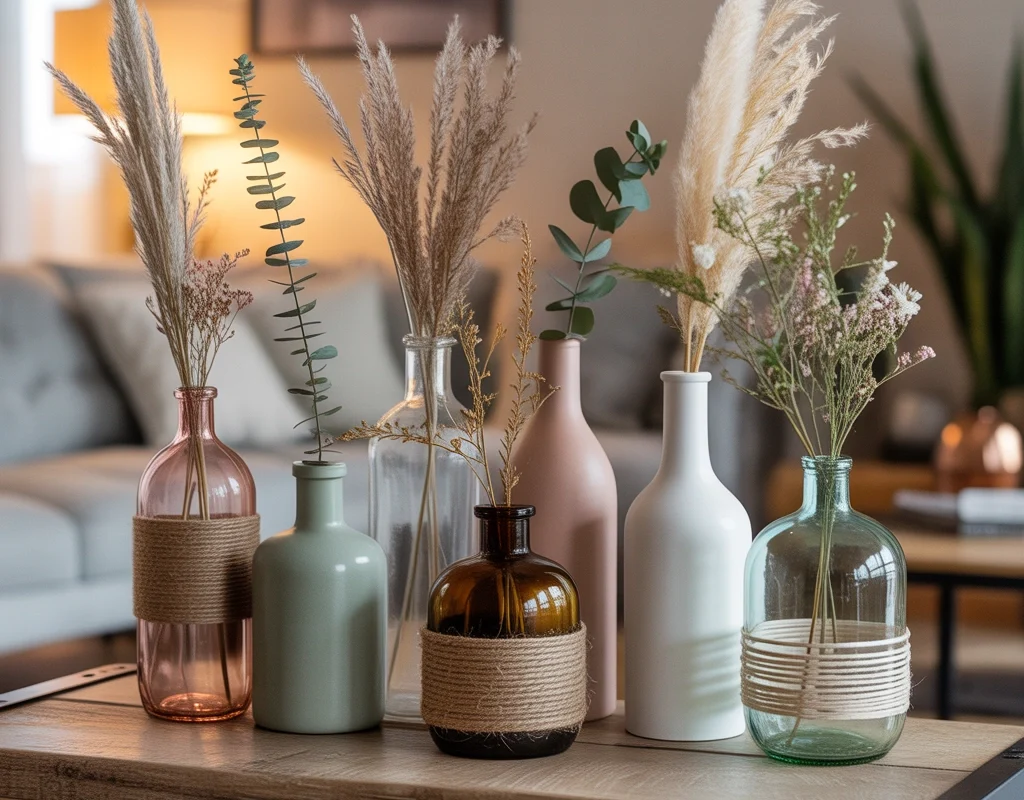
You can decorate the vases further by wrapping twine around the neck, adding simple painted patterns, or attaching small wooden beads. Place dried flowers, artificial stems, pampas grass, or fresh greenery inside.
Group three bottles of different heights together for a balanced display. They look especially attractive on dining tables, shelves, kitchen counters, and entryway consoles.
3. Design a Macramé-Inspired Yarn Wall Hanging
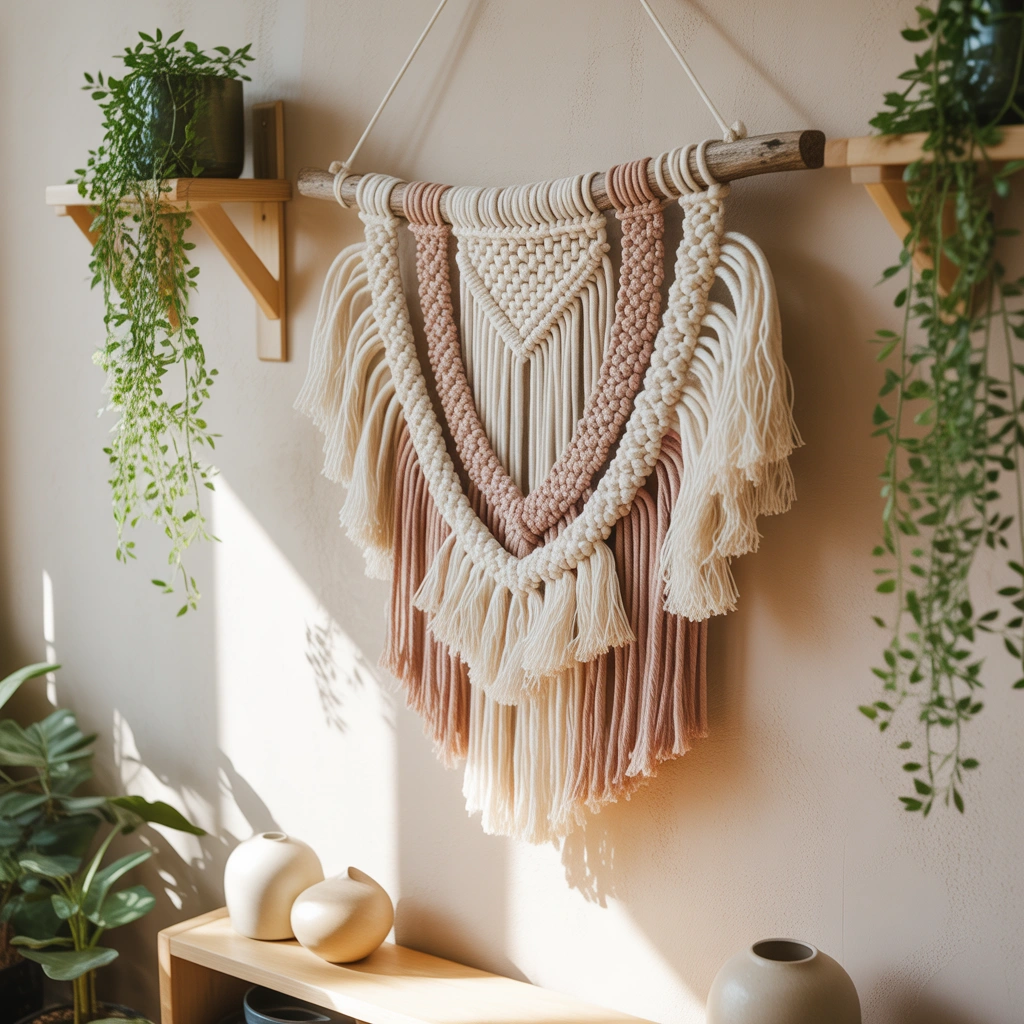
Traditional macramé can take time to learn, but you can create a simpler yarn wall hanging without mastering complicated knots.
You will need yarn in one or more colors, a wooden dowel or smooth tree branch, scissors, and a piece of string for hanging.
Cut several strands of yarn to your desired length. Fold each strand in half, place the folded loop over the dowel, and pull the loose ends through the loop. Repeat until the dowel is covered.
After attaching all the yarn, trim the bottom into a shape. A straight edge gives a clean look, while a V-shape, arch, or layered design creates more movement.
You can combine cream, rust, mustard, brown, and blush tones for a warm bohemian style. For a minimalist room, use a single neutral shade. Wooden beads can also be added to selected strands.
This DIY wall hanging is perfect for filling a narrow wall, decorating above a desk, or adding softness to a bedroom. It is also a creative way to use leftover yarn from other craft projects.
4. Transform Old Picture Frames into a Gallery Wall
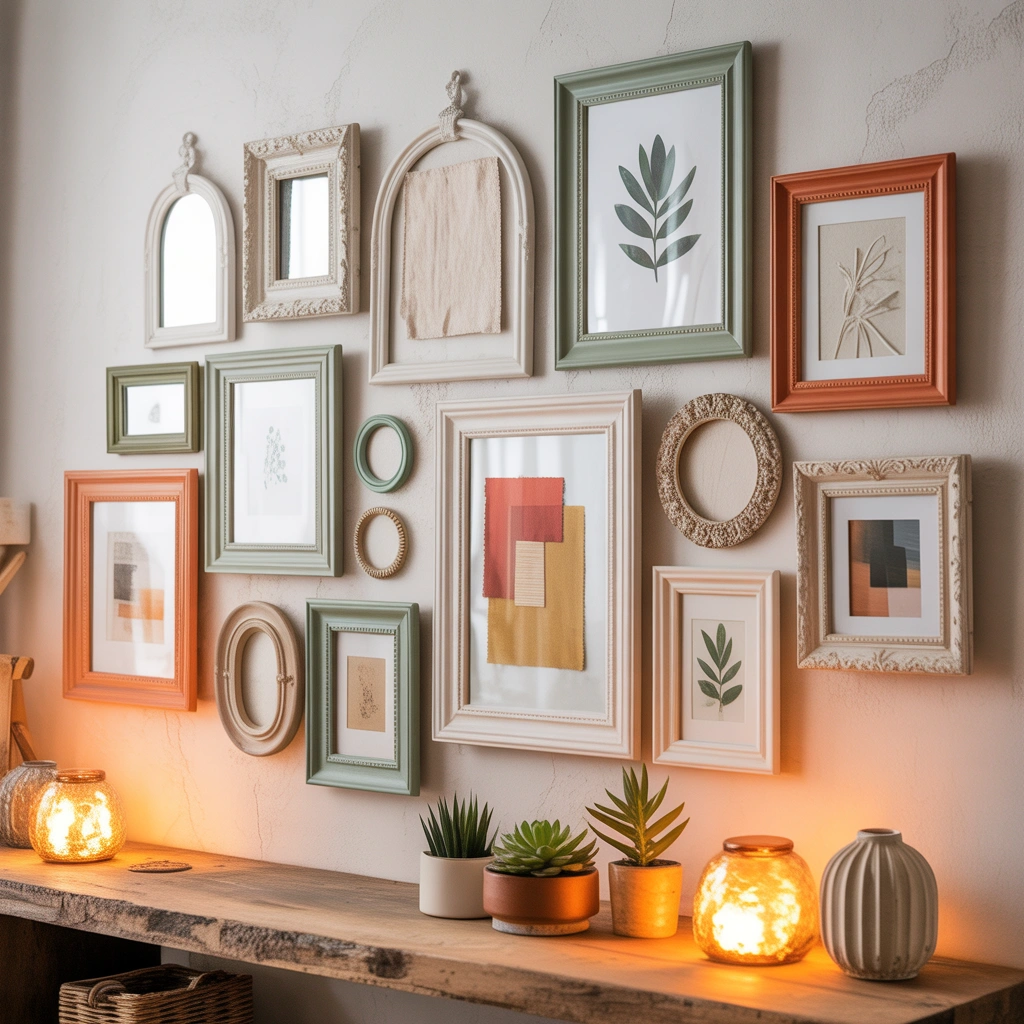
A gallery wall instantly adds character to a room, and it does not need to be expensive. Old or mismatched picture frames can be painted and arranged into a coordinated display.
Collect frames from around your home, thrift shops, or discount stores. They do not need to be the same size or style. In fact, a mixture of shapes can make the display more interesting.
Paint the frames in one consistent color to bring them together. Black creates a modern look, white feels clean and bright, while gold adds elegance. You can also use two complementary colors for a more playful arrangement.
Fill the frames with family photographs, travel memories, botanical prints, handwritten quotes, children’s artwork, postcards, or pressed flowers. I personally like mixing photographs with simple illustrations because it prevents the wall from feeling too formal.
Before hanging the frames, arrange them on the floor. Move them around until the spacing feels balanced. You can also trace each frame onto paper and tape the paper shapes to the wall before making any holes.
A gallery wall works beautifully in hallways, staircases, living rooms, and home offices.
5. Craft Handmade Clay Trinket Dishes
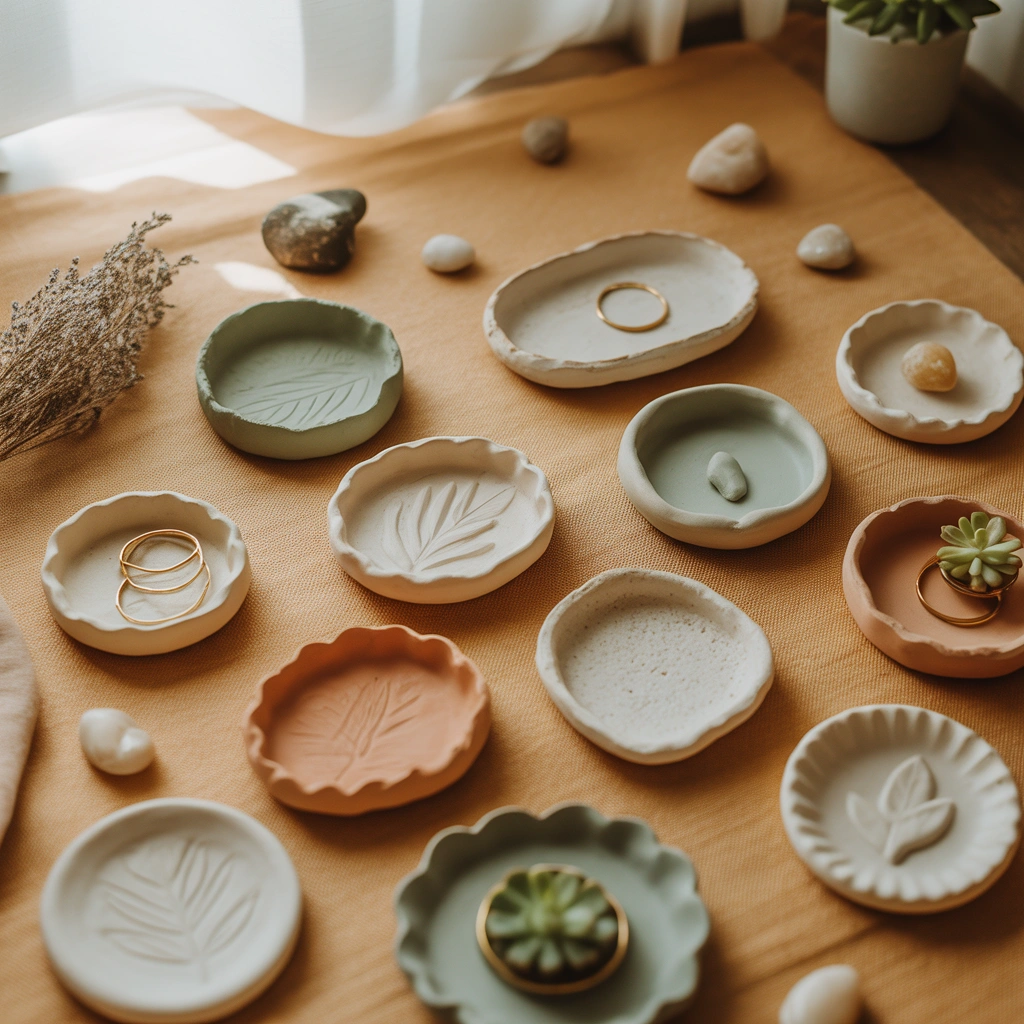
Small clay dishes are useful for holding rings, earrings, keys, coins, and other tiny items. They are also one of the easiest DIY crafts for home decor because no advanced pottery skills are required.
Use air-dry clay so you do not need a kiln. Roll the clay into a flat circle using a rolling pin or a smooth glass bottle. Cut out a round or organic shape, then gently curve the edges upward.
You can press leaves, lace, stamps, or textured fabric into the clay to create patterns. Another idea is to shape the dish like a flower, heart, moon, or abstract form.
Allow the dish to dry according to the clay instructions. Turn it over occasionally so both sides dry evenly. Once it is fully hardened, smooth rough edges with fine sandpaper.
Paint the dish with acrylic paint and finish it with a clear sealer. Metallic gold around the rim can make the piece look especially polished.
Place your handmade dish on a bedside table, vanity, entryway shelf, or bathroom counter. These dishes also make thoughtful handmade gifts.
6. Build a Rustic Wooden Serving Tray
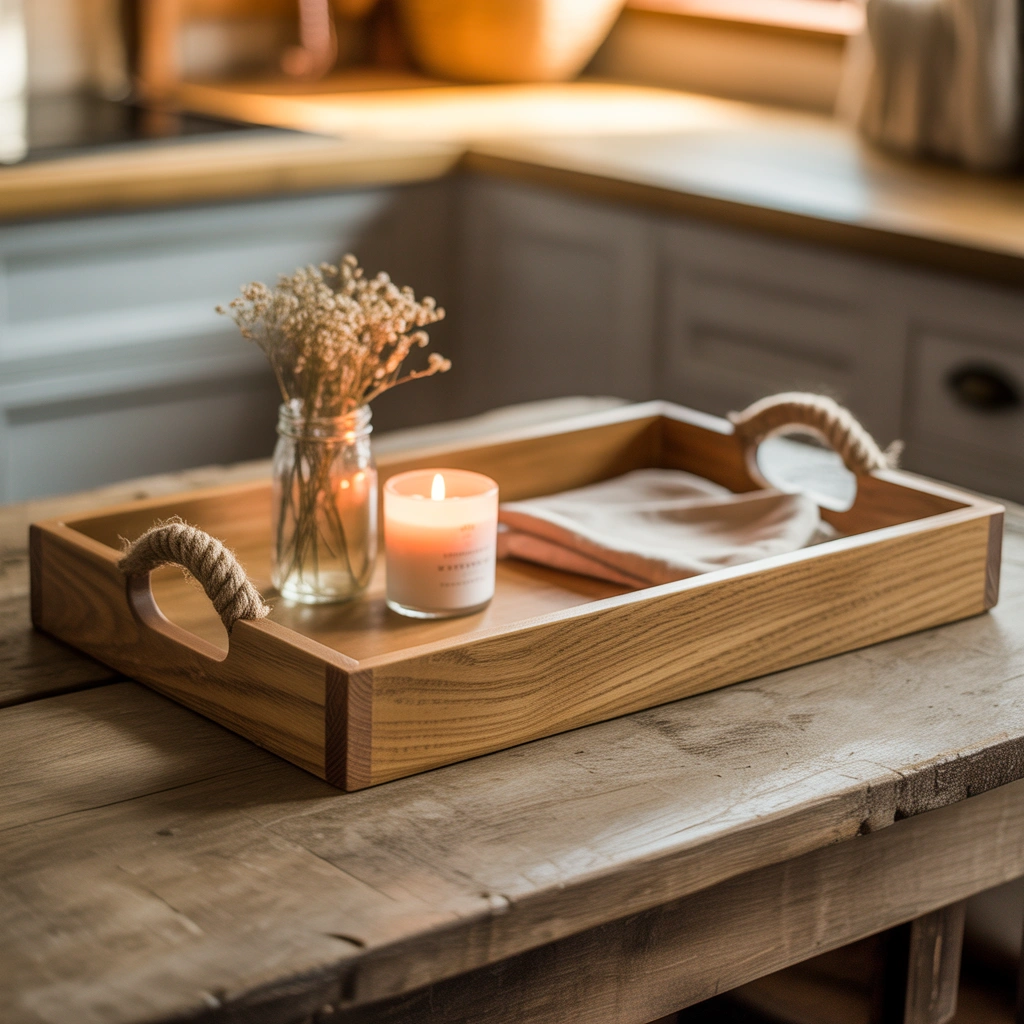
A decorative tray can make an ordinary table look more organized. It also gives small objects a defined place, helping the room feel less cluttered.
To create a rustic wooden tray, use a flat wooden board and two small handles. Sand the wood carefully to remove rough areas. You can stain it for a natural appearance or paint it to match your decor.
Attach the handles to both sides using suitable screws. For extra detail, add a stencil, painted border, or simple geometric design.
Use the tray on a coffee table to organize candles, books, and a small plant. In the kitchen, it can hold oils, seasonings, or tea supplies. It can also be placed on a bed or ottoman as a decorative surface.
For safety, treat it primarily as a decorative or light-serving tray unless the materials and finish are specifically food-safe.
I like this project because the final result looks practical and stylish at the same time. Even a basic tray can make a collection of everyday items appear intentionally arranged.
7. Turn Tin Cans into Stylish Plant Holders
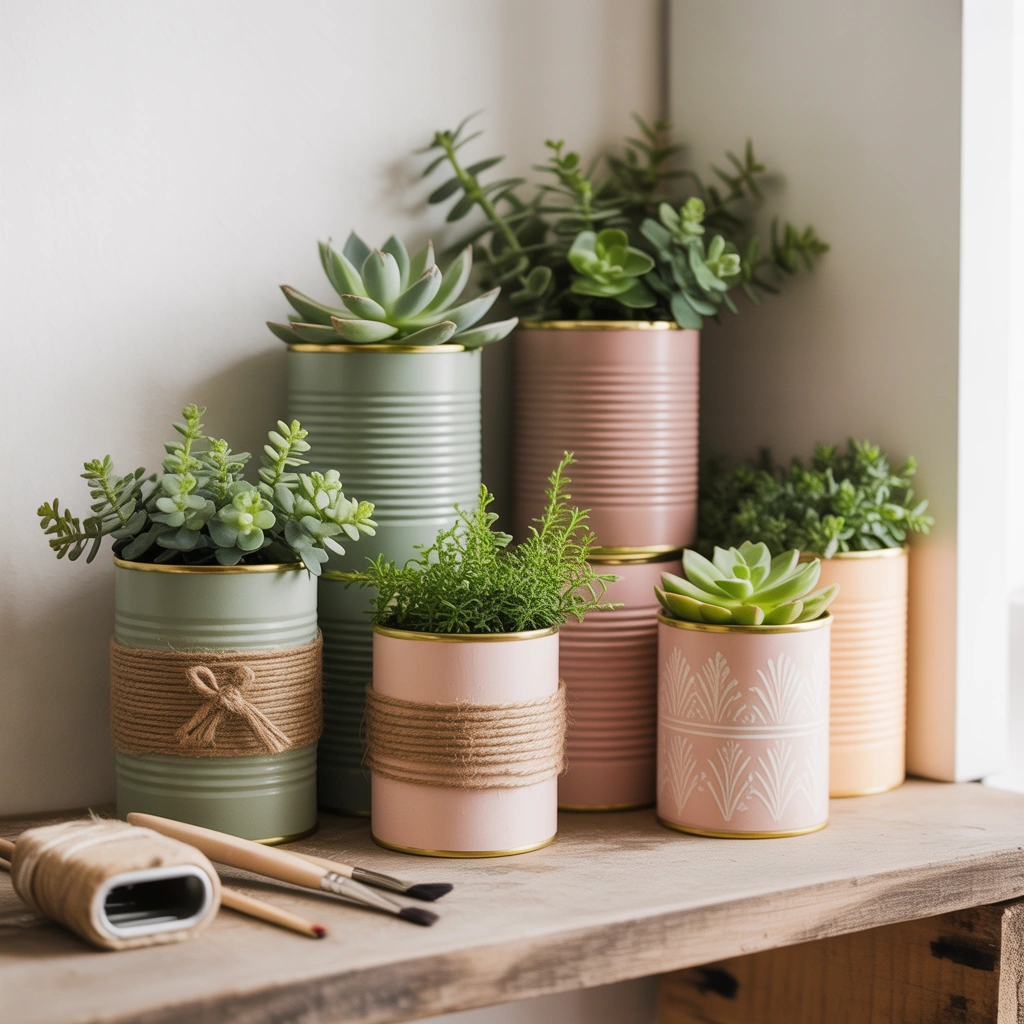
Tin cans are one of the easiest materials to reuse. With a little decoration, they can become attractive plant holders, utensil containers, or desk organizers.
Wash the cans carefully and remove any sharp edges. Paint them with acrylic paint, wrap them with fabric, cover them in jute rope, or decorate them with patterned paper.
For a modern design, paint the bottom half of the can in a bold color and leave the top half neutral. You can also create dots, stripes, leaves, or geometric patterns using a small brush.
If you plan to use the can as a planter, add drainage holes at the bottom. Place a small tray underneath to protect your furniture. Herbs, succulents, and compact indoor plants work well in these containers.
Arrange several matching cans on a windowsill or kitchen shelf. Labeling them with the names of herbs can create a charming indoor garden.
This project is proof that useful home decor does not have to begin with expensive materials.
8. Sew No-Sew Decorative Cushion Covers
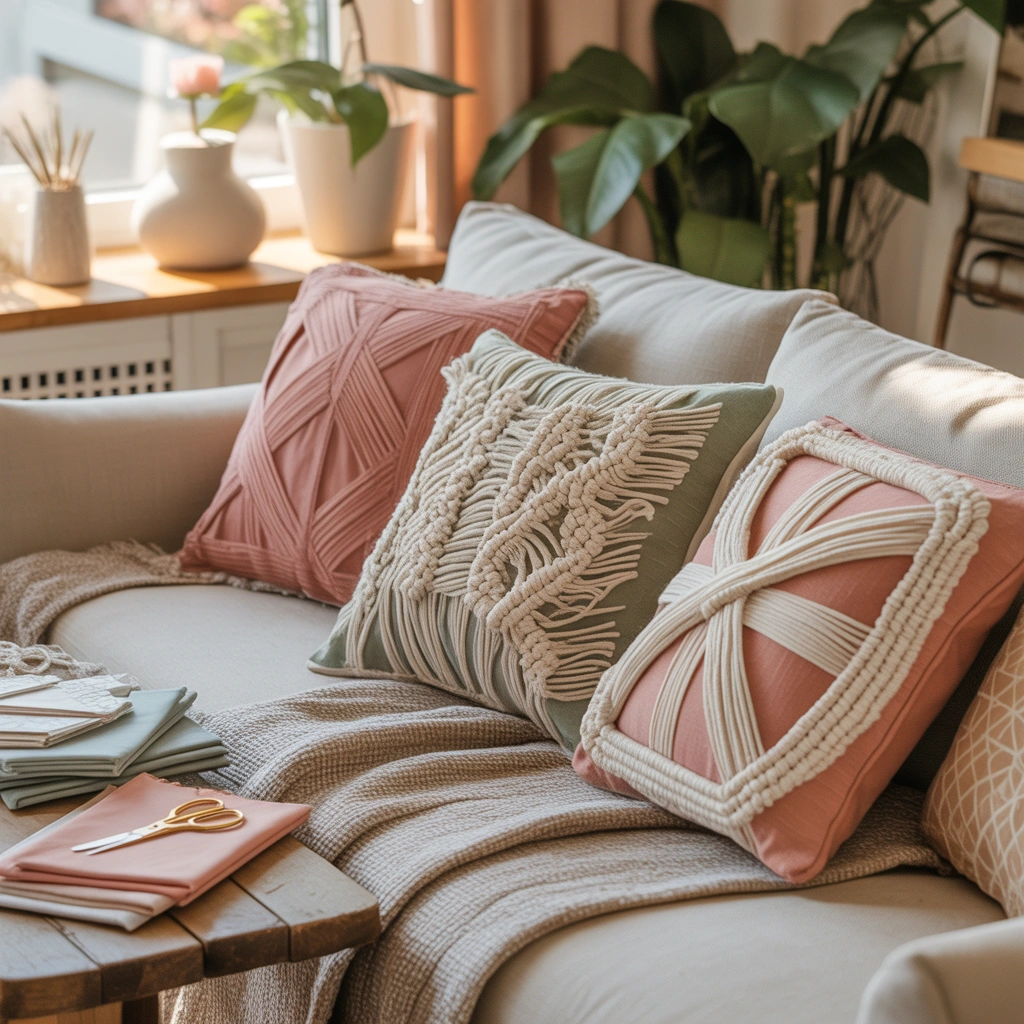
Changing cushion covers is one of the fastest ways to refresh a room. New colors and patterns can make an old sofa or bed feel completely different.
Even without a sewing machine, you can create simple cushion covers using fabric glue, iron-on hemming tape, or a tied design.
Choose fabric that is slightly larger than the cushion insert. Fold and secure the edges using hemming tape or fabric glue. An envelope-style back allows the cushion insert to slide in and out.
For an even easier option, wrap a square piece of fabric around the cushion and tie the ends decoratively at the back. This works particularly well with soft cotton or linen fabric.
Select materials that match the season. Light cotton, floral prints, and pastel shades feel fresh during spring and summer. Velvet, plaid, and deeper colors create warmth during autumn and winter.
You can personalize plain fabric with fabric paint, handmade stamps, tassels, or pom-pom trim. A few updated cushions can completely change the mood of your living room without replacing any furniture.
9. Create a Rope-Wrapped Storage Basket
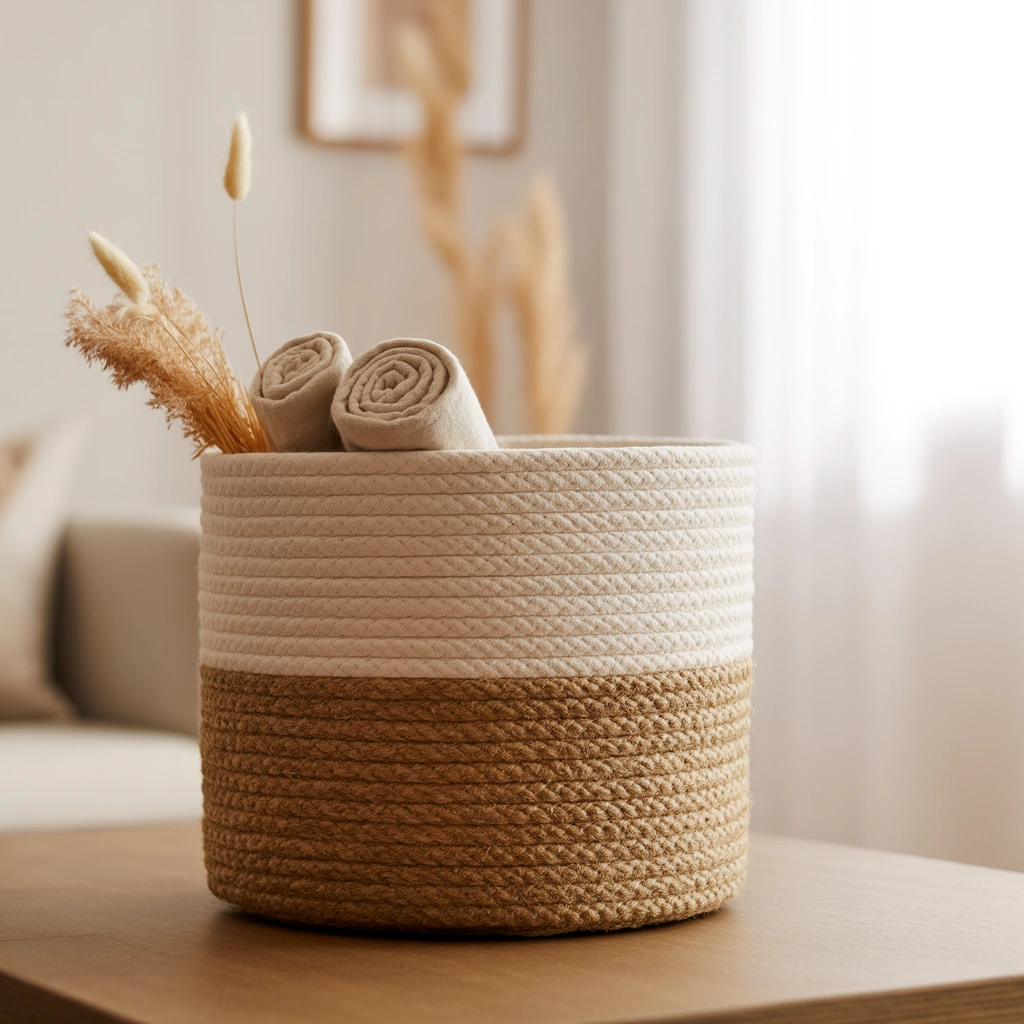
Storage is necessary in every home, but practical containers can also be decorative. A plain cardboard box or plastic bin can be transformed into a rope-wrapped basket.
Choose a sturdy container in the size you need. Starting at the bottom, attach thick cotton rope or jute rope using hot glue. Continue wrapping the rope around the container until the sides are completely covered.
For a softer finish, line the inside with fabric. Fold the fabric over the top edge to hide the original container and create a neat border.
You can also add handles made from rope, leather strips, or thick ribbon. A small label on the front can identify what is stored inside.
These baskets are useful for blankets, toys, towels, books, craft supplies, or laundry items. Smaller versions work well for remote controls, chargers, and bathroom products.
I especially like using matching rope baskets on open shelves because they hide clutter while adding texture to the room.
10. Make Pressed Flower Frames
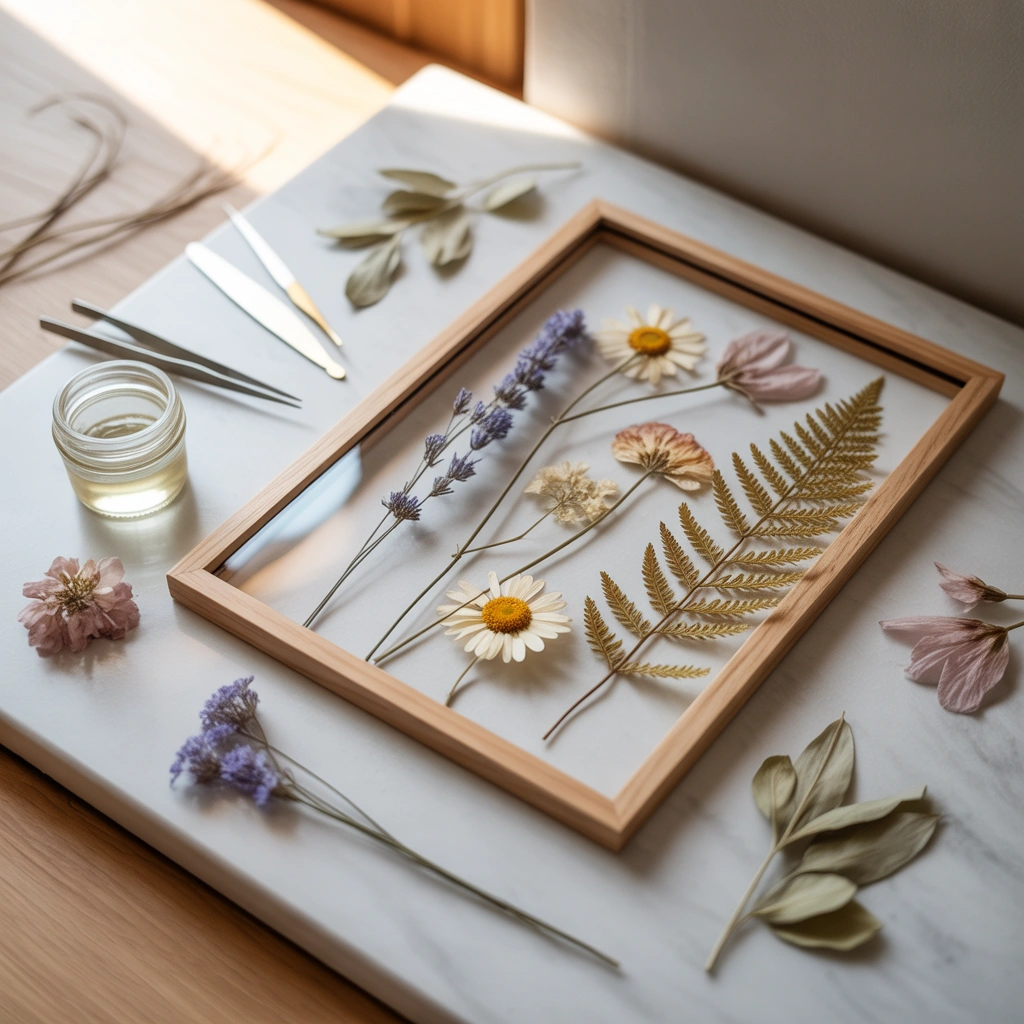
Pressed flower art brings a delicate natural element into the home. It is especially beautiful in bedrooms, reading corners, and bright living spaces.
Collect small flowers and leaves that are relatively flat. Place them between sheets of absorbent paper inside a heavy book. Add more books on top and leave the flowers for one to three weeks.
Once the flowers are completely dry, arrange them between two pieces of glass or on a sheet of plain paper. Use tiny amounts of clear-drying glue if necessary.
Simple arrangements often look more elegant than crowded ones. You might display a single flower in each frame or create a small botanical collection.
Light wooden frames create a natural style, while gold or black frames make the flowers feel more contemporary.
You can press flowers from a meaningful event, garden, trip, or bouquet. This turns the project into more than decoration; it becomes a preserved memory.
Keep pressed flower frames away from strong direct sunlight, as intense light may cause the colors to fade over time.
11. Decorate Mason Jar Candle Holders
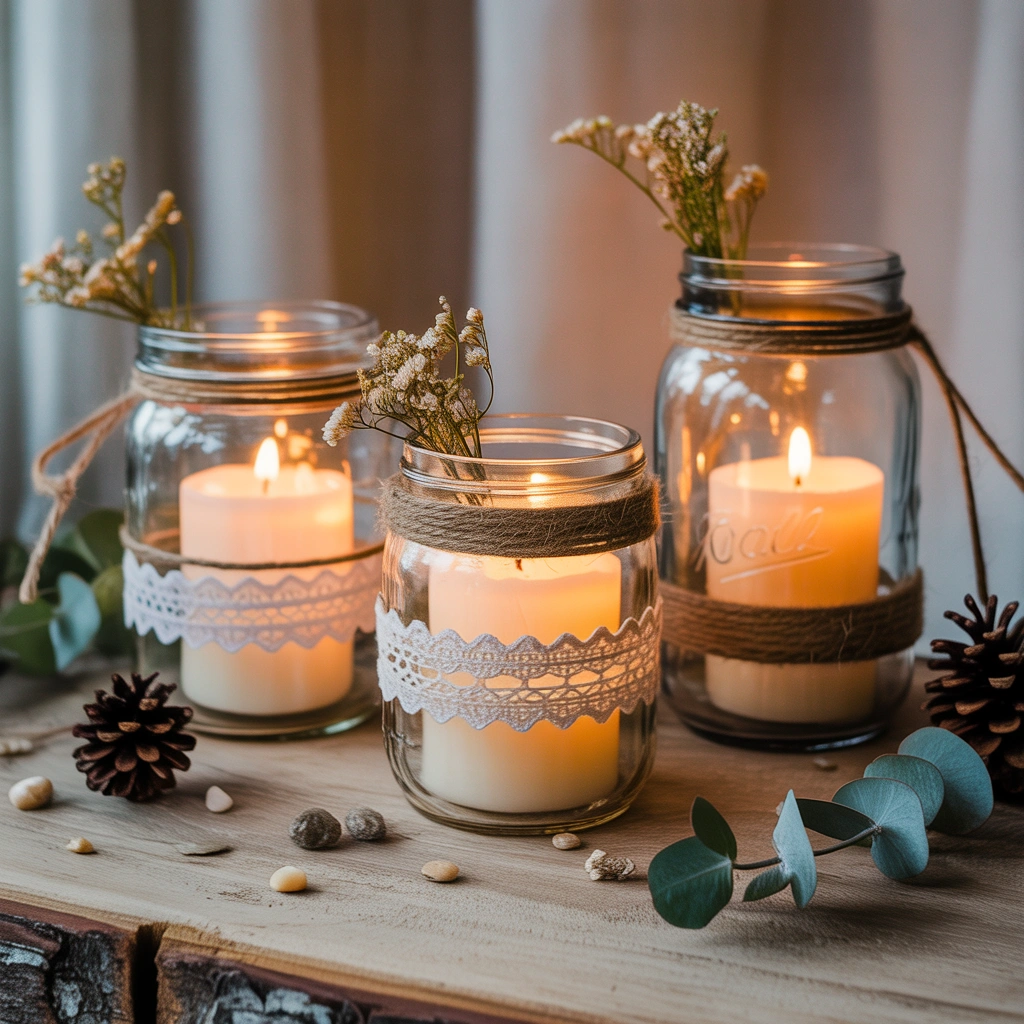
Mason jars and small glass containers can be transformed into beautiful candle holders. The soft light shining through decorated glass creates a warm, relaxing atmosphere.
Clean the jars thoroughly before decorating them. You can paint the outside, wrap them with lace, tie ribbon around the rim, or create patterns using frosted glass paint.
One easy technique is to place small stickers on the jar before painting it. Once the paint dries, remove the stickers to reveal clear shapes where the candlelight can shine through.
For a coastal look, add a layer of sand or small pebbles inside the jar. For a rustic design, use twine, dried leaves, or burlap ribbon.
Battery-operated LED candles are the safest choice, particularly when using paper, fabric, rope, dried flowers, or other flammable decorations. If you use real candles, keep all decorative materials far from the flame and never leave them unattended.
Group several candle holders together on a dining table, mantel, or outdoor seating area. Varying the jar heights will create a more interesting display.
12. Paint a Personalized Doormat
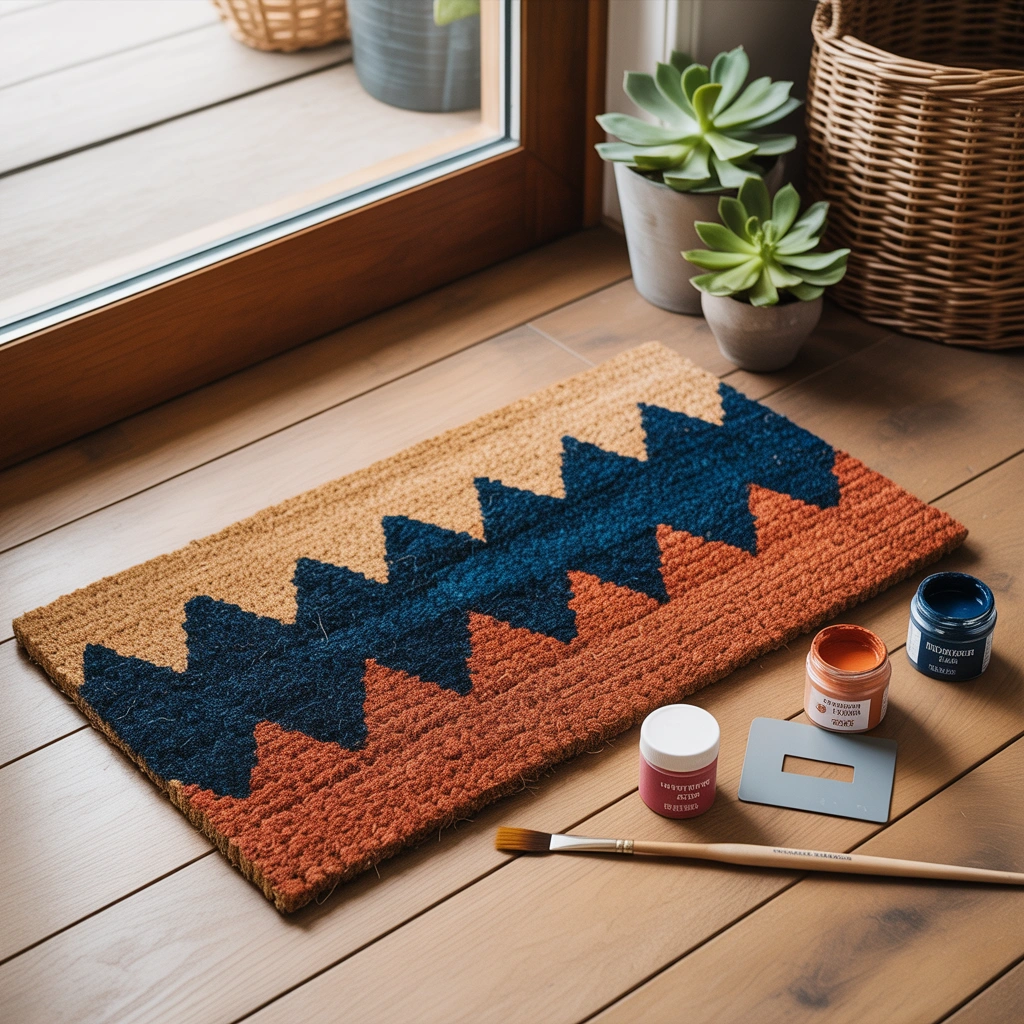
A plain doormat can become a cheerful entrance feature with a little paint and creativity.
Choose a natural coir doormat and exterior paint suitable for the material. Create a stencil using thick paper, plastic, or a cutting machine if you have one.
Your design could include a simple welcome message, family name, house number, floral border, paw prints, or a playful phrase. Secure the stencil firmly so it does not move while you apply the paint.
Use a dabbing motion rather than brushing from side to side. This helps push the paint into the textured surface and reduces bleeding under the stencil.
Apply several light layers, allowing the paint to dry between coats. Once finished, let the doormat dry completely before placing it outside.
A personalized doormat is a small detail, but it helps the entrance feel friendly and intentional. It is also an excellent housewarming gift idea.
13. Design a DIY Mirror with a Decorative Frame
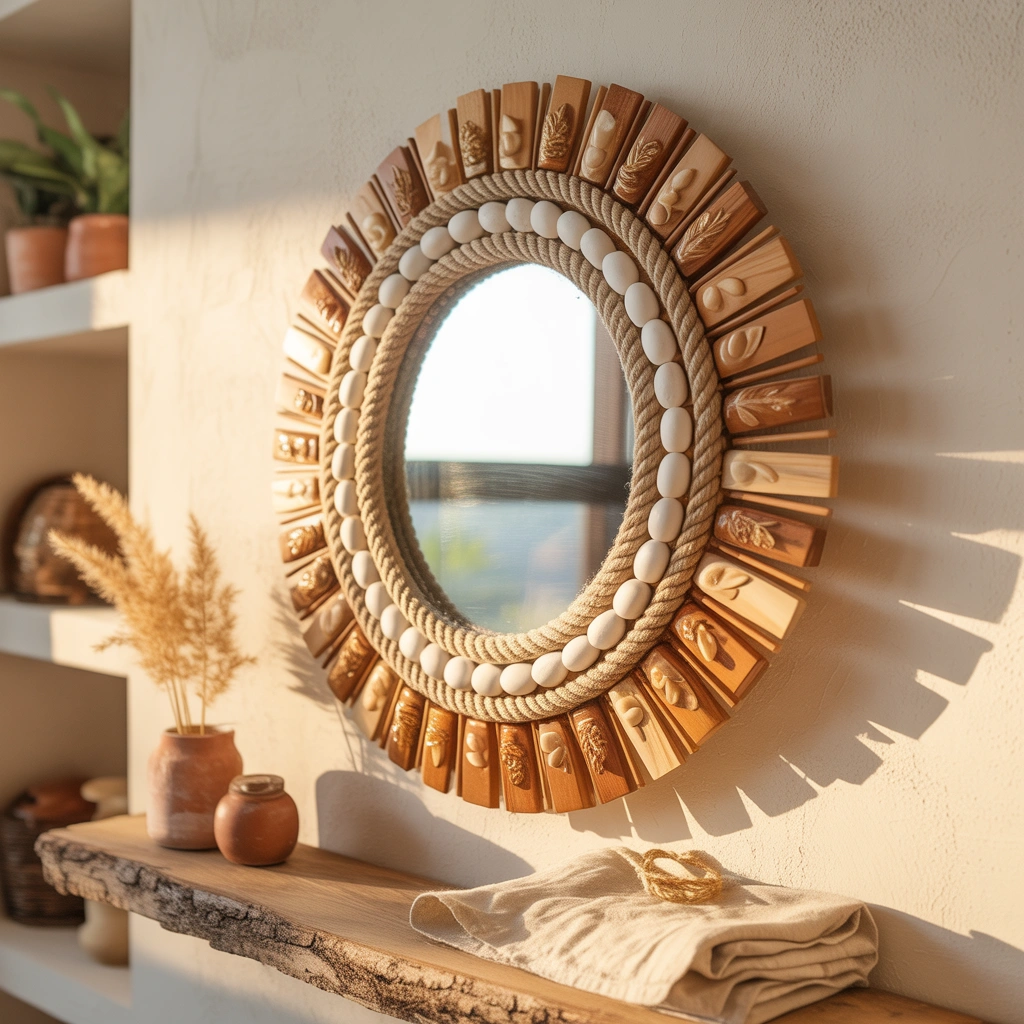
Mirrors reflect light and can make a small room feel more open. A basic mirror can become a statement piece when you add a handmade frame.
Begin with a simple round or rectangular mirror. Depending on your style, you can decorate the border with wooden dowels, rope, beads, bamboo sticks, painted craft pieces, or lightweight molding.
For a sunburst mirror, attach wooden sticks around the back in a circular pattern. Use sticks of different lengths to create a dramatic effect. Once the adhesive is fully dry, paint the frame gold, black, white, or leave the wood natural.
For a coastal or rustic design, wrap thick rope around the edge of the mirror. A small rope loop at the top can add a decorative touch, although the mirror should still be supported with proper wall hardware.
Always use an adhesive that is suitable for both the mirror backing and the framing material. Make sure every piece is firmly attached before hanging the mirror.
Place the finished mirror in an entryway, above a dresser, or on a wall opposite a window to help reflect natural light.
14. Create Floating Shelves from Reclaimed Wood
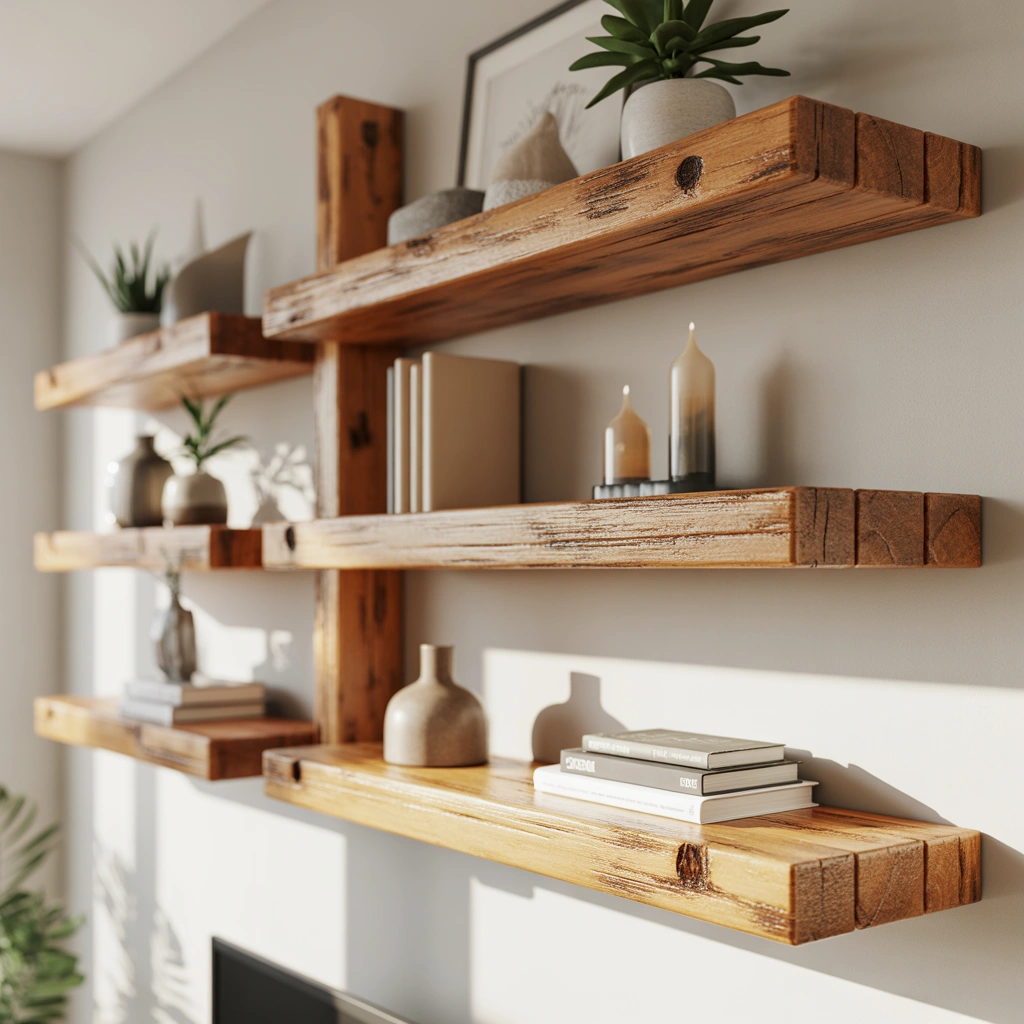
Floating shelves offer both storage and decoration. They are ideal for small spaces because they use wall space without taking up floor area.
Reclaimed wood can give the shelves warmth and character. You may use an old wooden board, leftover lumber, or a sturdy shelf purchased from a hardware store.
Sand the wood thoroughly. Apply wood stain for a natural finish or paint it in a color that complements the room. Seal the surface if necessary.
Install the shelves using appropriate brackets, anchors, and screws. The correct hardware will depend on the shelf weight, wall type, and items you plan to display. For heavier objects, fastening into wall studs is usually the safest option.
Decorate the shelves with a balanced combination of books, framed photographs, plants, candles, ceramics, and small baskets. Avoid filling every inch. Leaving open space around objects helps the display feel calm rather than crowded.
I usually arrange one taller object, one shorter object, and one natural element such as a plant. This simple grouping technique creates an attractive composition without requiring professional styling skills.
15. Make a Handmade Seasonal Door Wreath

A handmade wreath is a lovely way to decorate your front door or an interior wall. It can also be updated throughout the year.
Start with a wreath base made from grapevine, foam, wire, or flexible branches. Choose decorations that match the season and your home’s color palette.
For spring, use artificial flowers, greenery, and soft ribbon. A summer wreath may include lemons, wildflowers, or coastal elements. Autumn designs look beautiful with dried leaves, small pumpkins, wheat, and warm-colored fabric. Winter wreaths can feature pinecones, evergreen branches, berries, and bells.
Arrange the largest pieces first, then fill the gaps with smaller decorations. Step back occasionally to check whether the design feels balanced.
You do not have to cover the entire wreath. A partially decorated wreath with flowers concentrated on one side can look modern and elegant.
Use floral wire or strong adhesive to secure the decorations. Add a ribbon or loop for hanging, and check that the wreath is protected from harsh weather if it will be placed outdoors.
How to Choose the Right DIY Crafts for Your Home
With so many DIY home decor ideas available, it can be tempting to start several projects at once. However, a little planning will help you create decorations you will actually use and enjoy.
First, look at the room you want to update. Ask yourself what is missing. Does the wall need artwork? Is the table cluttered? Does the room need more texture, color, storage, or lighting?
Next, consider your existing decor style. A rope basket and wooden tray work well in rustic or coastal interiors, while textured canvas art and monochrome frames suit modern spaces. Pressed flowers, yarn wall hangings, and handmade clay dishes are perfect for soft, natural, or bohemian rooms.
You should also think about function. Decorative items are even more valuable when they solve a problem. A beautiful basket can hide clutter, a tray can organize a coffee table, and floating shelves can provide storage in a small room.
Finally, begin with a manageable project. Completing one simple craft successfully will build your confidence and help you understand which materials and techniques you enjoy most.
Budget-Friendly Materials for DIY Home Decor
You may already have many useful craft materials at home. Before purchasing new supplies, check cupboards, storage boxes, and recycling containers.
Glass jars, empty bottles, cardboard boxes, tin cans, old picture frames, leftover fabric, wrapping paper, yarn, ribbon, and unused wood pieces can all be repurposed.
Secondhand shops are also excellent places to find affordable frames, baskets, mirrors, containers, and wooden items. Try to look beyond the current appearance of an object. A dark frame can be painted, a plain basket can be decorated, and an old tray can be sanded and refinished.
Basic tools such as scissors, a glue gun, paintbrushes, sandpaper, measuring tape, and a craft knife can be used for many different projects. You do not need to buy every tool at once. Build your craft collection gradually according to the projects you choose.
Tips for Making DIY Home Decor Look Professional
The difference between a rushed craft and a polished decorative piece often comes down to preparation.
Clean all surfaces before painting or gluing. Remove old labels, dust, grease, and loose material. Sand wood and rough edges when necessary.
Choose a limited color palette. Using two or three coordinated colors usually creates a more stylish result than combining too many unrelated shades.
Measure carefully, especially when cutting fabric, arranging frames, or installing shelves. Even handmade decor benefits from thoughtful spacing and proportion.
Allow paint, glue, clay, and sealers to dry fully. Moving too quickly can create fingerprints, cracks, smudges, or weak attachments.
Finally, style your finished craft with intention. A handmade vase may look more impressive when displayed with two smaller objects. Wall art feels more connected to the room when its colors appear elsewhere in cushions, rugs, or accessories.
Common DIY Home Decor Mistakes to Avoid
One common mistake is choosing appearance over durability. Always use materials that suit the project. Outdoor items need weather-resistant paint, planters require proper drainage, and wall-mounted objects need secure hardware.
Another mistake is skipping preparation. Painting over dirty glass or rough wood can lead to peeling and uneven finishes.
It is also easy to overdecorate. Not every surface needs multiple handmade items. A few carefully selected pieces usually have more impact than a crowded display.
Avoid copying trends without considering your home. A project may look beautiful online but still feel wrong in your space. Change the color, scale, or materials so the craft fits your room and lifestyle.
Most importantly, do not expect every handmade item to look factory-perfect. DIY decor has character because it is created by a person. Small variations are part of its charm.
Frequently Asked Questions About DIY Crafts for Home Decor
What are the easiest DIY home decor projects for beginners?
Painted bottles, decorated candle jars, tin can planters, yarn wall hangings, and simple clay dishes are excellent beginner projects. They require basic materials and can usually be completed without specialized tools.
How can I decorate my home with a very small budget?
Begin by reusing materials you already own. Transform jars, cans, boxes, old frames, and leftover fabric. You can also visit thrift stores to find inexpensive items that can be painted or repurposed.
How do I make handmade decor match my room?
Use colors that already appear in the room. You can repeat shades from curtains, cushions, rugs, artwork, or furniture. Matching every item exactly is unnecessary, but a consistent color palette helps the room feel connected.
Which DIY crafts can help organize a home?
Rope baskets, decorative trays, floating shelves, tin can organizers, labeled boxes, and small clay dishes can all improve organization while adding style.
Can DIY home decor look expensive?
Yes. Careful preparation, neutral colors, clean finishes, balanced styling, and quality-looking textures can make inexpensive materials appear more refined. Matte paint, natural wood, linen, rope, and simple metallic details often create an elevated appearance.
Final Thoughts
Creating DIY crafts for home decor is one of the most enjoyable ways to personalize a living space. You do not need advanced artistic skills or a large budget. What matters most is choosing a project you genuinely like and adapting it to suit your home.
The 15 ideas in this guide offer a wide variety of possibilities. You can create artwork for empty walls, reuse old containers, improve storage, add natural details, or make seasonal decorations. Each project can be customized with your favorite colors, patterns, and materials.
For me, the best part of DIY decorating is seeing an ordinary object become something useful and beautiful. A glass bottle becomes a vase. A cardboard box becomes a storage basket. A plain canvas becomes personal artwork.
Start with one small project and enjoy the process. Your handmade decor does not have to be flawless. It simply needs to make your home feel more comfortable, creative, and personal.