Christmas is a wonderful time to bring creativity, color, and a little festive magic into the classroom. One of my favorite ways to transform an ordinary school space is through a beautifully decorated soft board. With colorful paper, handmade characters, sparkling stars, and cheerful Christmas messages, even a simple notice board can become an eye-catching seasonal display.
Whether you are decorating a primary school classroom, a school hallway, a library, or a learning corner, the right Christmas soft board decoration can make the entire space feel more welcoming. You do not need expensive materials or professional crafting skills to create something special. A few sheets of colored paper, some thoughtful planning, and a creative theme can make a remarkable difference.
In this guide, we will explore 14 Christmas soft board decoration ideas that combine festive charm with practical classroom use. From Santa’s workshop and snowy winter scenes to interactive kindness boards and eco-friendly paper crafts, there is something for different ages, budgets, and decorating styles. Each idea includes design inspiration, materials, step-by-step instructions, and a detailed Ideogram prompt to help you visualize the finished display.
1. Santa Claus and His Christmas Workshop
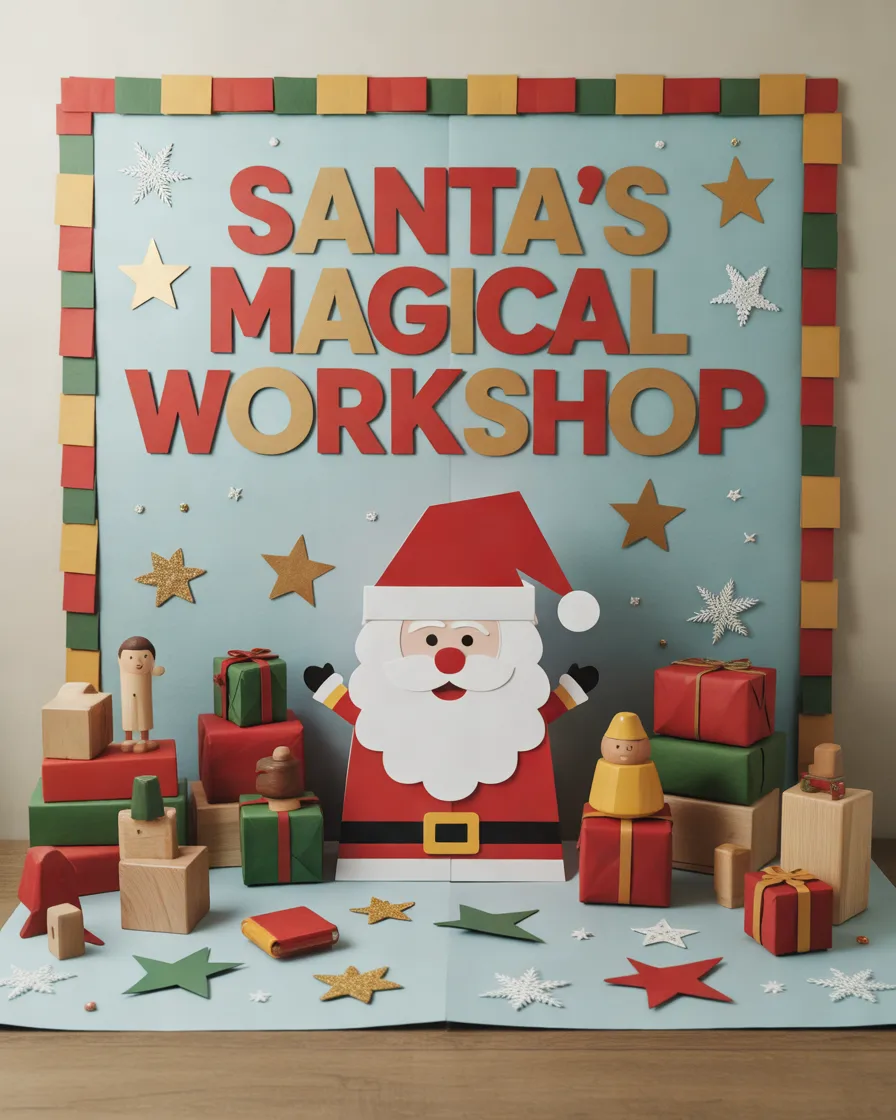
A Santa Claus Christmas workshop is a cheerful choice for classrooms that need a colorful, playful, and instantly recognizable festive display. Imagine a large smiling Santa in the center, surrounded by toy boxes, tiny elves, wrapped presents, and a snowy workshop. This design works especially well in kindergarten and primary classrooms because its friendly characters can capture children’s attention.
Color palette and layout
Use bright red, forest green, white, and touches of gold. Cover the soft board with a pale blue or snowy white background. Position Santa in the center or slightly to one side, then arrange paper presents and workshop details around him. A title such as “Santa’s Magical Workshop” can sit across the top in large, contrasting letters.
Avoid placing too many small decorations close together. A few large presents and recognizable characters usually look better than dozens of tiny shapes.
Materials needed
- Red, green, white, brown, and blue craft paper
- Cardstock for Santa and the elves
- Cotton or white paper for snow
- Colored markers and glue
- Gift-box cutouts, stars, and decorative borders
How to create it
- Cover the board with your chosen background paper.
- Draw or print a large Santa template and assemble the character using colored cardstock.
- Create paper presents, toy boxes, and elf characters in different sizes.
- Add a snowy floor and a few white snowflakes around the scene.
- Finish with a bold heading and a simple festive border.
Students can contribute by designing their own miniature presents or writing Christmas wishes on gift-shaped cards. For a smaller board, use one large Santa and three or four presents instead of building an entire workshop.
2. A Magical Christmas Tree Display
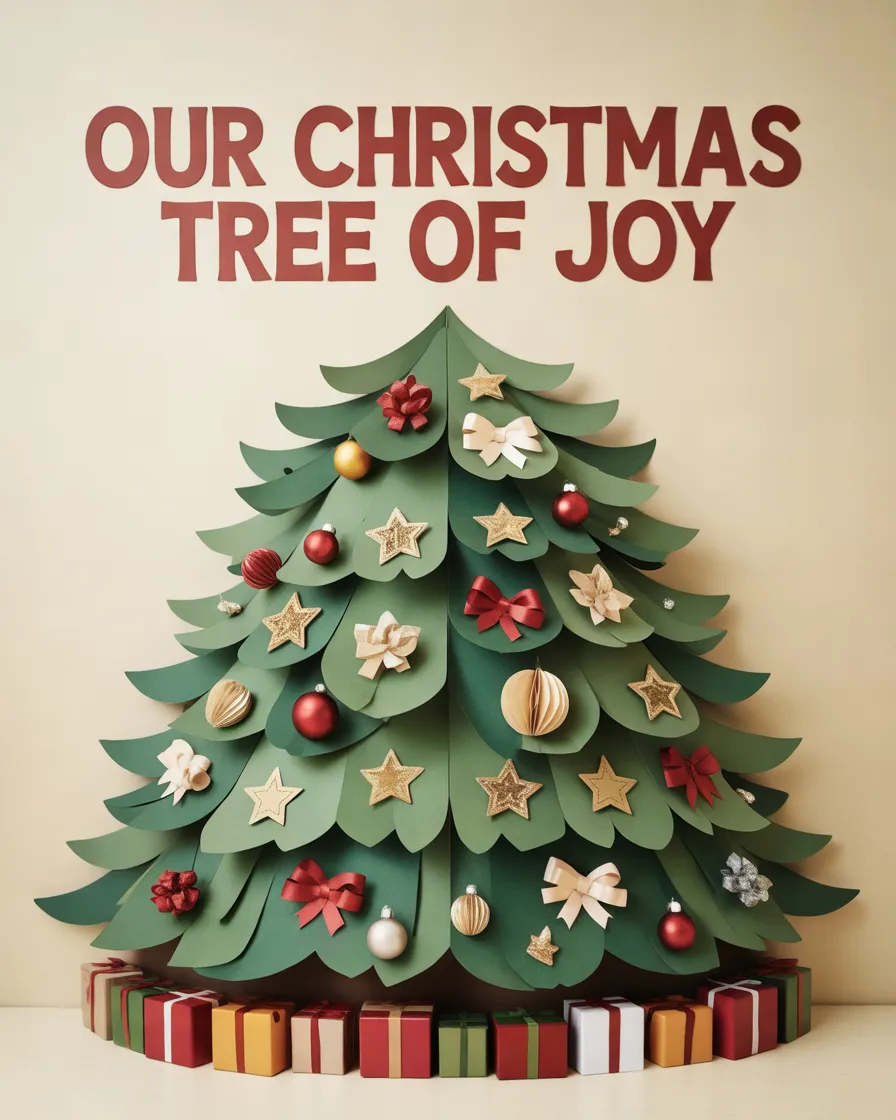
A Christmas tree board is a timeless option that can look elegant, playful, or educational depending on how you design it. The tree itself becomes the focal point, while handmade ornaments, stars, ribbons, and little presents add detail without making the board feel crowded.
Color palette and layout
Combine deep green, red, gold, and white for a traditional Christmas look. Alternatively, choose mint green, silver, and pale blue for a softer winter theme. Create a large triangular tree from layered green paper and place a gold star at the top. Arrange ornaments at different heights, leaving enough space between them to keep the design clear.
The title “Our Christmas Tree of Joy” would work beautifully above the tree.
Materials needed
Green construction paper, colored cardstock, gold paper, ribbon, glue, paper circles, star templates, and gift-box cutouts are enough to get started.
How to create it
- Prepare the background in a neutral color that contrasts with the tree.
- Cut green paper into overlapping triangular or branch-shaped layers.
- Add a star at the top and arrange handmade ornaments across the branches.
- Place several gift boxes at the bottom to complete the composition.
- Add a short festive message without covering the main design.
For a more meaningful classroom activity, invite each student to decorate one paper ornament with a personal goal, kind message, or favorite Christmas memory. The finished tree then becomes a collaborative display rather than simply a decoration.
3. Winter Wonderland With Snowflakes
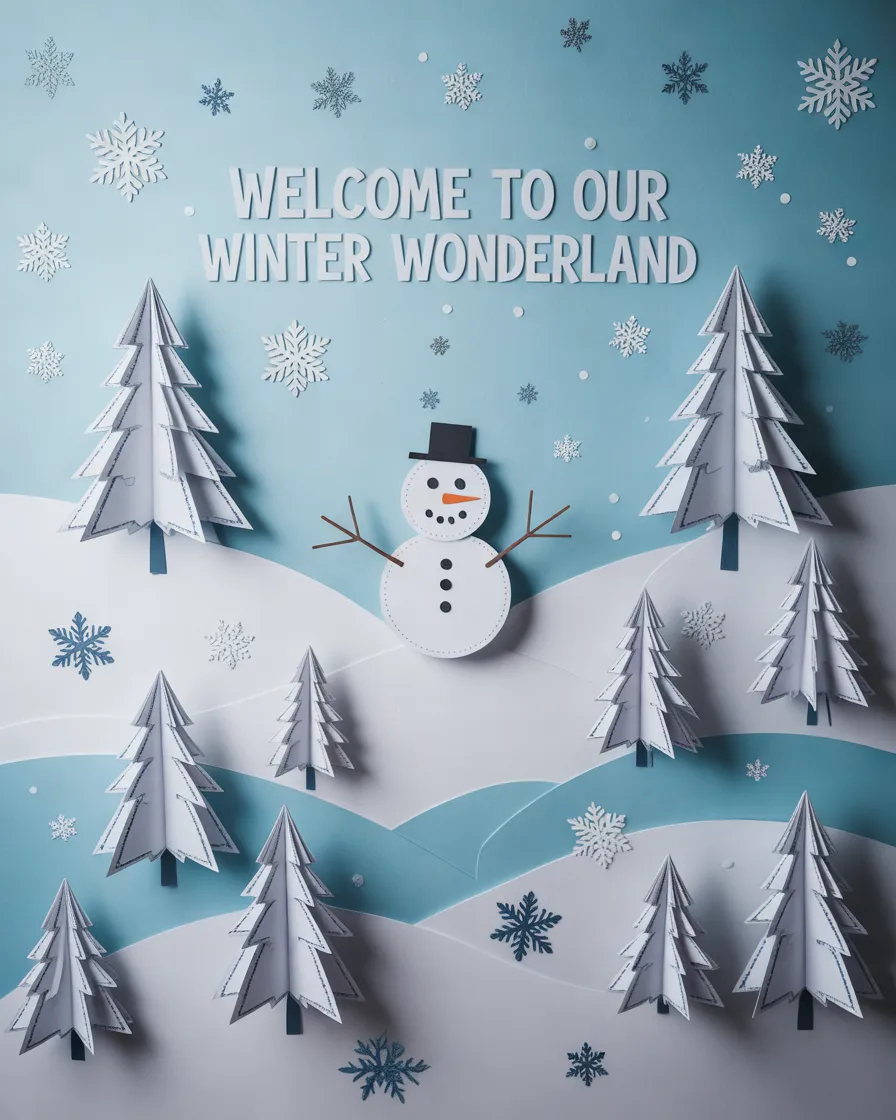
A winter wonderland board brings a calm, magical atmosphere to a classroom. Instead of relying on bright Christmas colors, this design focuses on snowy landscapes, delicate snowflakes, snow-covered trees, and friendly snowmen. It is especially suitable for classrooms that prefer a clean, coordinated display.
Color palette and layout
Choose icy blue, white, silver, and navy. Use a pale blue background, with white paper along the bottom to represent snow-covered ground. Place a large snowman or snowy tree in the center, then distribute snowflakes across the remaining space.
The heading “Welcome to Our Winter Wonderland” can run across the upper edge in dark blue or white lettering, depending on the background.
Materials needed
White and blue paper, silver cardstock, snowflake templates, cotton, glue, markers, and white border strips will help you create the scene.
How to create it
- Cover the board with pale blue paper.
- Cut uneven white paper shapes to create snowy hills.
- Add snow-covered trees, a snowman, and different sizes of snowflakes.
- Use silver accents sparingly to suggest frost and sparkle.
- Finish with a winter-themed title and a simple white border.
Students can cut their own snowflakes, making each one different. For younger children, provide pre-drawn templates and let them decorate the shapes using crayons or safe stickers.
4. Reindeer and Rudolph’s Christmas Adventure
Reindeer-themed decorations are perfect for adding personality to a festive classroom. Rudolph can become the main character, with his bright red nose drawing attention while the other reindeer create a fun seasonal scene. This idea works particularly well for younger students and playful classroom environments.
Color palette and layout
Use warm brown, cream, red, green, and white. Place Rudolph in the center with a few smaller reindeer around him. Add paper stars, a snowy ground, and a simple heading such as “Rudolph’s Christmas Adventure.”
Make the characters large enough to recognize from across the classroom. Simple facial expressions and clean silhouettes often work better than overly detailed designs.
Materials needed
Brown and cream cardstock, red paper circles, black markers, antler templates, white paper, glue, and decorative stars.
How to create it
- Choose a light background that contrasts with the brown characters.
- Create rounded reindeer faces and add antlers, ears, eyes, and noses.
- Give Rudolph a large red nose to distinguish him from the other reindeer.
- Arrange the characters along a snowy path or beneath a starry sky.
- Add the heading and a neat border to complete the scene.
Let students decorate individual reindeer with different scarves, hats, or patterns. This creates a display with a shared theme while allowing each child to contribute something unique.
5. Gingerbread House Christmas Board
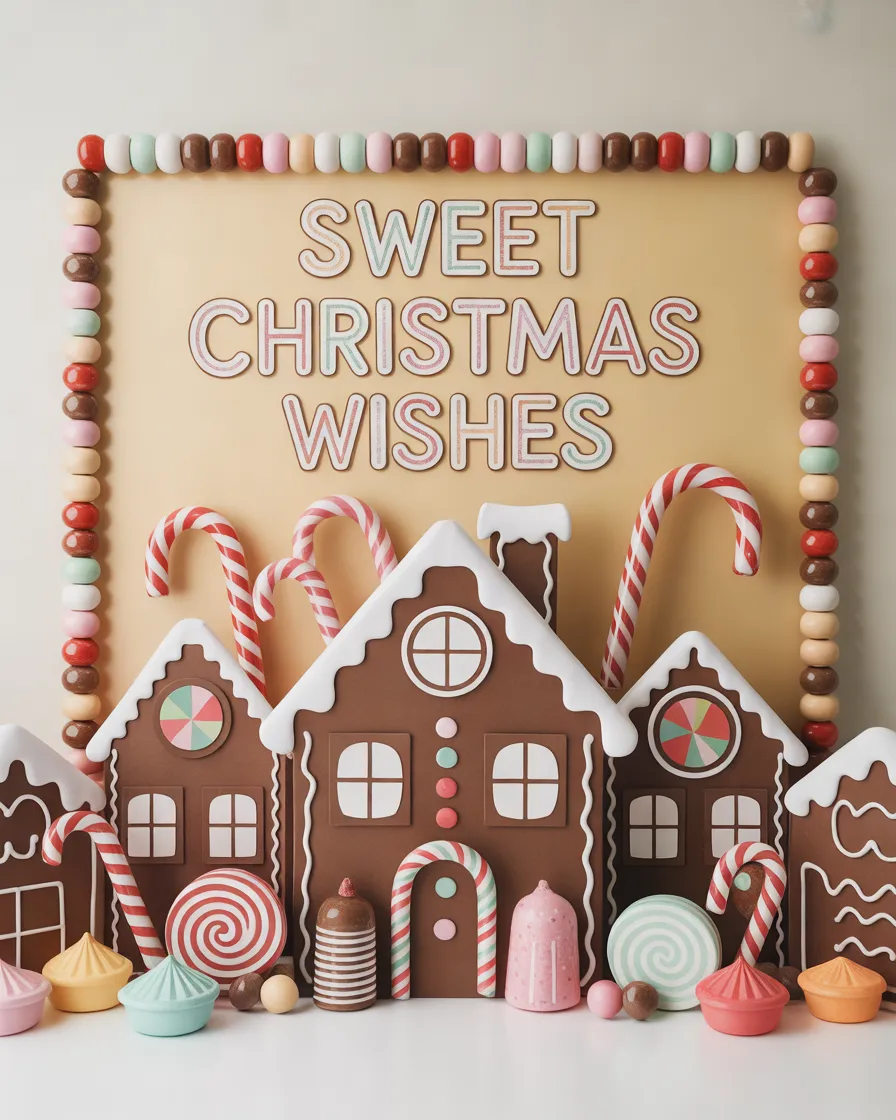
A gingerbread house theme can turn an ordinary soft board into a colorful confectionery-inspired scene. Paper houses, candy canes, gumdrops, peppermint circles, and icing-style borders create a playful display without needing actual sweets.
Color palette and layout
Use gingerbread brown, white, red, pink, and mint green. Place one large gingerbread house in the center, then arrange smaller candy shapes around it. White paper strips can imitate icing along the roof and windows, while a scalloped border gives the board a finished look.
A heading such as “Sweet Christmas Wishes” connects the theme with the festive season.
Materials needed
Brown cardstock, white paper, colored construction paper, circle templates, markers, glue, and decorative border strips.
How to create it
- Cover the board with pale blue, cream, or soft pink paper.
- Build a large gingerbread house from brown cardstock.
- Add white paper icing, colorful windows, a door, and a decorated roof.
- Create candy canes, gumdrops, and peppermint shapes to fill the surrounding space.
- Place the title above the house and use a simple candy-inspired border.
For an interactive version, students can design their own paper gingerbread cookies and add their names to the shapes. The cookies can be arranged around the house, creating a personalized classroom display.
6. Merry Christmas Around the World
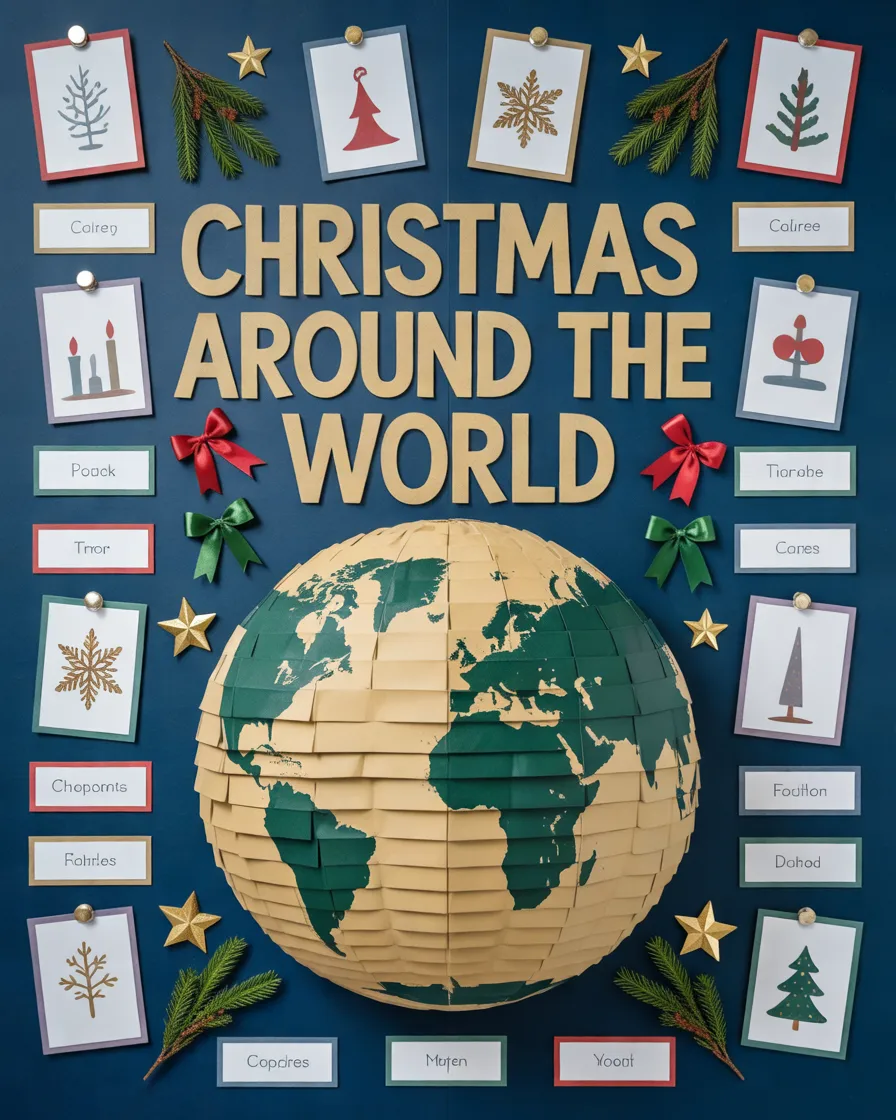
A Christmas-around-the-world board combines festive decoration with cultural learning. It can introduce students to the ways different communities celebrate Christmas, the languages they use for seasonal greetings, and the variety of traditions associated with the holiday.
Color palette and layout
Use dark blue, green, red, and gold to create a unified appearance. Place a large paper globe or world map in the center. Surround it with small greeting cards, country labels, and carefully selected illustrations representing different regional traditions.
A heading such as “Christmas Around the World” makes the educational purpose clear.
Materials needed
A printed or handmade world map, colored cardstock, paper flags where relevant, markers, glue, and small information cards.
How to create it
- Use a light background so the map and labels remain readable.
- Position the globe or map as the central feature.
- Add a limited selection of country labels and greetings, checking spelling and translations.
- Include short, accurate notes about specific traditions.
- Finish with a festive title and small seasonal accents.
Keep the cultural information respectful and specific. Not everyone celebrates Christmas, and traditions vary even within the same country. Ask students to research their chosen examples rather than presenting one custom as universal.
7. The Twelve Days of Christmas Display
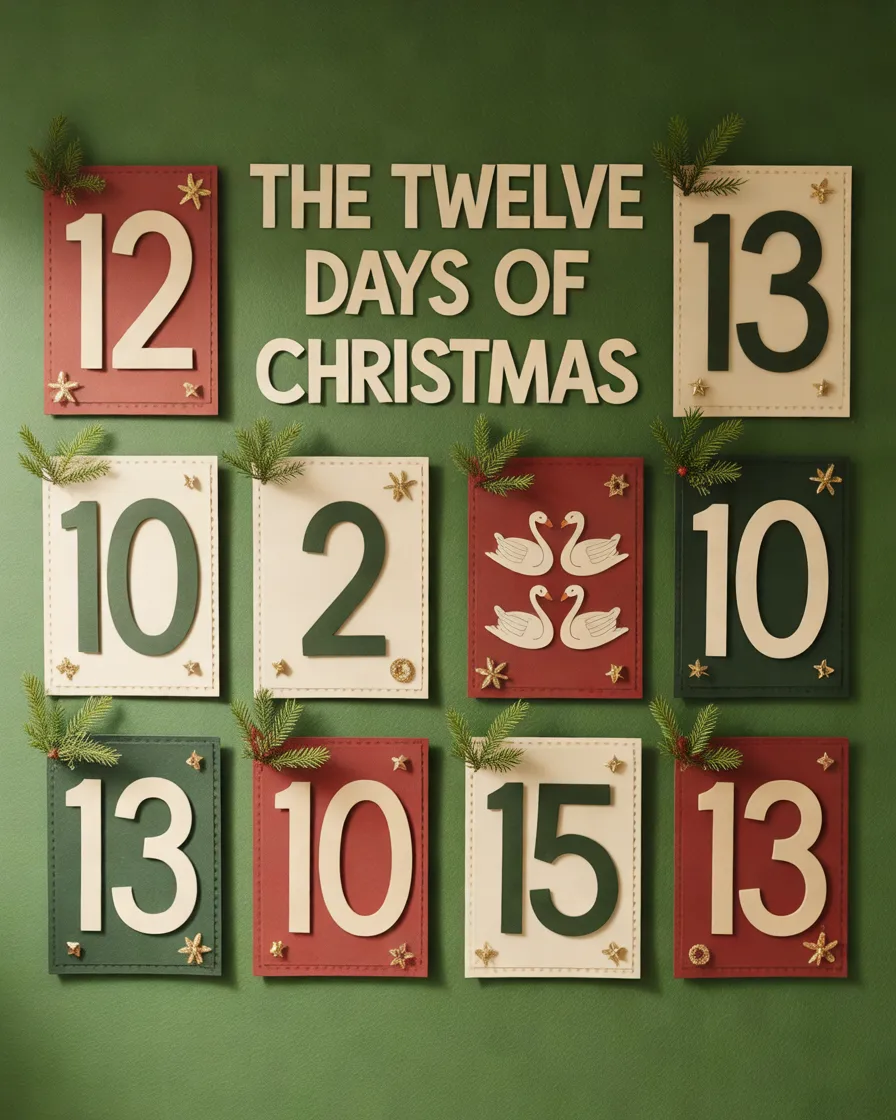
The Twelve Days of Christmas theme is an excellent option for teachers who want a board that combines festive creativity with music, counting, vocabulary, and classroom discussion. The traditional song provides a recognizable starting point for a numbered display.
Color palette and layout
Choose red, green, gold, and cream. Arrange twelve numbered cards in a neat grid, circular pattern, or gentle descending arrangement. Each card can feature a simple illustration associated with the corresponding verse, creating a structured display that students can explore.
Use the title “The Twelve Days of Christmas” at the top and keep the illustrations consistent in style.
Materials needed
Numbered cardstock cards, colored paper, illustration templates, markers, glue, and a background sheet.
How to create it
- Divide the board into twelve clear sections.
- Add the numbers in a consistent font and size.
- Create a simple illustration for each section.
- Align the cards carefully, leaving enough space between them.
- Add a title and a small decorative border.
Teachers can use the numbered cards for counting games, sequencing activities, or vocabulary practice. For a younger class, simplify the illustrations and make the numbers especially large.
8. Christmas Wishes and Kindness Board
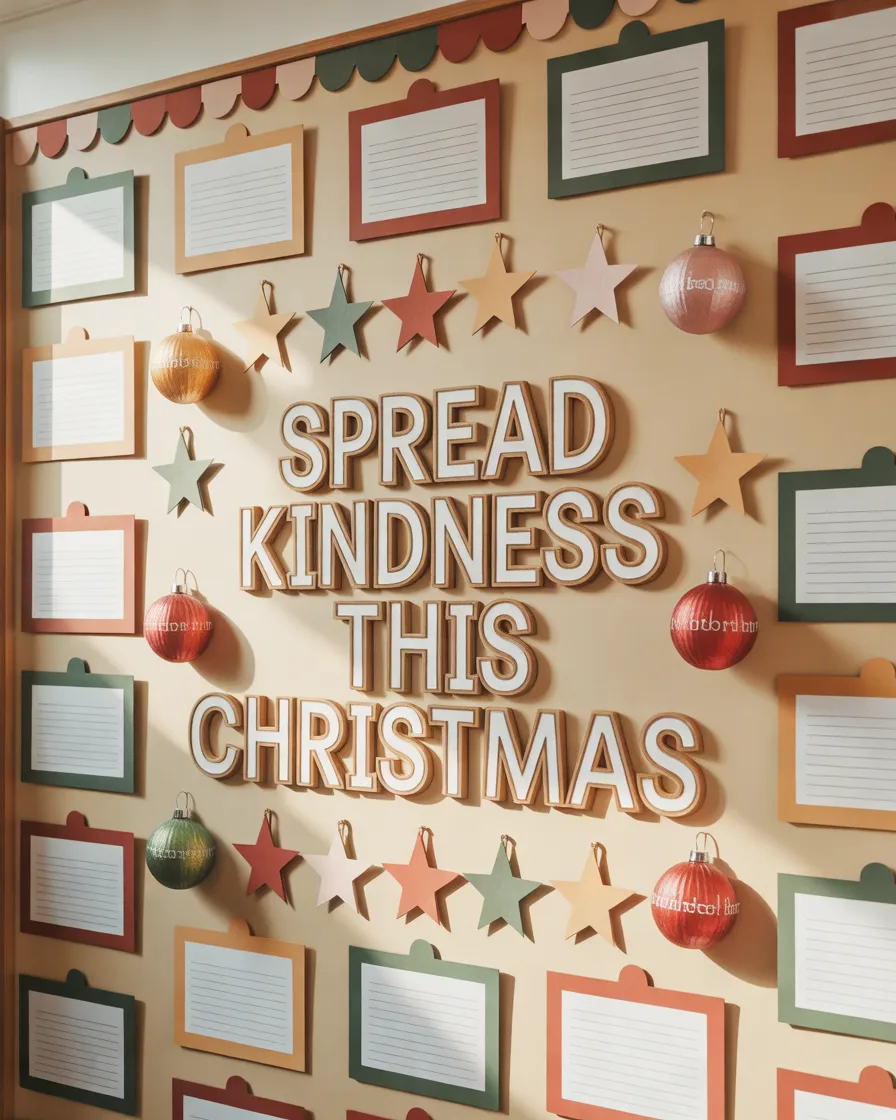
A Christmas wishes and kindness board can make a classroom feel personal and welcoming. Rather than decorating only with traditional characters, this idea invites students to contribute messages about gratitude, friendship, generosity, and the small actions that make a community stronger.
Color palette and layout
Use a light cream, pale blue, or soft green background. Create a central message such as “Spread Kindness This Christmas,” then arrange colorful paper ornaments, stars, or gift tags around it. Leave enough room for students to add their own messages throughout the season.
Materials needed
Colored paper, cardstock ornaments, markers, adhesive, decorative string or ribbon, and a large title template.
How to create it
- Place the main heading at the top or center.
- Cut out paper stars, baubles, or gift tags.
- Add a small basket or envelope where students can collect their messages.
- Invite students to write one kind wish or thoughtful action on each card.
- Attach the completed cards in an organized arrangement.
Review contributions before displaying them, and provide an alternative for students who prefer not to share personal messages publicly. The board can also feature anonymous kindness challenges, such as helping a classmate or thanking someone.
9. Snowman Family Christmas Scene
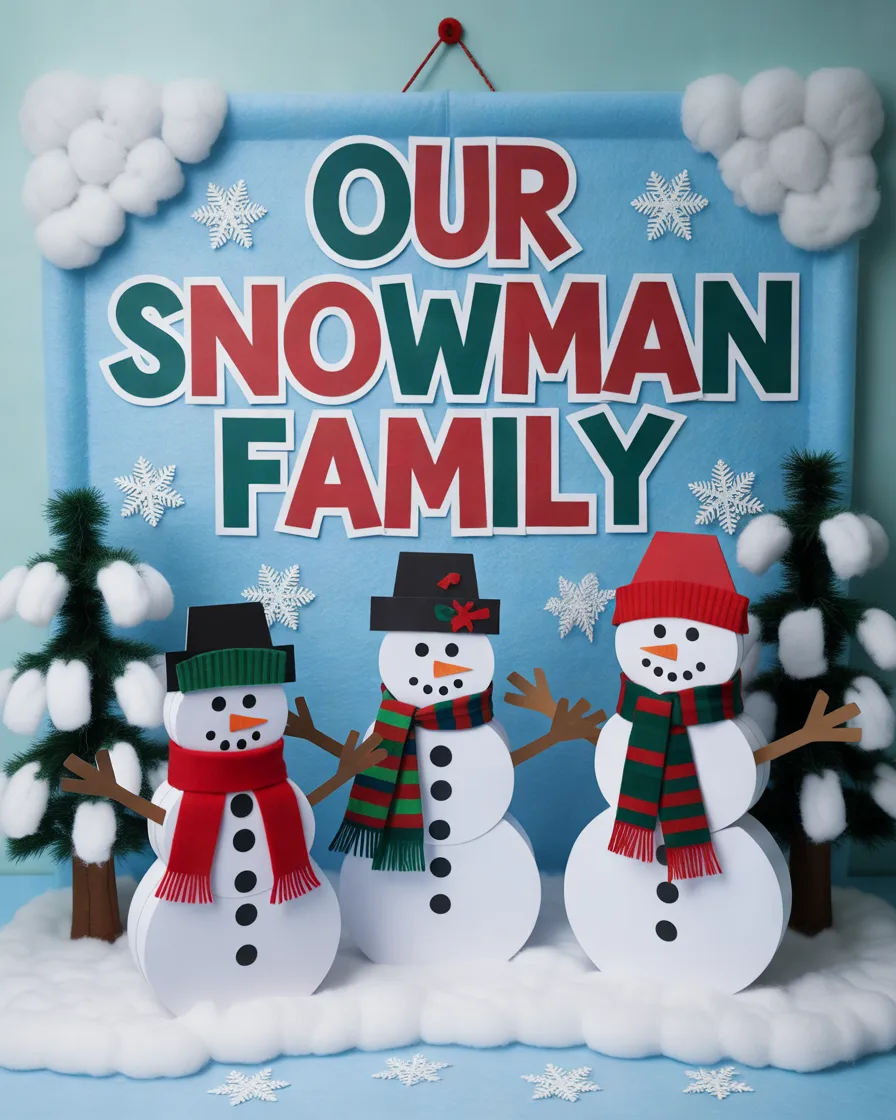
A snowman family display adds a friendly, storybook quality to a classroom. Instead of using just one snowman, create a small family with different hats, scarves, expressions, and sizes. The variation makes the board more interesting while keeping the overall design simple.
Color palette and layout
Use white, icy blue, navy, red, and green. Place the largest snowman in the center, with smaller snowmen on either side. Add snow-covered trees, paper snowflakes, and a white snowy ground to connect the characters.
The title “Our Snowman Family” is short enough to remain readable from a distance.
Materials needed
White cardstock, colored paper, black markers, orange paper for noses, scarf templates, cotton if appropriate, and glue.
How to create it
- Cover the board with pale blue paper.
- Cut out large white circles or rounded shapes for the snowmen.
- Add faces, buttons, scarves, hats, and stick-like arms.
- Arrange the snowmen against a snowy landscape.
- Add a simple heading and a few snowflakes around the scene.
For a classroom project, let each student design a snowman accessory. The finished board becomes a collection of individual contributions within one coordinated display.
10. Christmas Candy Cane Lane
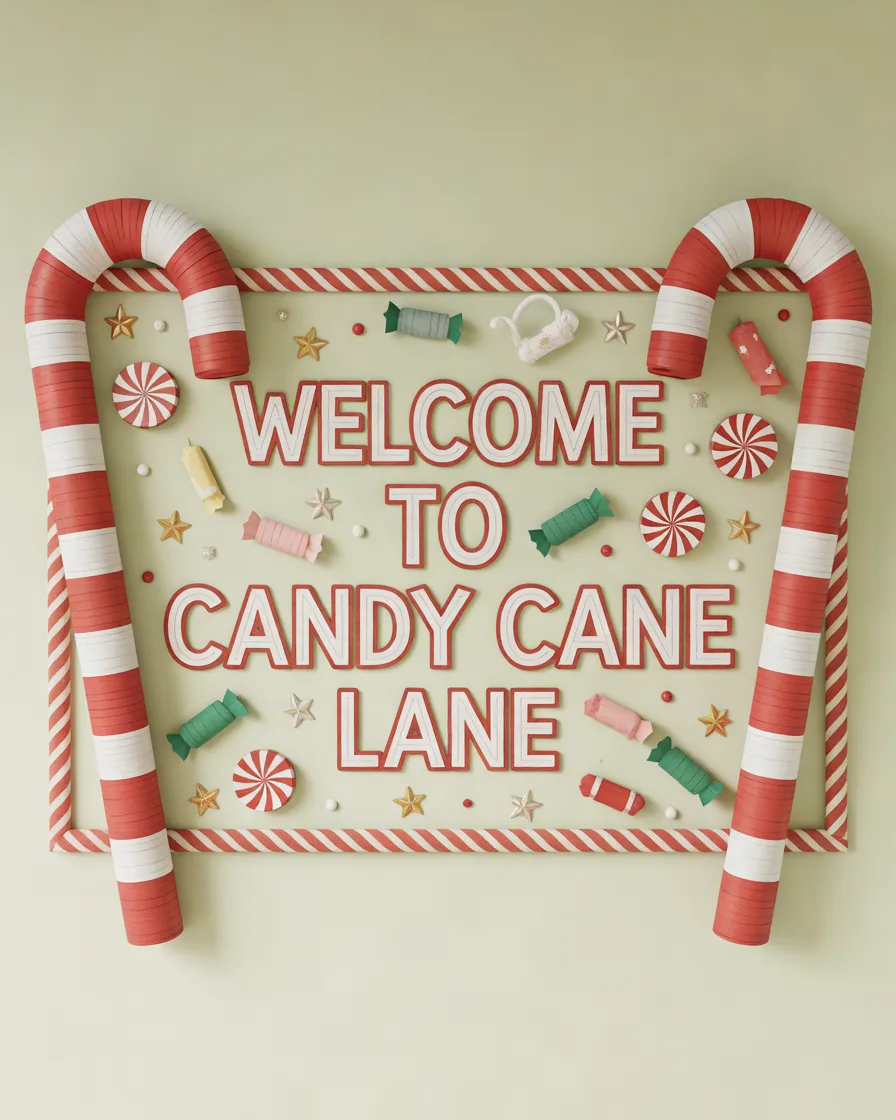
Candy Cane Lane is a bright, energetic theme that can make a classroom board stand out immediately. Oversized striped candy canes, peppermint circles, colorful sweets, and festive lettering create a playful design without requiring complicated characters.
Color palette and layout
Red and white should dominate, with touches of green, pink, and mint. Use a light background and place two large candy canes on opposite sides of the board. Fill the center with peppermint shapes and a short message such as “Welcome to Candy Cane Lane.”
Materials needed
Red and white cardstock, colored paper circles, scissors, glue, markers, and striped border paper.
How to create it
- Select a light background to emphasize the striped decorations.
- Cut two large candy cane shapes and add alternating red and white bands.
- Make peppermint circles, sweets, and small stars.
- Position the title in the center or across the upper edge.
- Finish with a simple striped border.
For younger children, prepare the main candy cane shapes in advance and allow students to decorate the smaller sweets. This keeps the project manageable while encouraging participation.
11. Nativity Scene Christmas Display
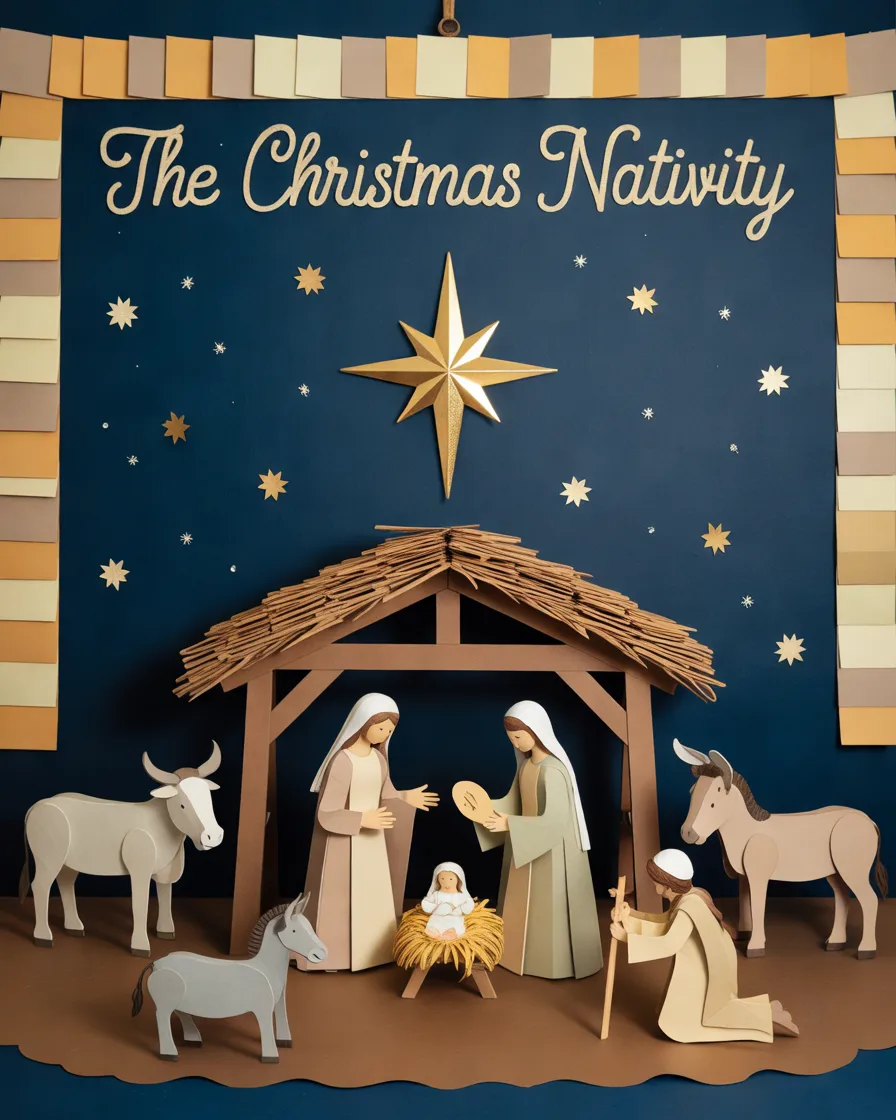
A nativity scene is a meaningful option for schools that wish to represent the Christian story of Christmas. A carefully arranged stable, the Holy Family, animals, and the Star of Bethlehem can create a peaceful display with a more traditional appearance than a candy-themed board.
Color palette and layout
Choose cream, brown, deep blue, gold, and muted green. Place the stable at the center, with the figures arranged simply beneath the star. Use a dark blue background to suggest a nighttime sky, adding a few gold stars without making the composition too busy.
Materials needed
Brown and cream cardstock, blue background paper, gold paper, figure templates, glue, and markers.
How to create it
- Prepare a deep blue background and add a few small stars.
- Build the stable from brown paper with simple layered roof shapes.
- Arrange the figures and animals within the stable.
- Position a prominent gold star above the scene.
- Add a restrained title and a clean border.
Keep the figures recognizable and the arrangement respectful. Before using a religious theme, consider the school’s policies and the diversity of the classroom community.
12. Christmas Book and Storytime Board
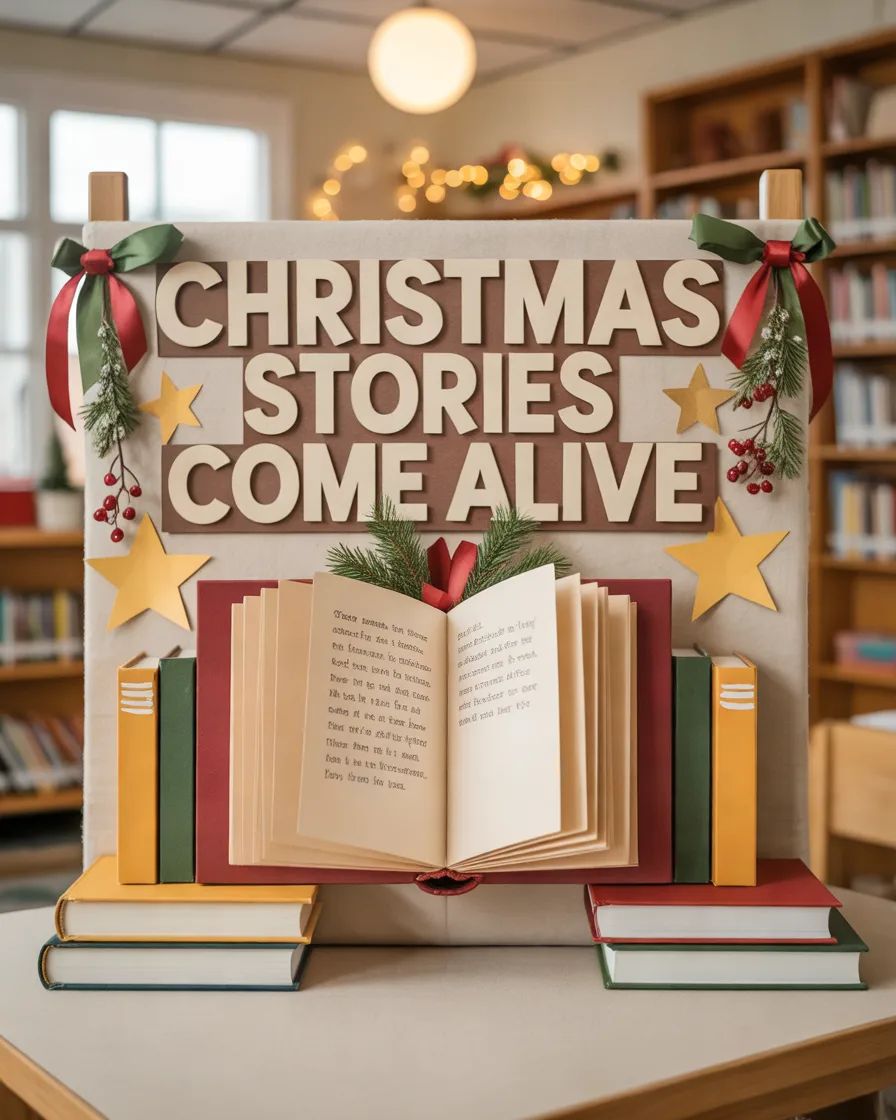
A Christmas storytime board is ideal for school libraries, reading corners, and classrooms that want to connect seasonal decoration with literacy. Instead of filling the board with ornaments alone, build a display around books, storytelling, and imaginative characters.
Color palette and layout
Use red, green, cream, and warm gold. Place a large open-book illustration in the center, with smaller paper books arranged around it. Add stars, evergreen branches, and a few seasonal illustrations to create a festive atmosphere.
The title “Christmas Stories Come Alive” connects the display with reading and imagination.
Materials needed
Colored cardstock, book-cover templates, markers, paper stars, glue, and optional printed illustrations of seasonal storybooks.
How to create it
- Choose a background that makes the paper books easy to see.
- Create a large open book as the main focal point.
- Add smaller book shapes with simple, original covers.
- Decorate the surrounding space with stars and festive accents.
- Place a reading recommendation area near the bottom or side.
Invite students to recommend a favorite seasonal story or write a short sentence about a book they enjoyed. Use appropriate book titles and illustrations, and check permissions if reproducing copyrighted artwork.
13. Christmas Gifts and Festive Surprises

A gift-themed board is easy to customize and works well when you want a festive display without building an elaborate scene. Colorful gift boxes, large bows, ribbons, stockings, and stars can create an attractive arrangement that looks coordinated even when the materials are simple.
Color palette and layout
Use red, green, gold, white, and a small amount of silver. Place several oversized paper presents across the lower half of the board, with smaller ornaments above them. A title such as “A Season of Giving” can introduce a thoughtful message about generosity.
Materials needed
Colored cardstock, ribbon, paper bows, wrapping-paper scraps, glue, markers, and star templates.
How to create it
- Cover the board with a neutral or pale background.
- Cut rectangular gift boxes in different sizes and colors.
- Add contrasting ribbons and paper bows to each gift.
- Arrange the boxes along the bottom, with stars and ornaments above.
- Add a heading and check that the design remains balanced.
For an interactive version, place a short message inside each paper gift. Students can open the flaps to discover a kindness challenge, a positive affirmation, or a classroom activity.
14. Eco-Friendly Handmade Christmas Board
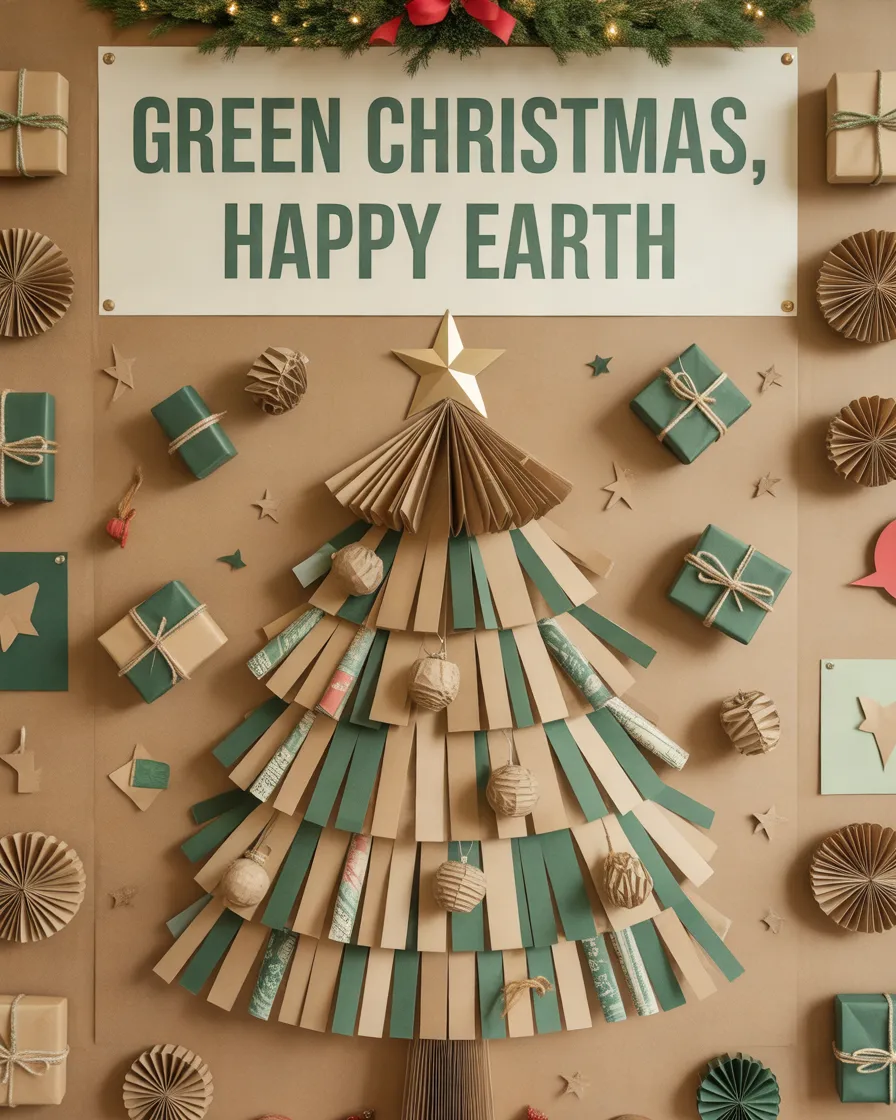
An eco-friendly Christmas soft board proves that festive decorations do not need to rely on brand-new materials. Reused cardboard, leftover wrapping paper, paper packaging, and saved craft supplies can become beautiful ornaments when they are arranged thoughtfully.
Color palette and layout
Choose earthy brown, forest green, cream, and muted red. Use recycled cardboard for the main tree, stars, and gift boxes. Add small accents from leftover paper or clean packaging to create texture without making the board look untidy.
A heading such as “Green Christmas, Happy Earth” connects the festive theme with environmental awareness.
Materials needed
Clean cardboard, leftover wrapping paper, reused ribbons, safe adhesive, paper scraps, markers, and reusable craft templates.
How to create it
- Collect clean, dry, safe materials and sort them by color and texture.
- Use cardboard to create a large tree or another simple central shape.
- Cover selected areas with leftover wrapping paper and paper scraps.
- Add handmade ornaments and small messages about reducing waste.
- Complete the design with a recycled-paper border.
Avoid sharp packaging edges, dirty materials, and anything that could create a safety issue. Keep the message positive by focusing on creativity, reuse, and thoughtful choices rather than making students feel guilty about buying new materials.
Tips for Creating a Beautiful Christmas Soft Board
A successful Christmas soft board decoration is not necessarily the one with the most ornaments. A clear focal point, a coordinated color palette, and thoughtful spacing can make a simple design look much more professional.
- Choose a theme before buying materials. Decide whether you want a traditional Christmas scene, a winter landscape, an educational display, or an interactive student project.
- Use a limited color palette. Three to five coordinated colors are usually easier to manage than using every available shade.
- Make the title readable. Use large letters with strong contrast against the background.
- Plan the layout first. Arrange the main pieces on a table or floor before attaching them to the board.
- Create visual hierarchy. Make the main character or illustration larger than the supporting decorations.
- Keep the border simple. A neat border frames the display without competing with the main design.
- Leave some empty space. Spacing helps individual elements stand out and makes the board easier to understand.
- Invite student participation. Handmade ornaments and student messages can make the display feel more personal.
- Check attachment methods. Use adhesives and pins suitable for the board and permitted by school policy. Keep sharp tools and hot-glue equipment under adult supervision.
How to Decorate a Christmas Soft Board on a Budget
You can create an attractive festive board without purchasing an entirely new collection of craft supplies. Start by checking what is already available in your classroom or school’s art cupboard. Leftover cardstock, old wrapping paper, ribbons, cardboard packaging, and unused border strips can all be useful.
Choose one main design element, such as a Christmas tree, Santa, or snowman family, and build the rest of the display around it. This prevents unnecessary spending on decorations that do not contribute to the overall theme.
Preparing templates in advance is another helpful time-saving technique. Teachers can cut basic shapes before the activity, allowing students to focus on coloring, decorating, and arranging the pieces. For a larger display, divide the work into small groups and assign each group a specific task.
Reusable decorations are especially valuable. Keep durable cardstock characters, laminated titles, and paper templates in labeled folders after the season ends. They can be refreshed with new colors or details in future years, saving both time and materials.
The most important thing is to plan before crafting. A clear design and a few well-made decorations will often look better than an overcrowded board filled with unrelated pieces.
Frequently Asked Questions About Christmas Soft Board Decorations
What Is the Easiest Christmas Soft Board Decoration for a Classroom?
A Christmas tree, snowman family, or gift-themed board is a good starting point for beginners. Each design uses basic shapes that are easy to cut from colored paper. Choose one main focal point, add a short festive heading, and use a simple border. You can make the display more personal by including student-made ornaments.
Which Colors Work Best for a Christmas Bulletin Board?
Traditional red, green, white, and gold are popular choices because they create a recognizable Christmas look. For a winter wonderland, icy blue, white, and silver work beautifully. An eco-friendly display can use forest green, kraft brown, and cream. Choose colors that contrast clearly so the main decorations and lettering remain visible from a distance.
How Can Teachers Decorate a Christmas Soft Board on a Budget?
Reuse leftover craft paper, cardboard packaging, ribbons, and previous decorations whenever possible. Select a simple theme that requires only a few main elements, and create paper templates for repeated shapes. Students can help make ornaments and other decorations, reducing preparation time while making the finished board more personal.
What Materials Are Useful for Handmade Christmas Board Decorations?
Colored cardstock, construction paper, scissors, glue, markers, templates, and background paper are useful for most projects. You can also use clean cardboard, leftover wrapping paper, cotton, or ribbon for selected designs. Choose materials suitable for your students’ ages and follow school rules for adhesives, pins, and cutting tools.
How Can Students Participate in Christmas Soft Board Decoration?
Students can make paper snowflakes, decorate ornaments, design reindeer, write kindness messages, or recommend seasonal books. Assign tasks based on age and ability, and prepare templates when necessary. For interactive boards, review contributions before displaying them and offer different ways for students to participate comfortably.
How Can I Make a Christmas Soft Board Attractive Without Overcrowding It?
Start with one clear focal point and a short heading. Choose a limited color palette, use a few large decorations instead of many tiny ones, and leave visible space between the elements. Arrange everything before attaching it to the board. A consistent style and a neat border will help the finished display look organized.
Conclusion
Creating a beautiful Christmas soft board does not have to be complicated or expensive. With a clear theme, a coordinated color palette, and a little imagination, you can transform an ordinary classroom board into a festive display that students will enjoy throughout the season.
These 14 Christmas soft board decoration ideas offer a range of possibilities, from Santa’s workshop and magical Christmas trees to interactive kindness displays and environmentally friendly paper crafts. You can follow one concept closely or adapt its colors, characters, and activities to suit your own classroom.
Remember that the most memorable decorations are not always the most elaborate. Sometimes, a simple design made together by students and teachers carries the greatest meaning.
Which of these Christmas soft board decoration ideas would you love to try first? Share your favorite concept and use it as inspiration for your next festive classroom project.