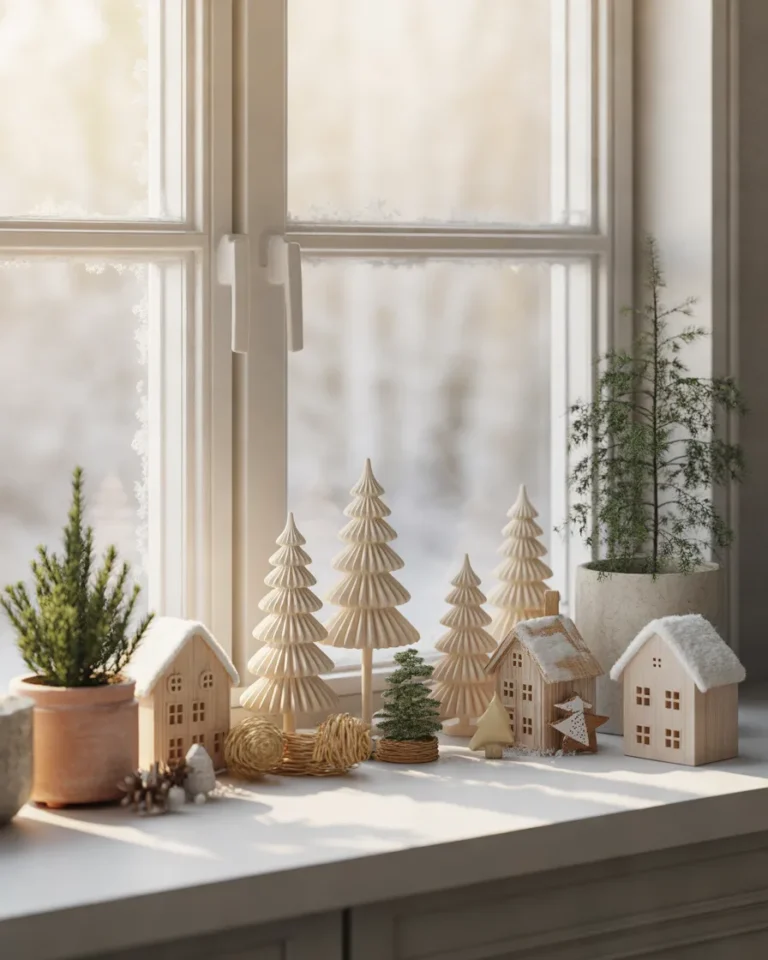
Christmas is one of my favorite times to transform an ordinary classroom into a cheerful, welcoming space. Even before students walk through the door, a beautiful holiday display can make them feel excited about the season. That is why classroom door Christmas decorations are such a wonderful way to bring creativity, color, and a little Christmas magic into the school day.
The best part is that you do not need an expensive decorating budget or professional crafting skills to create something memorable. With colorful construction paper, ribbons, cotton balls, paper snowflakes, and a few clever ideas, you can turn a plain classroom door into a festive masterpiece. You can even involve students in the decorating process, giving everyone a chance to contribute something personal to the design.
In this collection, you will discover 14 classroom door Christmas decorations that combine attractive designs with practical, easy-to-follow instructions. Whether you prefer a traditional Santa theme, a playful gingerbread house, a snowy winter wonderland, or a colorful display featuring your students’ artwork, there is an idea here to suit your classroom. Each design includes a materials list, decorating instructions, budget-friendly alternatives, and practical tips to help you create a beautiful display.
1. Santa Claus Classroom Door Christmas Decoration
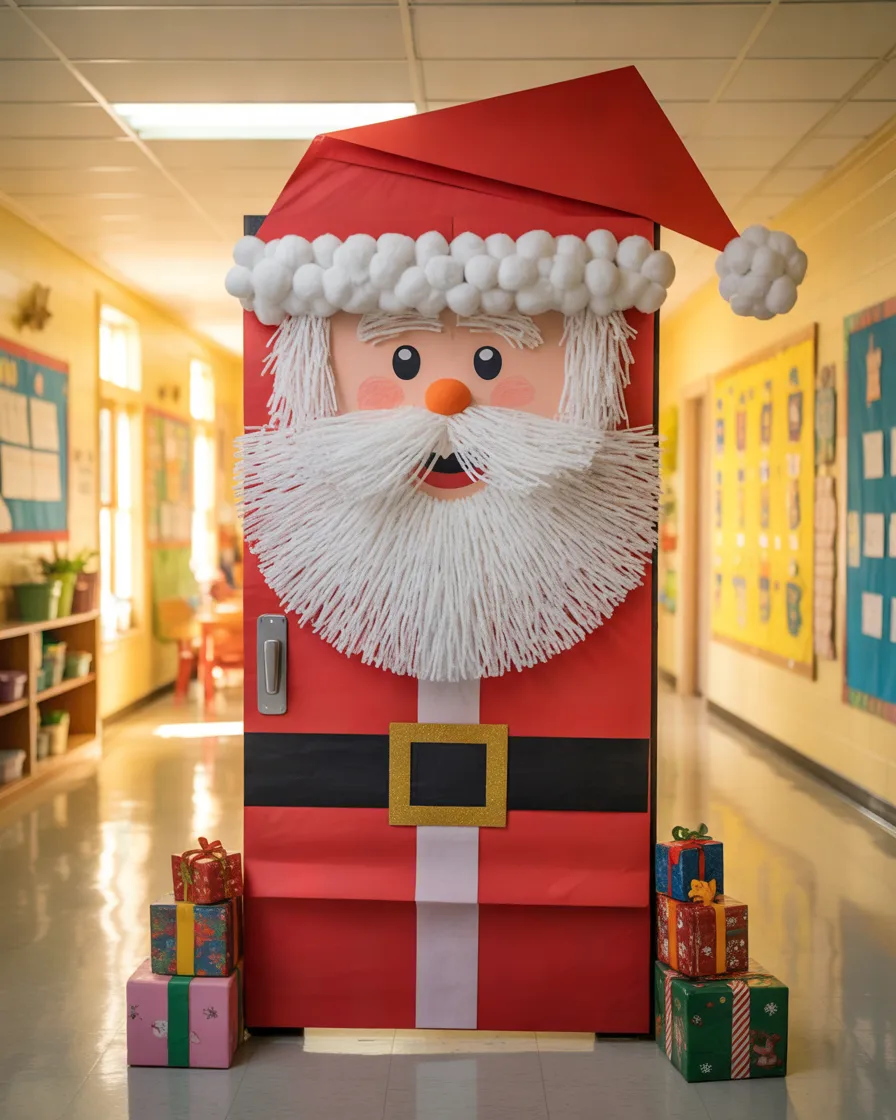
A Santa Claus classroom door is a timeless choice that instantly brings the excitement of Christmas into a school hallway. I love this idea because Santa’s familiar red suit, fluffy white beard, and cheerful expression make the door recognizable from a distance. It is particularly suitable for preschool, kindergarten, and elementary classrooms where playful, colorful decorations are always a hit.
Materials Needed:
- Red, white, black, and peach-colored construction paper
- Large sheets of cardstock or bulletin-board paper
- Cotton balls or white tissue paper
- Child-safe scissors and glue sticks
- Black paper or cardstock for Santa’s belt
- Optional red ribbon and paper snowflakes
Step-by-Step Decorating Instructions:
- Cover the door with red paper to represent Santa’s suit.
- Cut a large peach-colored oval for Santa’s face and position it in the upper-middle section.
- Create a fluffy white beard using layered paper shapes or cotton balls.
- Add a white mustache, rosy cheeks, eyebrows, and a red hat with a white trim and pom-pom.
- Make a wide black belt with a yellow paper buckle across the lower portion of the door.
- Finish with small snowflakes and a short greeting such as “Ho Ho Ho!”
Personal Touches: Ask students to create tiny paper Christmas gifts and write their names on them. Arrange the gifts around Santa so the entire class contributes to the finished design.
Budget-Friendly Alternatives: Reuse leftover red bulletin-board paper and make the beard from inexpensive white paper instead of cotton balls. Hand-drawn facial details can replace purchased embellishments.
Practical Decorating Tips: Keep Santa’s face large and simple so it is visible from the hallway. Use lightweight materials, and ensure the door handle, window, and required classroom signage remain unobstructed.
2. Christmas Tree Classroom Door With Student Ornaments
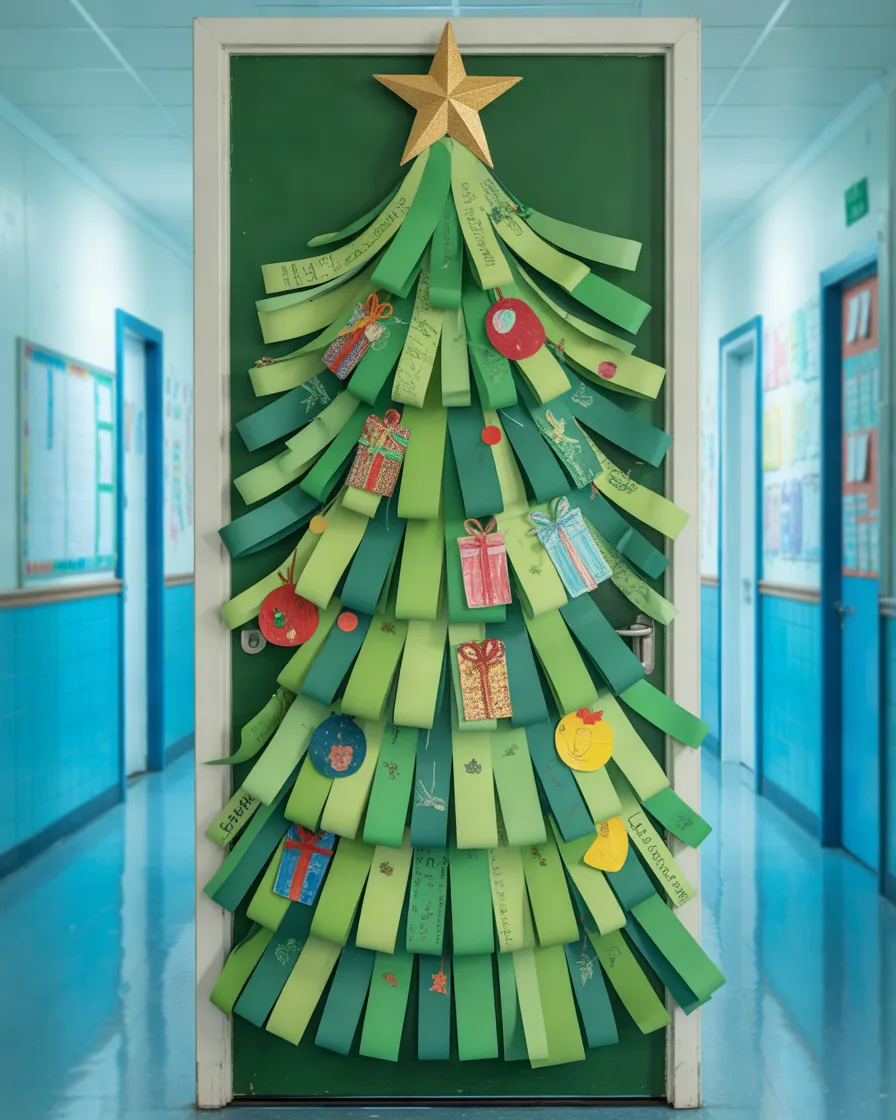
A Christmas tree door is perfect when you want something festive, recognizable, and easy to customize. The triangular tree shape works beautifully on most classroom doors, while handmade ornaments give students an opportunity to participate. This design can be as simple or elaborate as you like, making it suitable for both small classrooms and larger school displays.
Materials Needed:
- Green construction paper or bulletin-board paper
- Brown cardstock for the tree trunk
- Colorful paper circles and stars
- Yellow cardstock for the tree topper
- Glue sticks, scissors, and markers
- Optional metallic paper, ribbon, and paper garlands
Step-by-Step Decorating Instructions:
- Cover the door with a neutral background, such as light blue or white.
- Cut several large green triangles or curved branches and layer them into a Christmas tree.
- Add a brown rectangular trunk near the bottom.
- Create colorful ornaments from paper circles, stars, candy-cane shapes, and small gift cutouts.
- Invite each student to decorate an ornament with their name, favorite Christmas color, or a small drawing.
- Attach the ornaments evenly across the tree and place a large golden star at the top.
Personal Touches: Add a message such as “Our Class Shines Together” to celebrate teamwork. Students can also write one kind word or holiday wish on each ornament.
Budget-Friendly Alternatives: Use recycled cardboard for the trunk and ornaments. Scraps of wrapping paper can add color without requiring additional craft supplies.
Practical Decorating Tips: Arrange the branches from widest at the bottom to narrowest at the top. This creates a balanced tree shape and leaves room for student decorations without making the door look crowded.
3. Snowman Classroom Door With a Winter Wonderland Theme
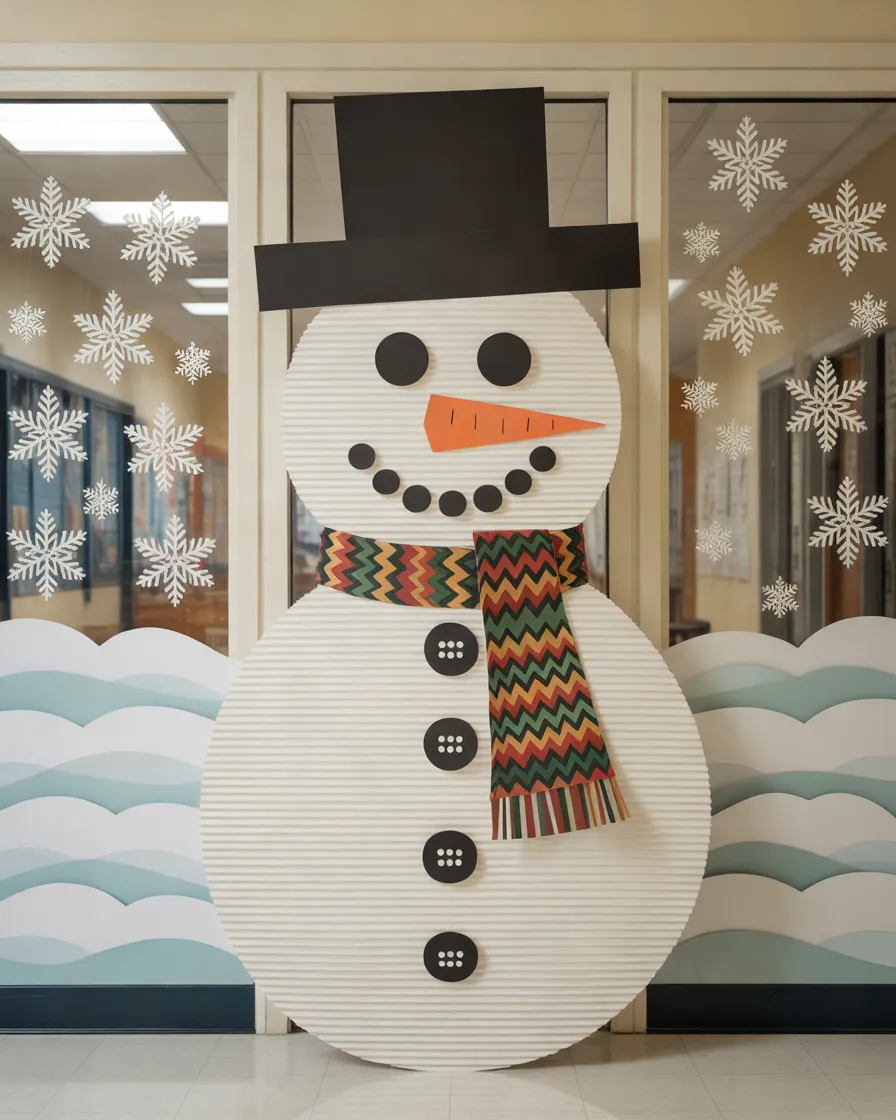
If you prefer a winter-inspired design rather than traditional red-and-green Christmas decorations, a snowman door is a wonderful option. White paper, icy blue accents, and a few playful accessories can make the classroom entrance feel like a snowy scene. The design is especially attractive during December and works well for younger students who enjoy friendly winter characters.
Materials Needed:
- White and pale blue construction paper
- Black paper circles for eyes and buttons
- Orange cardstock for the carrot nose
- Black cardstock for a top hat
- Colored paper for a scarf and mittens
- Cotton balls and paper snowflakes
Step-by-Step Decorating Instructions:
- Cover the door with pale blue paper to create a winter sky.
- Cut three overlapping white circles or rounded shapes to form the snowman’s body.
- Add black eyes, a smiling mouth, and an orange carrot-shaped nose.
- Make a bright scarf from colored paper and add a black top hat.
- Decorate the surrounding space with snowflakes, snowdrifts, and tiny paper stars.
- Add a friendly greeting such as “Let It Snow!”
Personal Touches: Let students design paper snowflakes with their names or draw small winter pictures to surround the snowman. Every snowflake can be different, making the display feel personal.
Budget-Friendly Alternatives: White printer paper can be folded into snowflakes, while leftover fabric scraps can be used for the scarf if they can be attached safely.
Practical Decorating Tips: Keep the snowman’s face near eye level and use large shapes rather than tiny details. A simple background will make the white snowman stand out.
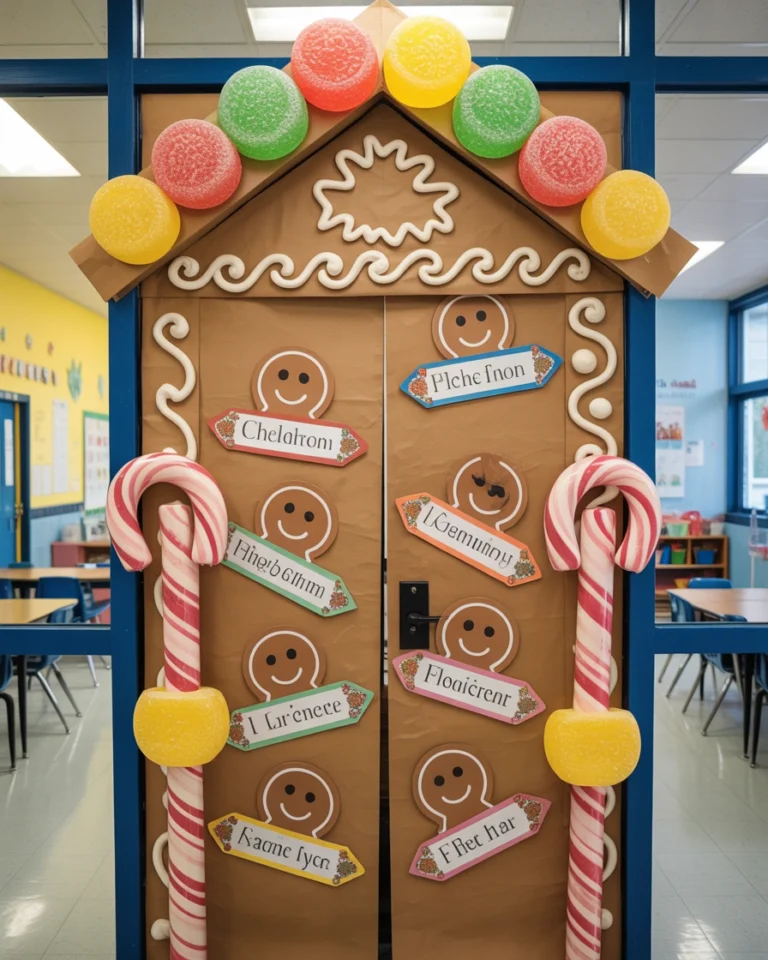
4. Gingerbread House Classroom Door Decoration
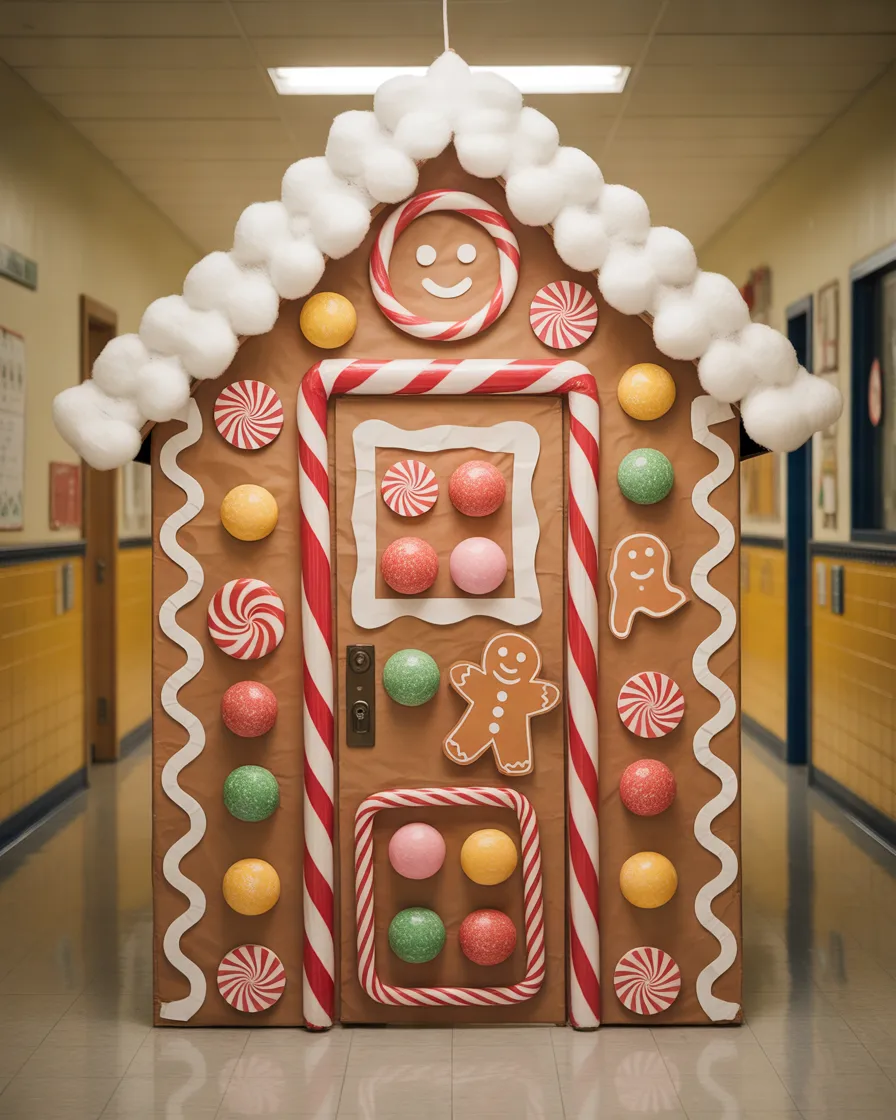
A gingerbread house door adds a sweet, storybook feeling to classroom Christmas decorations. With warm brown tones, colorful candy shapes, and snowy icing details, the entire door can look like an oversized holiday cookie. This theme is especially appealing for elementary classrooms because students can help create candy decorations and imagine their own magical gingerbread village.
Materials Needed:
- Brown bulletin-board paper or kraft paper
- White paper for icing and snow
- Bright cardstock in red, green, pink, and yellow
- Paper circles, gumdrop shapes, and candy-cane cutouts
- Glue sticks, scissors, and markers
- Optional cotton balls for snowy accents
Step-by-Step Decorating Instructions:
- Cover the door with brown paper to create the gingerbread background.
- Add a white icing border around the edges using wavy strips of paper.
- Create a peaked roof with layered brown paper and white icing details.
- Decorate the roof with colorful paper candies, gumdrops, and candy-cane shapes.
- Add a gingerbread-person character or two near the center.
- Finish with a greeting such as “Welcome to Our Sweet Christmas!”
Personal Touches: Give each student a small gingerbread-person cutout to decorate with a name, bow tie, paper buttons, or colorful clothing. Arrange the figures around the door like a friendly gingerbread family.
Budget-Friendly Alternatives: Use brown paper bags opened into flat sheets, and make the candy from colored paper scraps. Draw icing details with white markers if cutting paper strips is too time-consuming.
Practical Decorating Tips: Use a consistent color palette so the design looks intentional. Keep the candy decorations flat against the door, and avoid heavy three-dimensional pieces that could fall off.
5. Reindeer Classroom Door With a Rudolph Theme
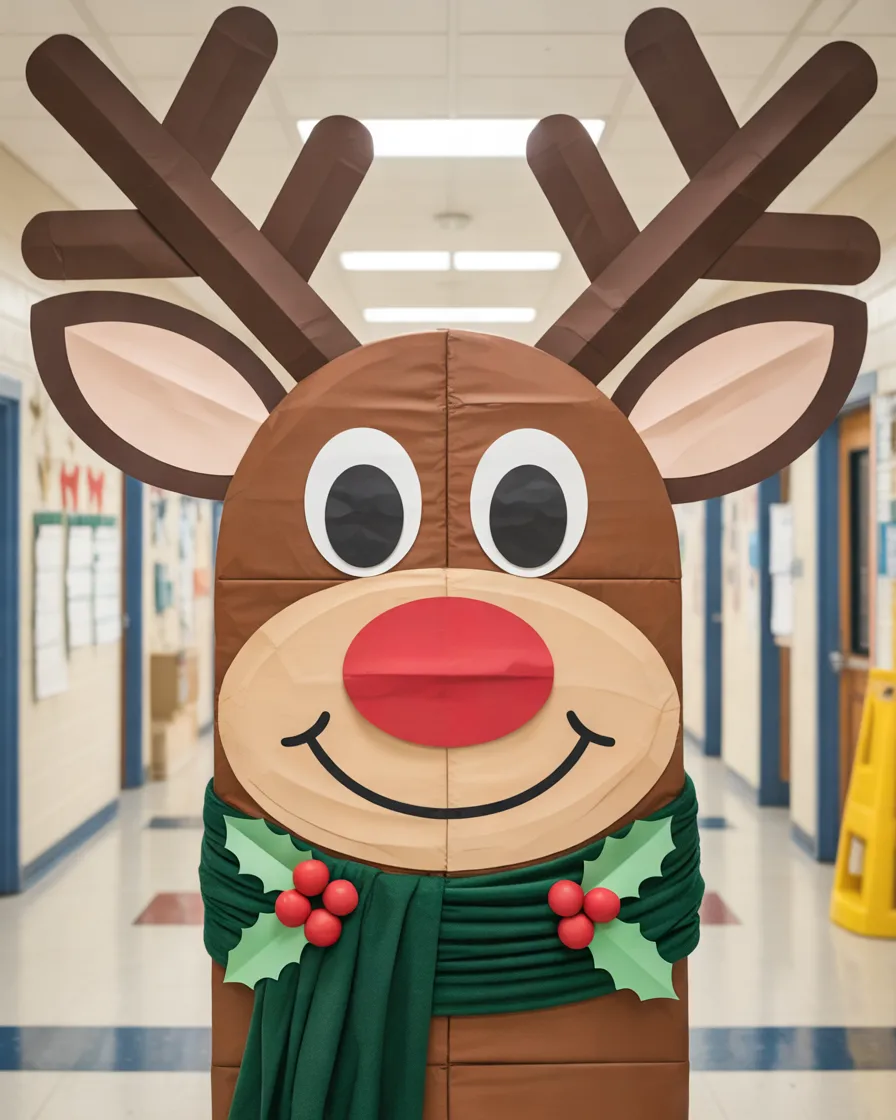
A Rudolph-inspired reindeer door brings humor and personality to a classroom entrance. The combination of brown paper, antlers, a bright red nose, and a friendly expression makes this a great choice for a classroom that needs a little extra character. It is also easy to adapt for different age groups by changing the expression, colors, or accessories.
Materials Needed:
- Brown construction paper
- Light brown or beige paper for the muzzle
- Red cardstock for Rudolph’s nose
- Black paper for the eyes
- Brown cardstock for antlers
- Green and red paper for decorative accents
Step-by-Step Decorating Instructions:
- Cover the door with brown paper or create a large brown reindeer face in the center.
- Cut two branching antlers from brown cardstock and position them near the top.
- Add large expressive eyes, rounded ears, and a beige muzzle.
- Attach a bright red circle for Rudolph’s nose.
- Add small holly leaves, paper berries, or a festive scarf around the lower part of the design.
- Place a cheerful message such as “Ready to Sleigh the School Day!” near the top or bottom.
Personal Touches: Students can make miniature reindeer faces with different colored noses and write their names on them. This creates a classroom family of reindeer around the main character.
Budget-Friendly Alternatives: Use cardboard packaging for the antlers and recycled paper for the facial shapes. Red paper works well for the nose if shiny craft materials are unavailable.
Practical Decorating Tips: Keep the antlers within the door’s boundaries, and make sure the nose is large enough to be a recognizable focal point. Use broad, simple facial shapes for a polished appearance.
6. Elf Workshop Classroom Door Decoration
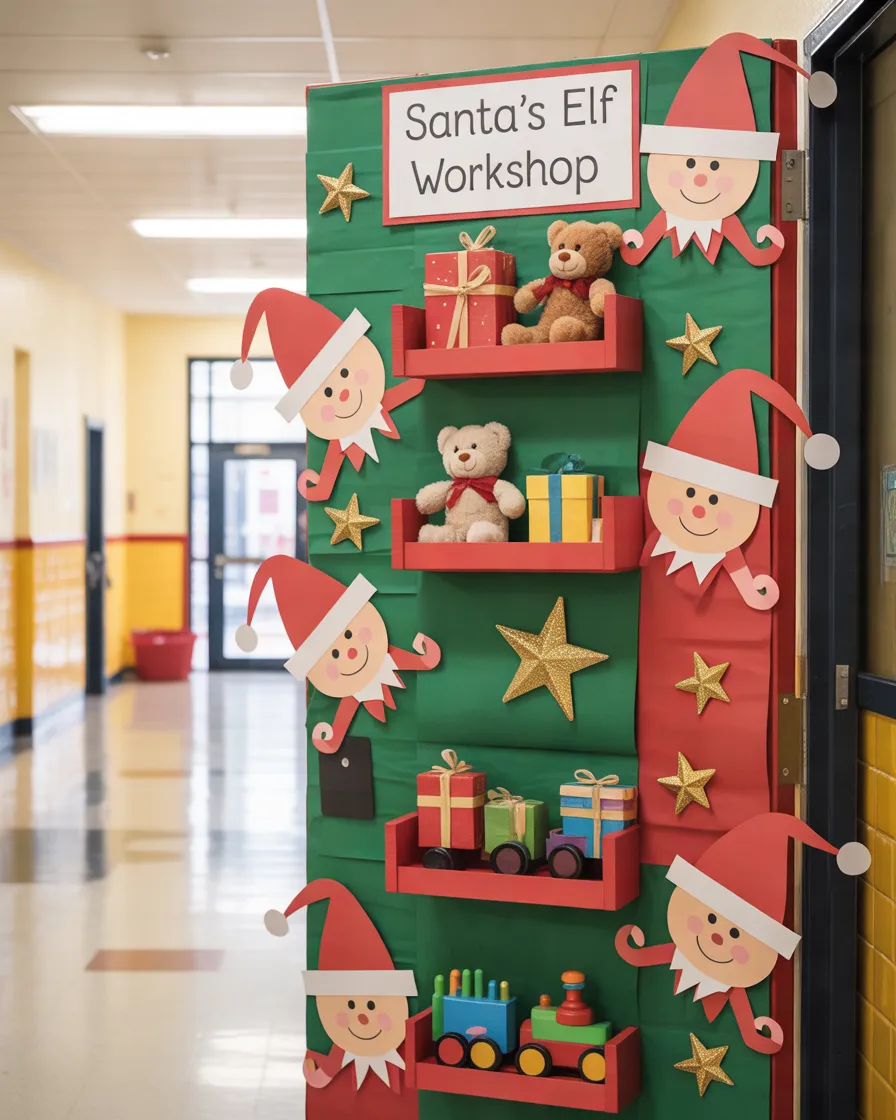
An elf workshop theme is a playful way to turn a classroom door into a scene from Santa’s imaginary Christmas workshop. The display can feature tiny presents, toy-making tools, colorful stripes, and cheerful elf characters. I especially like this idea for classrooms where students enjoy imaginative storytelling because the door can become part of a larger Christmas activity.
Materials Needed:
- Green, red, white, and brown paper
- Cardstock for elf hats and shoes
- Paper gift boxes and toy shapes
- Yellow paper for stars and decorative details
- Markers, glue sticks, and scissors
- Optional ribbon and lightweight gift bows
Step-by-Step Decorating Instructions:
- Cover the door with green or red paper.
- Create a large workshop sign that reads “Santa’s Little Helpers.”
- Add paper shelves filled with toy trains, teddy bears, dolls, and wrapped gifts.
- Make two or three elf characters using green outfits, red hats, and pointed shoes.
- Arrange small paper presents around the lower edge of the door.
- Finish with snowflakes, stars, and a festive border.
Personal Touches: Assign each student a workshop role, such as gift wrapper, toy designer, or kindness helper. Display their names on tiny paper badges beside the elves.
Budget-Friendly Alternatives: Draw toy shapes directly onto recycled cardboard instead of cutting out multiple layers. Old wrapping paper can be used for presents and workshop shelves.
Practical Decorating Tips: Choose a clear focal point, such as the workshop sign, and keep the shelves organized. Too many tiny toys can make the design look messy, so use larger illustrations for the most important objects.
7. North Pole Classroom Door With Santa’s Mailbox
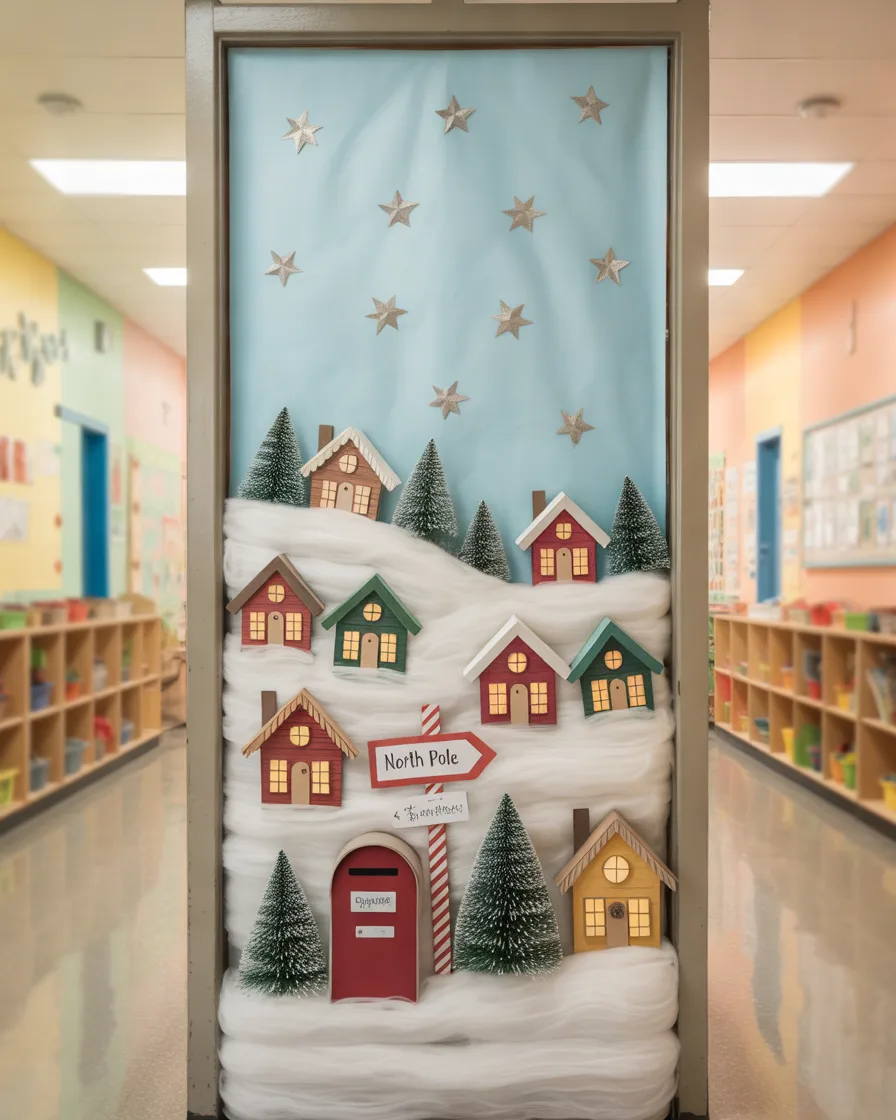
A North Pole door is ideal for teachers who want a complete Christmas scene rather than a single oversized character. Snow-covered buildings, a directional sign, a mailbox, and a little festive village can make the classroom entrance look like a destination in Santa’s world. The theme also creates opportunities for writing activities and imaginative classroom discussions.
Materials Needed:
- White, blue, and red construction paper
- Cardstock for houses and directional signs
- Red paper for a mailbox
- Cotton balls or white paper for snow
- Small paper envelopes and stars
- Markers and adhesive suitable for classroom surfaces
Step-by-Step Decorating Instructions:
- Cover the door with pale blue paper to represent the winter sky.
- Create a snow-covered ground using layered white paper along the bottom.
- Add a colorful North Pole sign pointing toward Santa’s workshop.
- Make a red paper mailbox with a visible mail slot.
- Decorate the remaining space with tiny houses, trees, snowflakes, and paper envelopes.
- Add a welcoming phrase such as “Letters to the North Pole.”
Personal Touches: Create small paper letters in which students write wishes, gratitude notes, or kind messages. Display them around the mailbox rather than including private information.
Budget-Friendly Alternatives: Make the houses and envelopes from scrap paper. A red rectangular paper cutout can serve as the mailbox without requiring a separate craft object.
Practical Decorating Tips: If you include a real pocket for letters, attach it securely and keep it lightweight. Avoid covering required door labels or using decorations that interfere with access.
8. Candy Cane Classroom Door With Red and White Stripes
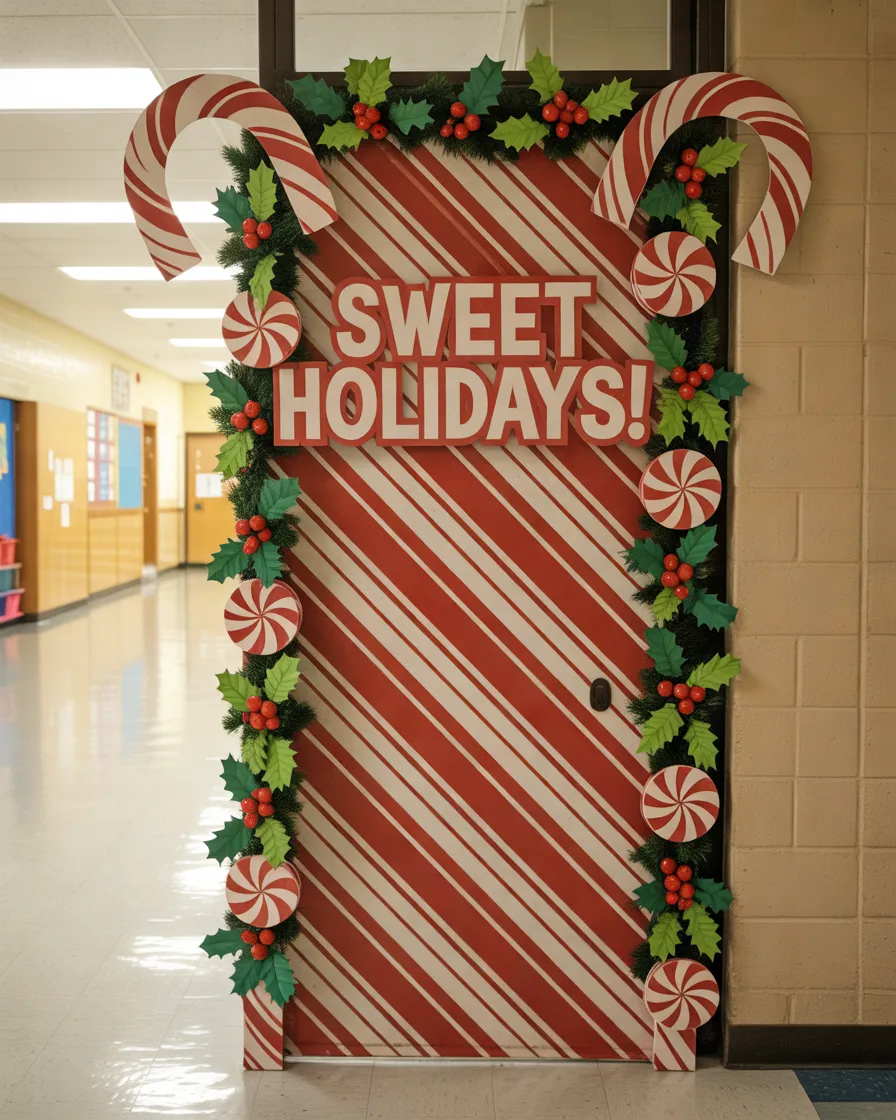
Sometimes a simple color scheme creates the most striking result. A candy-cane classroom door uses bold red-and-white stripes, peppermint decorations, and green accents to create a design that is instantly recognizable. This option is particularly useful when you need a beautiful display without spending hours cutting dozens of small shapes.
Materials Needed:
- Red and white bulletin-board paper
- Green cardstock for holly leaves
- Red paper circles for berries
- White paper for snowflakes
- Scissors, markers, and glue
- Optional red-and-white ribbon
Step-by-Step Decorating Instructions:
- Cover the door with white paper.
- Cut wide red strips and position them diagonally to create candy-cane stripes.
- Add one or two oversized candy-cane shapes along the sides.
- Place peppermint circles, holly leaves, and red berries in the corners.
- Add a large greeting in the center, such as “A Sweet Christmas Starts Here.”
- Finish with a thin green or red border for a coordinated appearance.
Personal Touches: Invite students to design their own paper peppermint candies using different patterns, initials, or small festive drawings. Display the candies in a border around the main design.
Budget-Friendly Alternatives: Reuse red and white paper from previous school projects. Instead of buying decorative ribbon, cut long paper strips to create the same visual effect.
Practical Decorating Tips: Keep the stripes evenly spaced and angled in the same direction. Bold patterns can make a door look busy, so leave enough white space around the central message.
9. Christmas Present Classroom Door
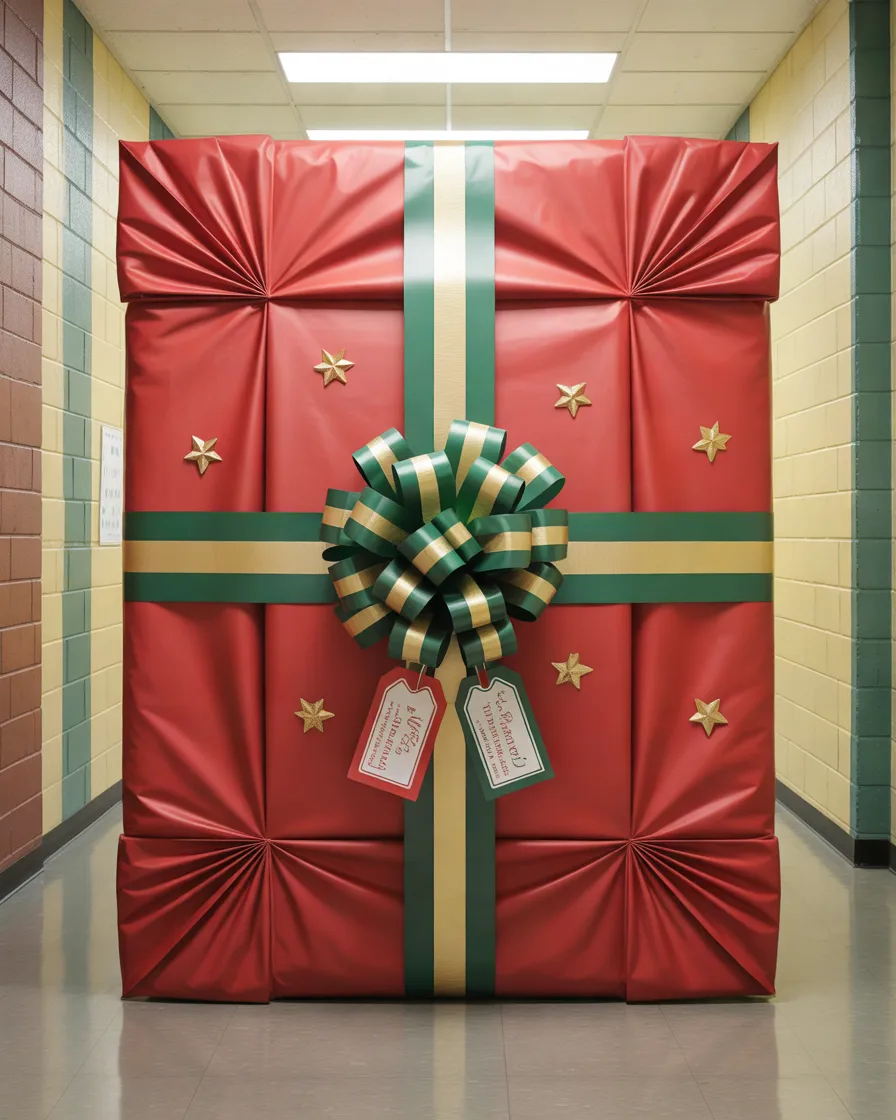
A Christmas present door is one of the easiest classroom Christmas decorations to create, yet it can look surprisingly impressive. By turning the entire door into a giant wrapped gift, you can achieve a polished holiday display with just a few materials. This design works especially well when time is limited or when several classroom doors need to follow a coordinated theme.
Materials Needed:
- Large sheets of wrapping paper or colored bulletin-board paper
- Wide paper strips for ribbons
- Cardstock for an oversized bow
- Gift-tag cutouts
- Scissors, tape, and markers
- Optional lightweight decorative stars
Step-by-Step Decorating Instructions:
- Select a festive wrapping-paper pattern or cover the door with a solid color.
- Run one wide strip of paper vertically and another horizontally to form a ribbon.
- Make an oversized bow from folded paper and attach it near the top center.
- Add several gift tags with short holiday messages.
- Decorate the corners with small stars or snowflakes.
- Add a greeting such as “Our Classroom Is a Gift!”
Personal Touches: Use gift tags to highlight classroom values, including kindness, creativity, teamwork, and curiosity. Students can write one positive word on each tag.
Budget-Friendly Alternatives: Use leftover wrapping paper or plain colored paper with hand-drawn patterns. A folded cardstock bow can look attractive without buying a premade decoration.
Practical Decorating Tips: Choose paper that will not tear easily, and secure the ribbon flat against the surface. Leave the handle and any required door signage clear.
10. Christmas Lights Classroom Door Decoration
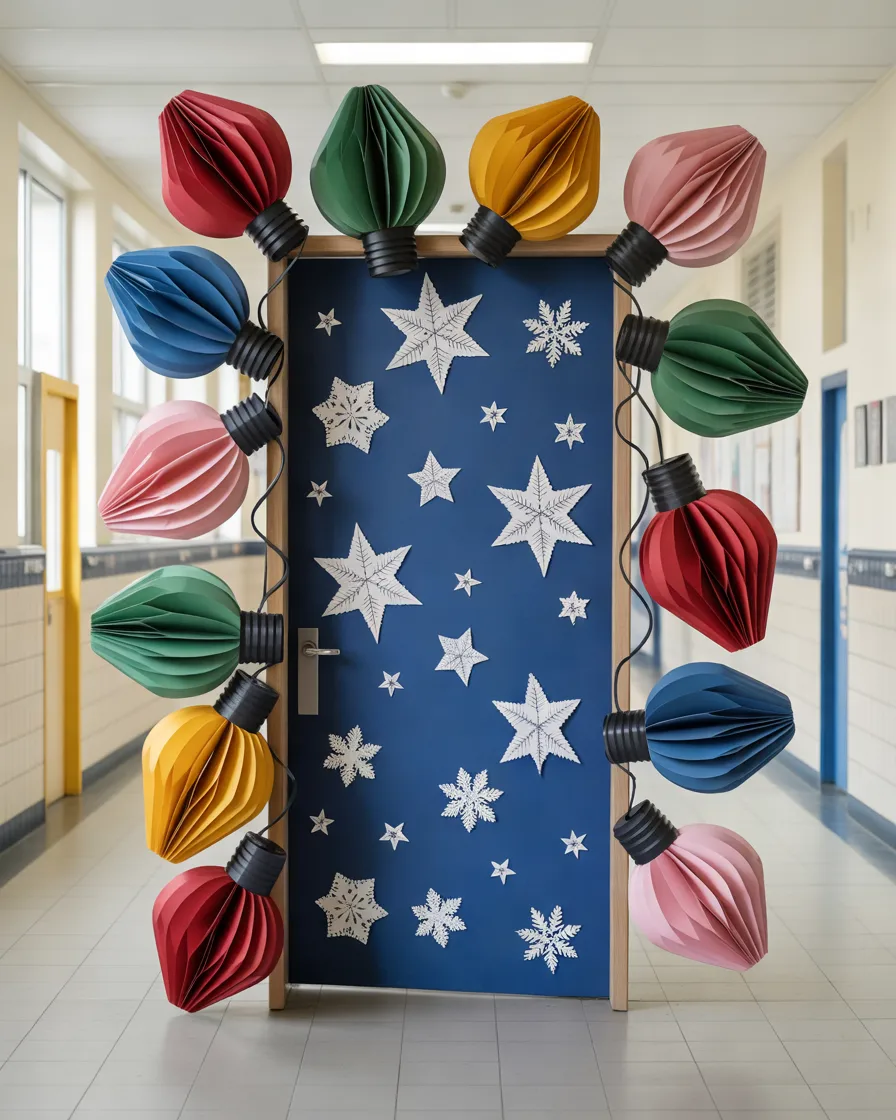
Colorful Christmas lights can make a classroom door feel festive without relying on a particular character or holiday story. Oversized paper bulbs arranged around the door create a playful border, while a dark blue or deep green background makes the colors stand out. This is a flexible design that can be adapted to almost any grade level.
Materials Needed:
- Dark blue, green, or black bulletin-board paper
- Bright cardstock in red, yellow, green, blue, and pink
- Black paper for the light string
- Scissors, glue sticks, and markers
- White paper stars and snowflakes
- Optional reflective paper accents
Step-by-Step Decorating Instructions:
- Cover the door with a dark background.
- Cut a long, gently curving black paper strip to represent an electrical cord.
- Make large colorful lightbulb shapes and attach them along the cord.
- Add white stars and snowflakes between the bulbs.
- Include a cheerful message such as “Shine Bright This Christmas.”
- Add small student-created decorations along the lower edge.
Personal Touches: Give students different colored bulbs and ask them to write a positive classroom quality on each one. Arrange the finished bulbs to represent how every student contributes to the classroom community.
Budget-Friendly Alternatives: Use colored paper scraps and draw the bulb outlines by hand. White chalk or paint markers can add small highlights without requiring specialty supplies.
Practical Decorating Tips: Space the bulbs evenly and alternate colors for a balanced look. Paper decorations are sufficient for this design; avoid adding actual electrical lights or cords to the door unless school policy explicitly permits them.
11. Penguin Christmas Classroom Door
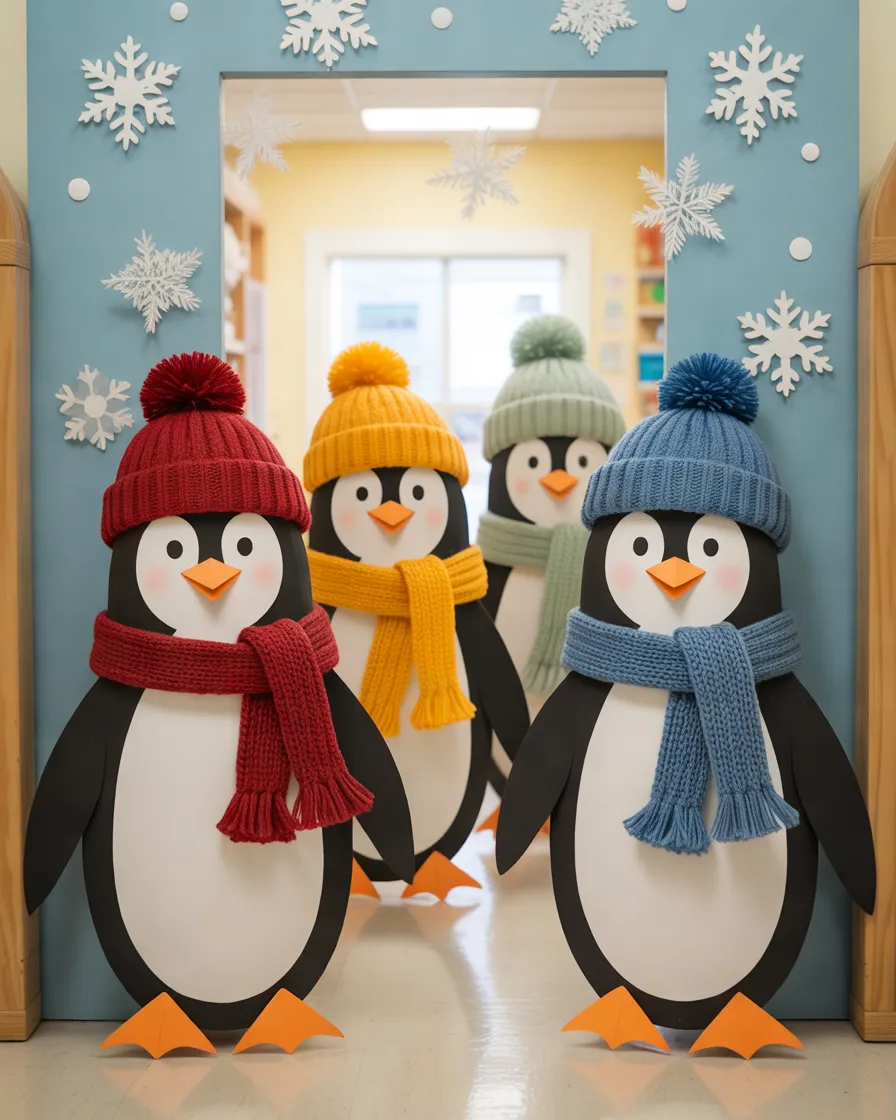
A penguin-themed classroom door is an adorable alternative for teachers who want a winter design with a little personality. Black-and-white penguins, orange paper beaks, colorful scarves, and snowy surroundings create a cheerful scene without requiring traditional Christmas characters. This idea is particularly suitable for younger students and classrooms that use winter animals in their seasonal activities.
Materials Needed:
- Black, white, and pale blue paper
- Orange cardstock for beaks and feet
- Colored paper for scarves and hats
- White paper snowflakes
- Black markers and glue sticks
- Optional cotton balls for snow
Step-by-Step Decorating Instructions:
- Cover the door with pale blue paper.
- Cut large black oval shapes for the penguins’ bodies.
- Add smaller white ovals for their bellies and white circles for their eyes.
- Create orange beaks and feet, then add colorful paper scarves or winter hats.
- Arrange the penguins in a group, using different poses to make the scene lively.
- Decorate the background with snowflakes and a greeting such as “Waddle Into Christmas!”
Personal Touches: Ask students to create individual penguins with different scarves, hats, or expressions. Write each student’s name on a small snowflake beside their penguin.
Budget-Friendly Alternatives: Make the penguin bodies from recycled black paper or dark cardstock. Fold white printer paper into snowflakes for inexpensive background details.
Practical Decorating Tips: Use three or four large penguins rather than many tiny figures. Give each character a slightly different pose while keeping the same basic style to make the display feel coordinated.
12. Christmas Book and Reading-Themed Classroom Door

For teachers who want to combine seasonal decorating with learning, a Christmas book-themed door is an excellent choice. The design celebrates reading while creating a warm holiday atmosphere. It works particularly well for language arts classrooms, school libraries, and teachers who enjoy building a reading culture during the festive season.
Materials Needed:
- Blue, green, or red background paper
- Cardstock for book covers and pages
- Paper stars, snowflakes, and Christmas trees
- Markers for titles and decorative details
- Glue sticks and scissors
- Optional paper bookmarks and book characters
Step-by-Step Decorating Instructions:
- Choose a background color that complements the books you plan to display.
- Cut several colorful rectangular book shapes in different sizes.
- Add paper spines, page details, and short festive book titles.
- Arrange the books in a bookshelf pattern across the lower and middle sections of the door.
- Add small Christmas trees, stars, and snowflakes around the books.
- Finish with a message such as “Open a Book, Discover Christmas Magic.”
Personal Touches: Invite students to recommend their favorite winter or Christmas stories. Include their suggestions on paper book covers, or let them illustrate their favorite reading moments.
Budget-Friendly Alternatives: Use cereal-box cardboard for sturdy book shapes and leftover construction paper for covers. Handwritten titles can be more personal than printed labels.
Practical Decorating Tips: Use large, legible titles and avoid overcrowding the door with too many book covers. Check spelling carefully, particularly if the display includes titles intended to represent real books.
13. Christmas Wreath Classroom Door With Student Handprints
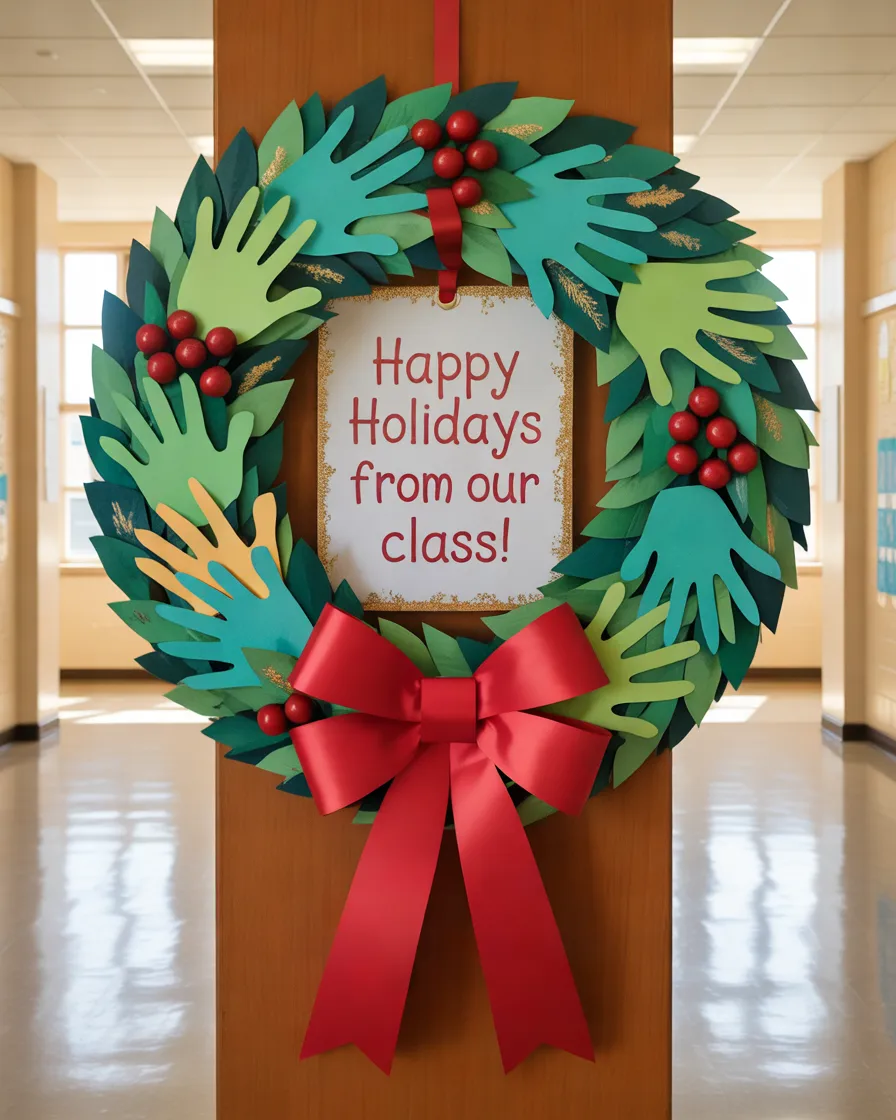
A Christmas wreath door offers a classic, welcoming appearance while providing an opportunity to incorporate student artwork. Instead of purchasing an expensive wreath, you can create a large circular design from paper leaves and colorful handprints. The finished display feels personal and works particularly well for classrooms that emphasize collaboration and community.
Materials Needed:
- Green construction paper in several shades
- Red paper for berries and bows
- Cardstock for handprint templates
- Scissors, markers, and glue
- Ribbon-shaped paper strips
- Optional gold or white paper accents
Step-by-Step Decorating Instructions:
- Create a large circular wreath outline using green paper.
- Cut leaves from light and dark green cardstock.
- Ask students to trace their hands on green paper and cut out the shapes with appropriate supervision.
- Layer the leaves and handprints around the circle until the wreath looks full.
- Add red paper berries and a large red bow near the top.
- Place a greeting in the center, such as “Our Classroom Welcomes You.”
Personal Touches: Write each student’s name on a handprint or leaf. This makes the wreath a visual reminder that every member of the classroom belongs.
Budget-Friendly Alternatives: Reuse scrap green paper from previous activities. Students can decorate the handprints with markers, reducing the need for additional embellishments.
Practical Decorating Tips: Arrange the handprints in a consistent direction so the circular shape remains clear. Keep the center message large enough to read and avoid adding bulky objects that might detach.
14. Personalized Christmas Door With Student Names and Holiday Wishes
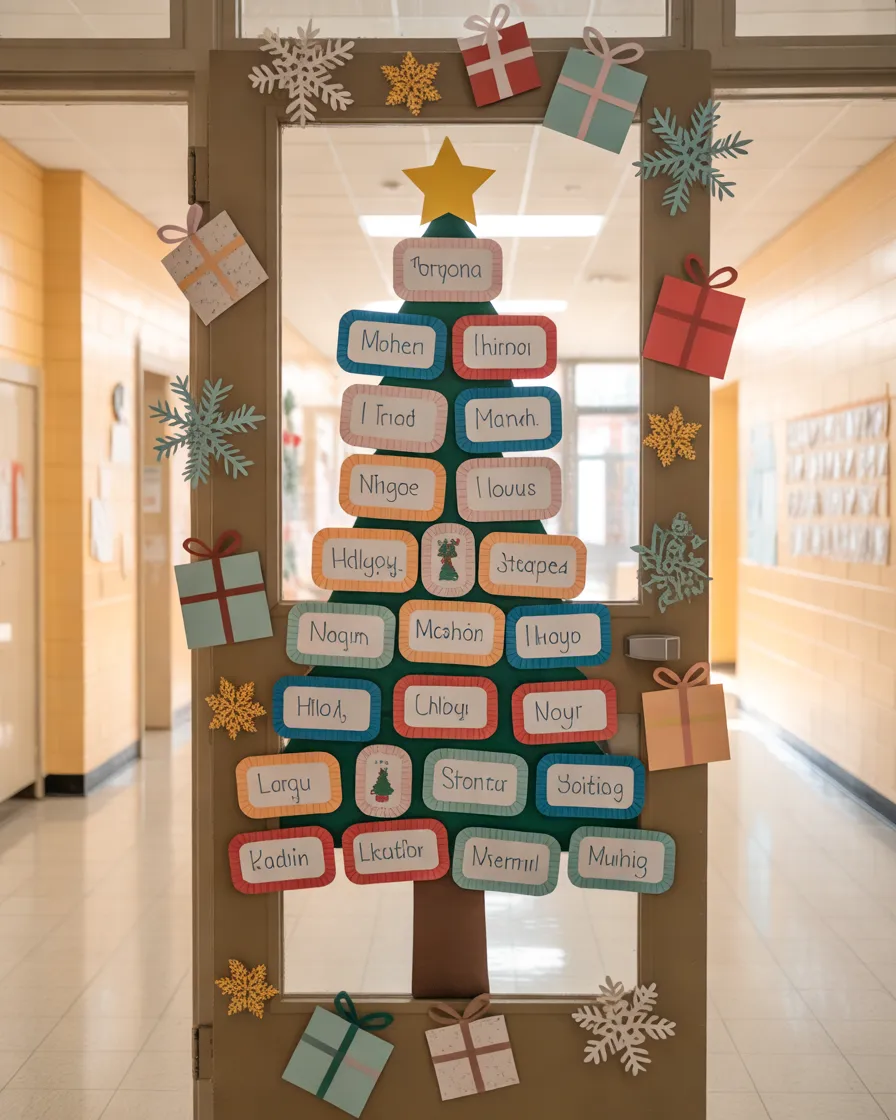
If you want a classroom door that feels meaningful rather than simply decorative, a personalized holiday wishes theme is a wonderful choice. This design can combine snowflakes, stars, ornaments, gift shapes, and student names in one cohesive display. It is especially useful when you want every child to feel included and recognized during the holiday season.
Materials Needed:
- White, blue, green, and red construction paper
- Cardstock for ornaments, stars, and gift shapes
- Markers and colored pencils
- Scissors and glue sticks
- Ribbon-shaped paper strips
- Optional metallic paper accents
Step-by-Step Decorating Instructions:
- Cover the door with a light winter background, such as white or pale blue.
- Choose a central design, such as a Christmas tree, wreath, or large holiday star.
- Create individual ornaments, snowflakes, or gift tags for each student.
- Write students’ names or positive holiday wishes on the decorations.
- Arrange the pieces around the central design, leaving enough space for each contribution to be visible.
- Add a short message such as “Kindness Makes Our Classroom Shine.”
Personal Touches: Ask students to write a wish for their classroom, a thank-you message, or one kind thing they can do for someone else. For a more inclusive display, focus on kindness, winter, friendship, and community rather than assuming every student celebrates Christmas in the same way.
Budget-Friendly Alternatives: Use scrap paper, recycled cardstock, and handmade decorations. Students can draw their own ornaments instead of using printed templates.
Practical Decorating Tips: Double-check every name before attaching the decorations. Use a consistent color scheme and arrange the pieces carefully so the display looks unified even though every student’s contribution is different.
How to Choose the Best Classroom Door Christmas Decorations
Choosing the right design depends on your students’ ages, available time, school policies, and the materials you already have. A preschool classroom might benefit from oversized Santa faces, friendly snowmen, or colorful penguins, while older students may enjoy contributing to a more detailed Christmas tree, book-themed display, or personalized holiday wreath.
Before starting, measure the door and sketch a simple layout. This small step helps you decide where the main character or focal point should go and prevents the finished display from looking crowded. If you have limited time, choose a design with large shapes and a simple color palette, such as a Christmas present or candy-cane door.
It is also worth considering how much student participation you want. Handprint wreaths, personalized ornaments, and holiday wish displays are ideal for collaborative projects. More detailed themes, such as a North Pole village or elf workshop, may require a little preparation from the teacher before students add their own creative touches.
Finally, check your school’s decorating rules. Use appropriate materials, keep door handles and required signage accessible, and avoid blocking vision panels, emergency instructions, or exits. Choose lightweight decorations that can be removed without damaging the door.
Conclusion
Beautiful classroom door Christmas decorations do not have to be expensive or complicated. With a little creativity, simple craft materials, and some student participation, an ordinary classroom entrance can become a cheerful holiday display that makes students smile every day.
From a classic Santa Claus door and a colorful Christmas tree to a sweet gingerbread house and a personalized wreath, each of these 14 ideas offers a different way to celebrate the season. You can choose a design that matches your classroom theme, adapt the colors to your school’s environment, or combine a few simple elements to create something entirely your own.
My favorite approach is to make the decorating process part of the classroom experience. When students help design ornaments, create snowflakes, or add their names to a shared display, the finished door becomes more than decoration. It becomes a reminder of teamwork, creativity, and the memories made together.
Which of these classroom door Christmas decorations would you love to try first? Choose your favorite, gather your craft supplies, and let your students help bring the holiday magic to life!