
Halloween is one of my favorite times of the year because it gives everyone permission to be creative, playful, and just a little spooky. You do not need to spend a fortune on expensive store-bought decorations to transform your home. With a few simple materials, some imagination, and a free afternoon, you can create memorable decorations that look surprisingly impressive.
These 15 DIY Halloween decorations ideas are perfect for decorating your porch, living room, dining table, garden, windows, or Halloween party space. Some projects are creepy, while others are cute and family-friendly. Most can be created with inexpensive supplies you may already have at home.
Whether you enjoy traditional pumpkins, floating ghosts, haunted houses, or dramatic candlelight, you will find plenty of inspiration below. Gather your glue gun, paintbrushes, cardboard, old jars, and recycled materials because it is time to make your home wonderfully spooky.
Why Make Your Own Halloween Decorations?
Before we begin, let me explain why I personally love making Halloween decorations instead of buying everything from a store.
First, DIY decorations allow you to create a style that matches your home. You can choose whether you want your space to feel elegant, mysterious, funny, child-friendly, or genuinely frightening.
Second, homemade decorations are often much more affordable. Cardboard boxes, glass jars, old fabric, paper bags, plastic bottles, and fallen branches can all become beautiful Halloween décor.
Finally, making decorations can become a fun seasonal tradition. Children, friends, or family members can help paint pumpkins, cut paper bats, make ghosts, or arrange spooky table displays. The process becomes part of the celebration.
Now, let us explore the best DIY Halloween decoration ideas you can create this season.
1. Floating Cheesecloth Ghosts
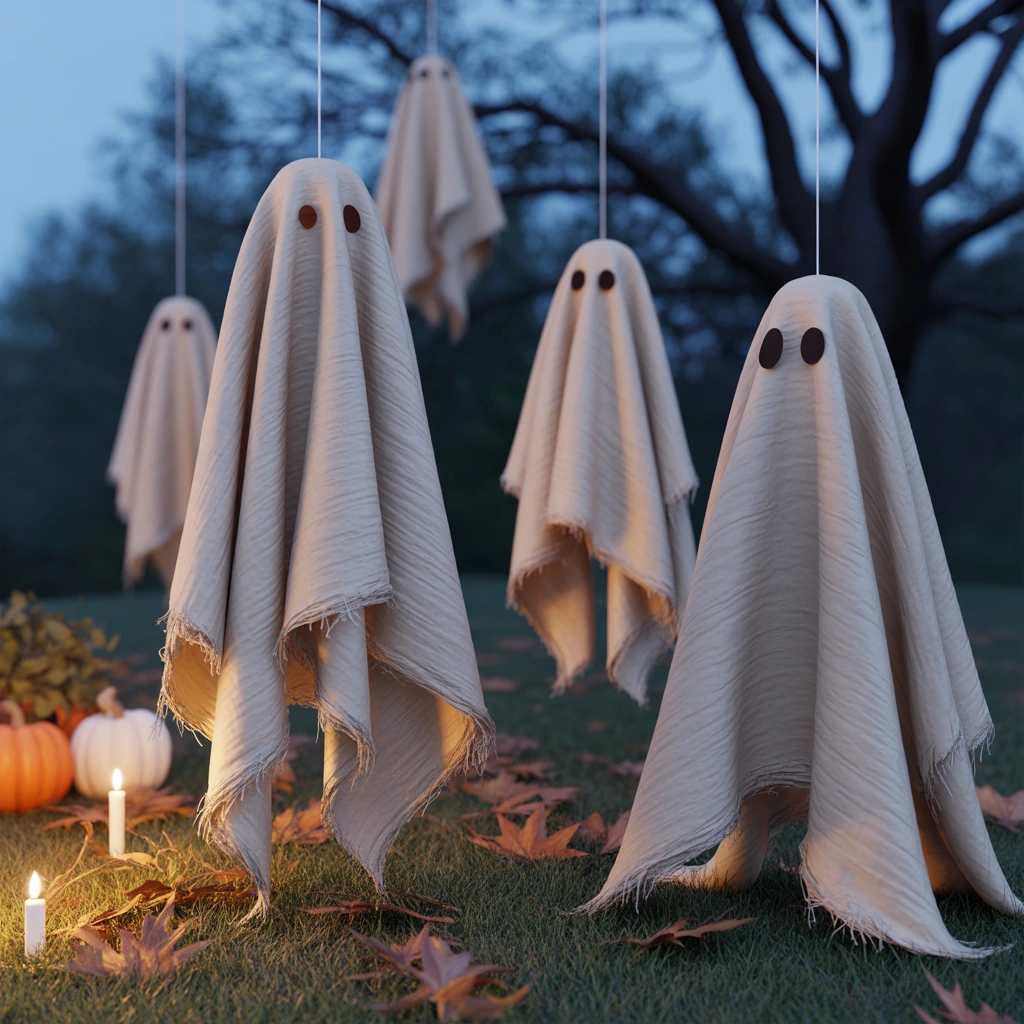
Floating ghosts are among the most magical-looking Halloween decorations, yet they are surprisingly easy to make.
Materials You Will Need
- Cheesecloth or thin white fabric
- Liquid starch or diluted white glue
- Balloons
- Plastic bottles or cups
- Aluminum foil
- Black felt or construction paper
- A bowl
- Fishing line or transparent thread
How to Make Floating Ghosts
Begin by creating a simple ghost-shaped frame. Place an inflated balloon on top of a plastic bottle. Use aluminum foil to form two arms extending from the sides.
Pour liquid starch into a bowl and soak the cheesecloth until it is completely covered. Carefully drape the wet fabric over your frame. Arrange the bottom so that it spreads out slightly because this will help the ghost stand or appear to float.
Allow the cheesecloth to dry completely. Once it becomes stiff, remove the balloon, bottle, and foil supports. Cut two small eyes from black felt or paper and attach them to the front.
You can place these ghosts on a table, hang them from a ceiling, or suspend them from tree branches with transparent thread. In low light, they look like they are floating through the air.
2. Glowing Mason Jar Lanterns
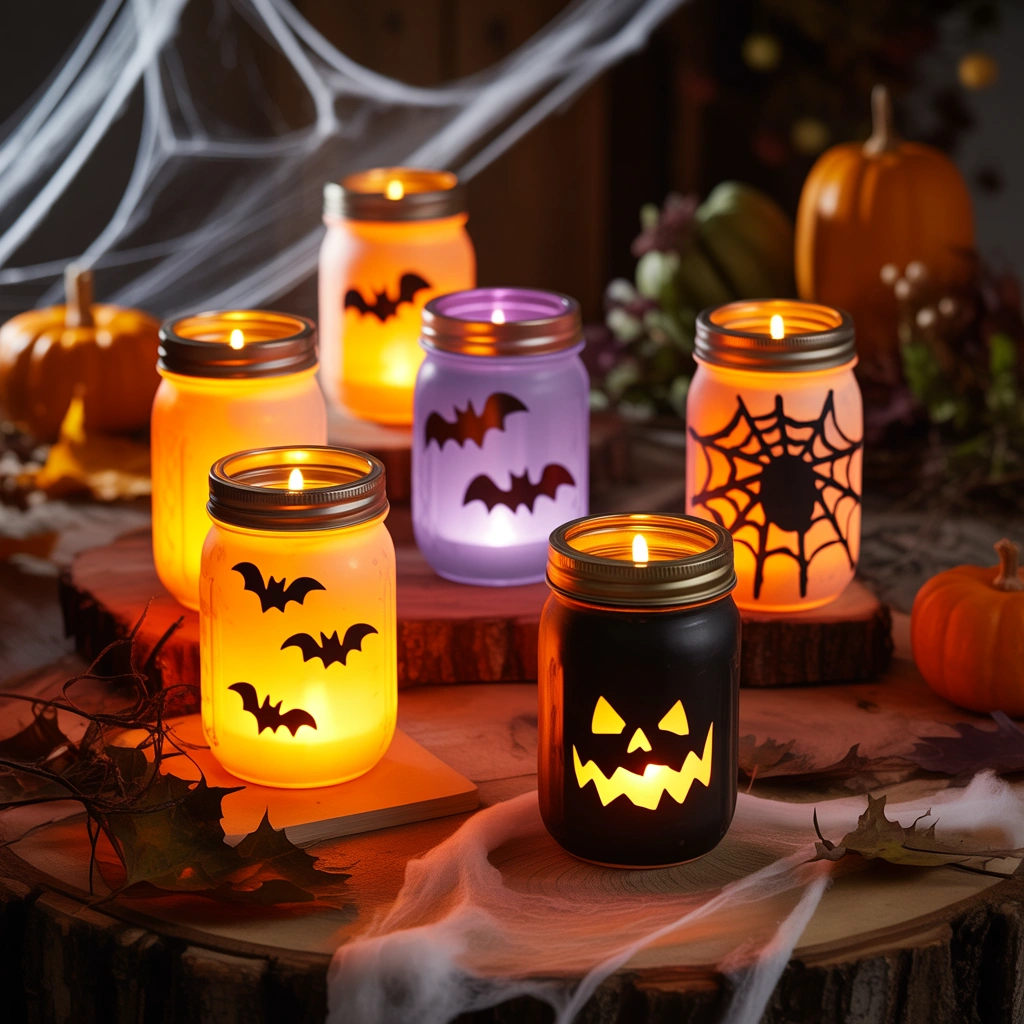
Old glass jars can quickly become eerie Halloween lanterns. This project is perfect for mantels, tables, windowsills, and front porch steps.
Materials You Will Need
- Clean glass jars
- Orange, green, white, or purple tissue paper
- Decoupage glue
- Paintbrush
- Black construction paper
- Scissors
- Battery-operated tea lights
How to Make Halloween Jar Lanterns
Tear the tissue paper into small pieces. Brush a thin layer of decoupage glue over the outside of the jar, then press the paper pieces onto the surface. Add another light layer of glue on top to seal them.
Once dry, cut Halloween shapes from black paper. You could create jack-o’-lantern faces, haunted houses, bats, cats, witches, or ghost silhouettes. Glue these shapes to the jars.
Place battery-operated tea lights inside. The soft glow will shine through the tissue paper and make the silhouettes stand out.
I recommend using flameless candles rather than real flames, especially if children or pets will be near the decorations.
3. Giant Spider Web for the Front Porch
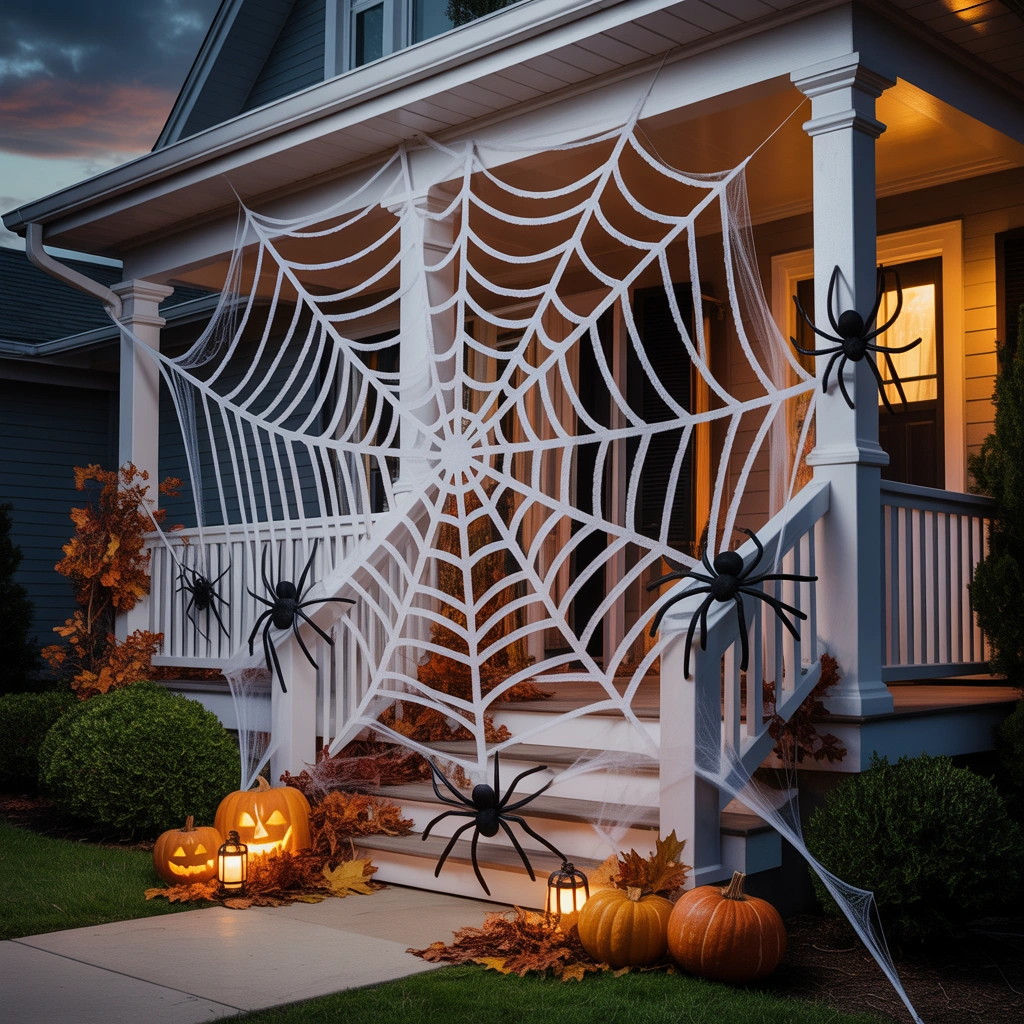
A giant spider web immediately makes a front porch look ready for Halloween. It is dramatic, inexpensive, and visible from the street.
Materials You Will Need
- Thick white yarn, rope, or clothesline
- Scissors
- Removable hooks or tape
- A large plastic spider
How to Create the Web
Choose a large open area, such as the front porch, garage door, fence, or an empty wall.
Start by attaching several long pieces of yarn from one central point. Spread them outward like spokes on a wheel. Next, weave another piece of yarn around the spokes in a circular or spiral pattern.
The lines do not need to be perfectly even. In fact, an irregular web often looks more realistic.
Attach a large plastic spider near the center. You can also add smaller spiders around the edges. For a creepier appearance, stretch artificial cobweb material around nearby railings, plants, or furniture.
4. Paper Bat Wall Display
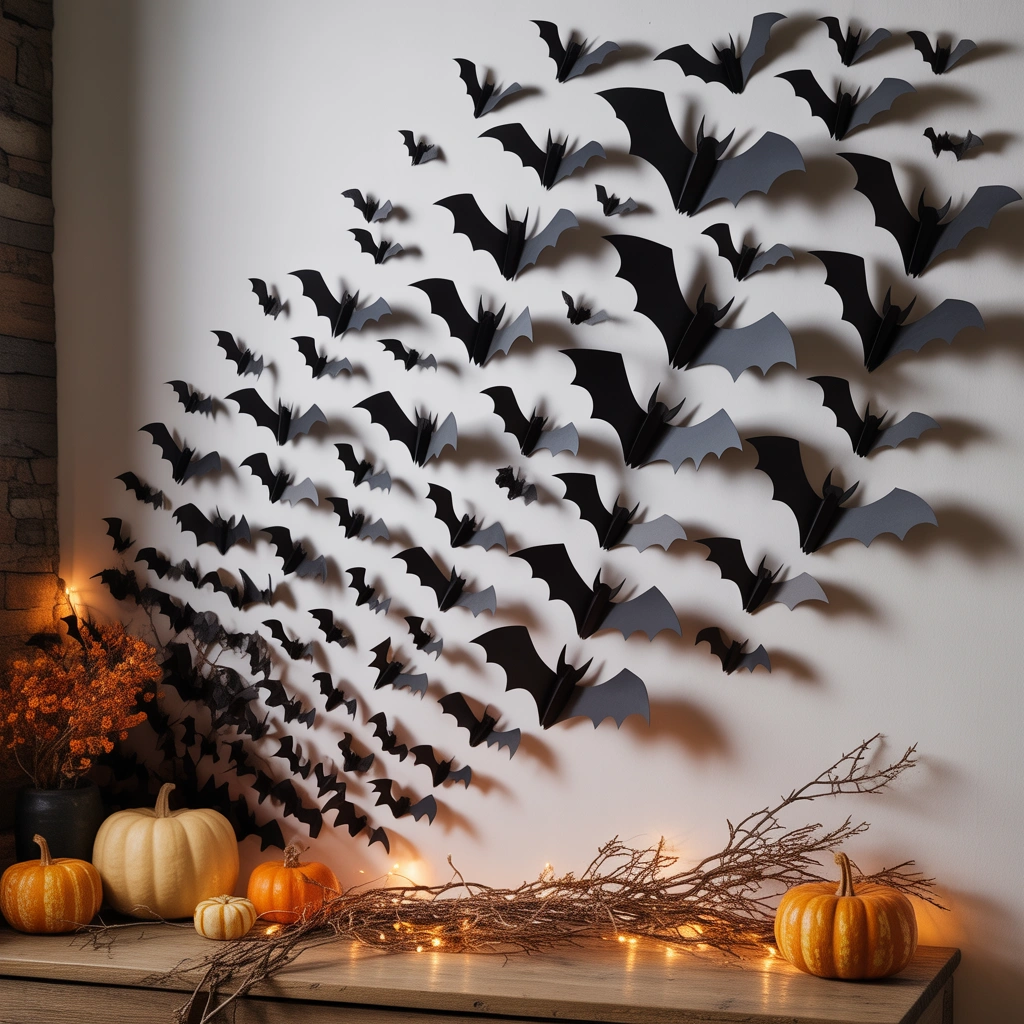
Paper bats are one of the easiest decorations on this list, but they can create an impressive visual effect when arranged correctly.
Materials You Will Need
- Black cardstock
- Bat template
- Pencil
- Scissors
- Removable adhesive dots
How to Make the Bat Display
Print or draw bat shapes in several sizes. Trace the templates onto black cardstock and cut them out.
Fold each bat slightly through the center so the wings lift away from the wall. This small detail makes them appear three-dimensional.
Arrange the bats in a sweeping pattern, beginning with a few large bats and gradually adding smaller ones. You can make them look as though they are flying out of a fireplace, mirror, doorway, staircase, or dark corner.
For the best effect, avoid placing them in perfectly straight rows. A loose, curved formation feels much more natural.
5. Trash Bag Spider
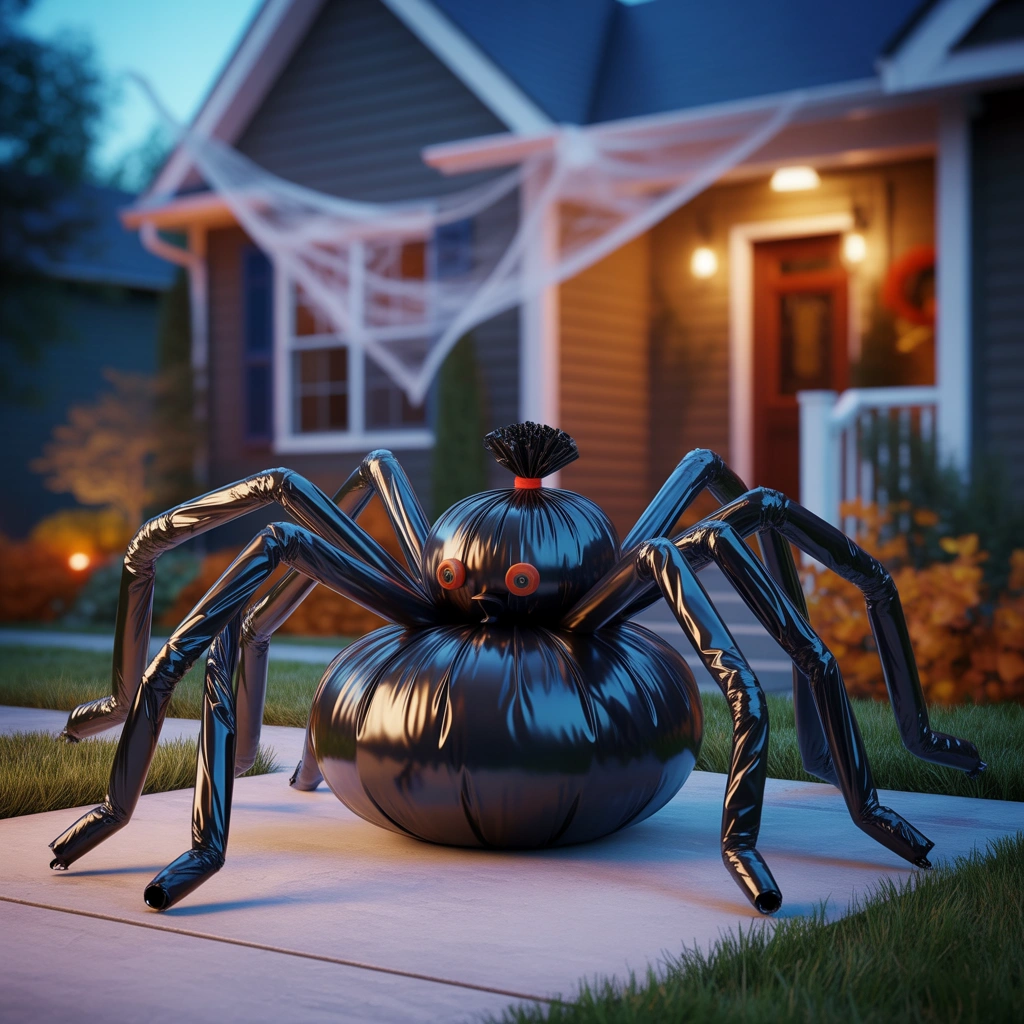
A giant spider made from trash bags is ideal for outdoor Halloween decorating. It is lightweight, affordable, and easy to customize.
Materials You Will Need
- Large black trash bags
- Newspaper, plastic bags, or lightweight filling
- Black pool noodles or long plastic bags
- Tape
- Black rope or zip ties
- Red paper or paint for the eyes
How to Build the Spider
Stuff one trash bag to create the spider’s body. Make a smaller stuffed section for the head and secure both pieces together with tape or zip ties.
For the legs, use black pool noodles or tightly rolled trash bags. Attach four legs to each side of the body. Bend the legs at angles so the spider appears to be crawling.
Add red eyes to make it look more menacing. Position the spider on your lawn, roof, fence, or porch. You could also place it above a doorway so guests have to walk beneath it.
Because the decoration is lightweight, secure it properly if you expect windy weather.
6. Painted Pumpkin Characters
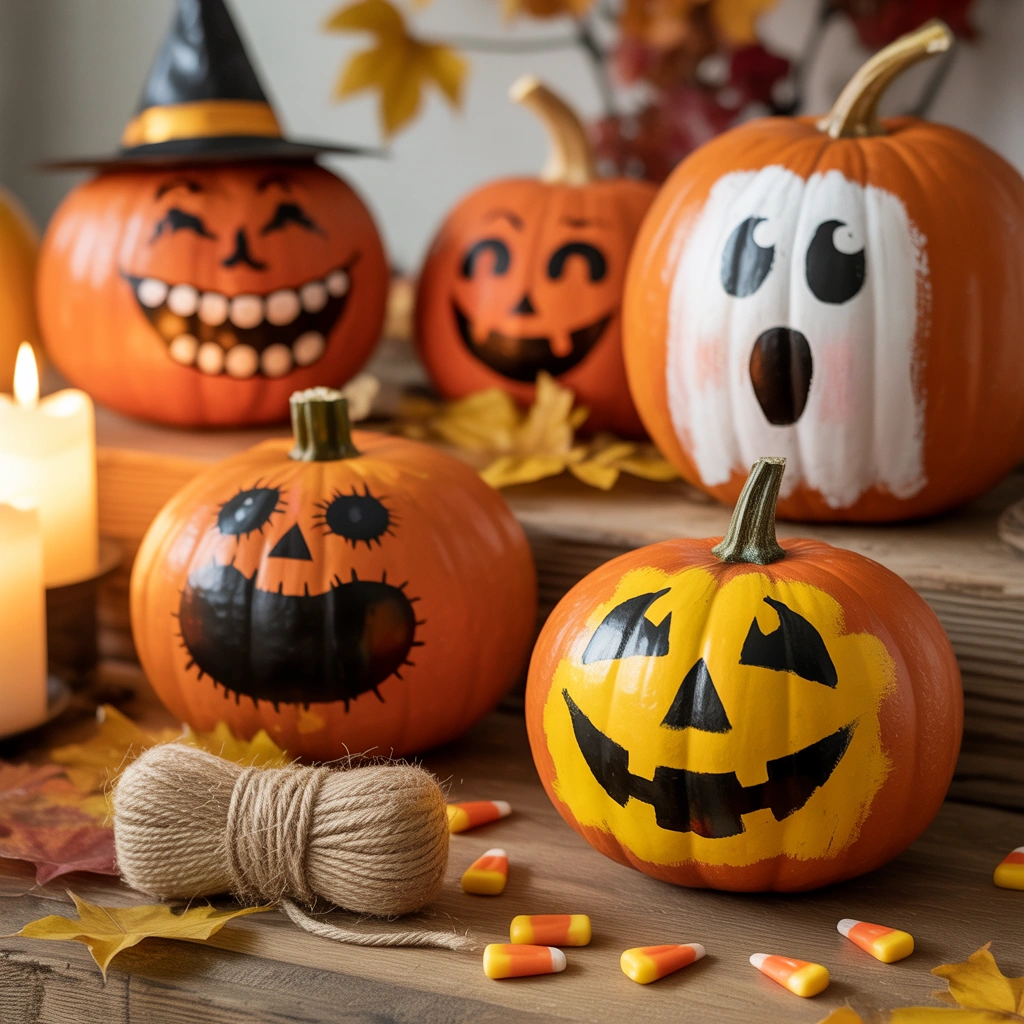
Traditional carved pumpkins are beautiful, but painted pumpkins are cleaner, safer for children, and often last longer.
Materials You Will Need
- Real or artificial pumpkins
- Acrylic paint
- Paintbrushes
- Pencil
- Felt, yarn, ribbon, or craft foam
- Glue
Pumpkin Character Ideas
You can paint pumpkins as:
- Friendly ghosts
- Black cats
- Mummies
- Monsters
- Skeletons
- Vampires
- Witches
- Cartoon characters
- Spiders
- Candy corn
Start by cleaning and drying the pumpkin. Sketch your design lightly with a pencil, then fill it in with acrylic paint. Add accessories such as yarn hair, felt ears, paper hats, or ribbon bows.
I particularly like creating a group of pumpkin characters and placing them together on porch steps. It looks more complete than displaying a single pumpkin.
For an elegant Halloween theme, paint pumpkins matte black, white, cream, or metallic gold and decorate them with simple patterns.
7. Halloween Door Wreath
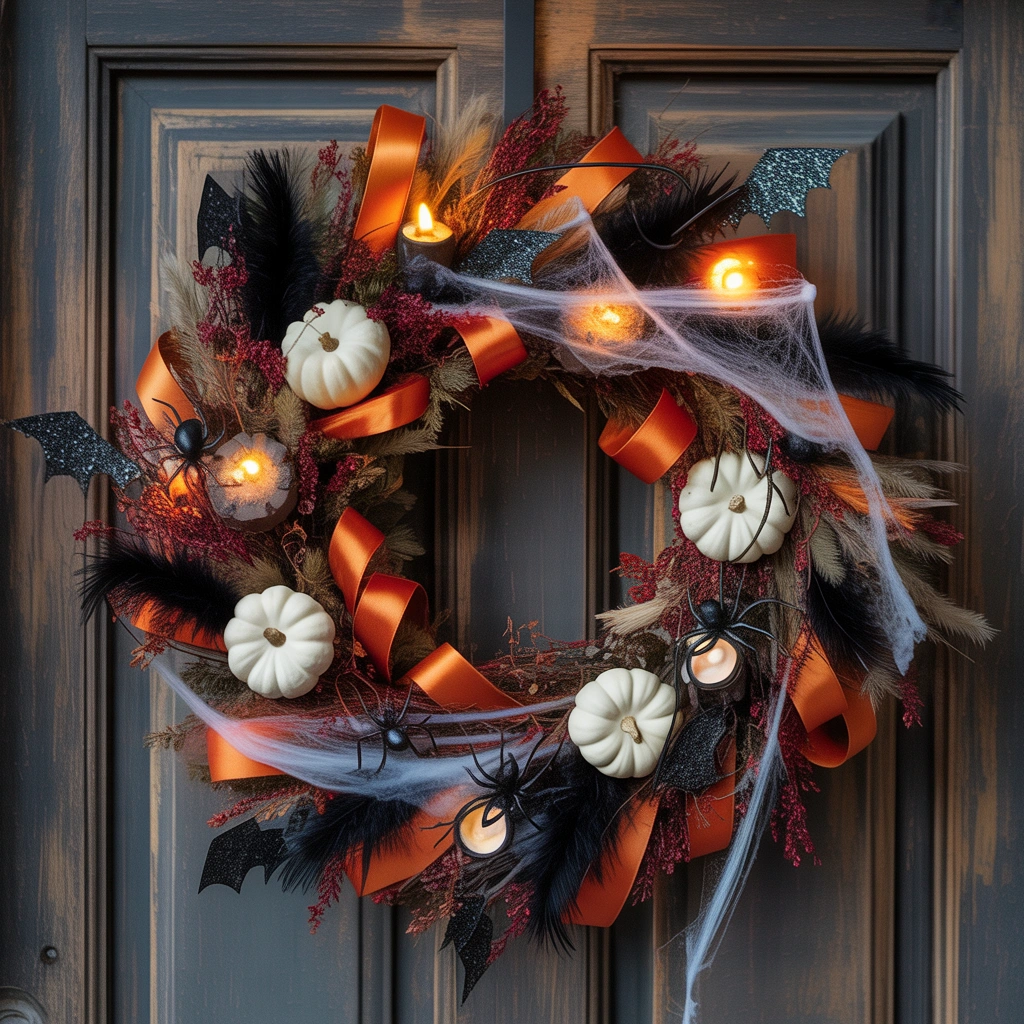
A homemade Halloween wreath creates a strong first impression before visitors even enter your home.
Materials You Will Need
- Foam, grapevine, or wire wreath base
- Black ribbon, mesh, or fabric strips
- Artificial spiders
- Plastic skulls
- Miniature pumpkins
- Faux leaves
- Hot glue gun
- Decorative sign
How to Assemble the Wreath
Wrap the wreath base with black fabric, ribbon, or decorative mesh. Secure the ends with glue.
Arrange your decorative pieces before attaching them permanently. Place larger objects, such as a skull or small sign, slightly off-center. Fill empty spaces with spiders, leaves, webbing, bones, or miniature pumpkins.
You could add a sign saying:
- Enter If You Dare
- Welcome, Foolish Mortals
- Trick or Treat
- Beware
- Happy Halloween
Finish the wreath with a large bow or hanging ribbon. Make sure every item is securely glued, especially if the wreath will be exposed to outdoor weather.
8. Creepy Candle Display
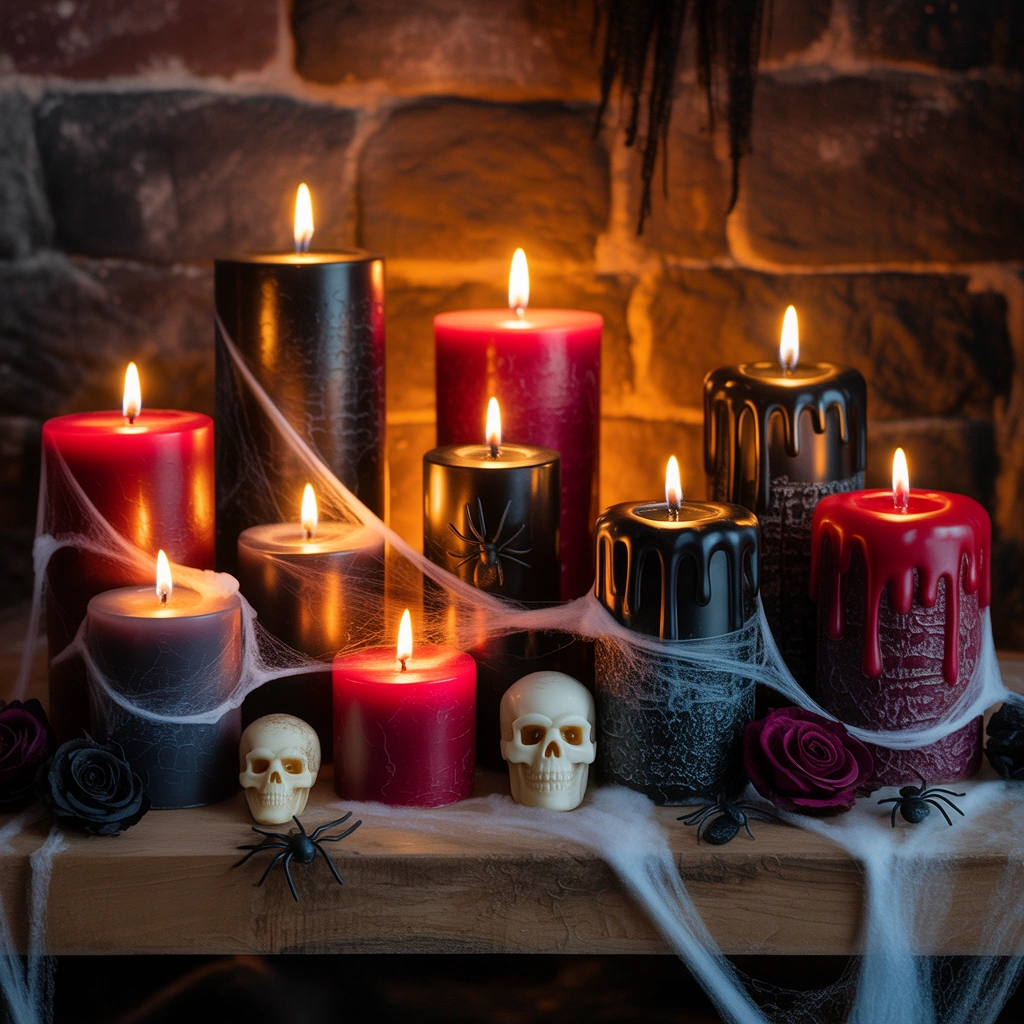
Nothing creates a haunted atmosphere quite like flickering candles. You can make an ordinary table or mantel feel mysterious using safe, battery-operated candles.
Materials You Will Need
- Battery-operated pillar candles
- White, red, or black hot glue
- Candle holders
- Black spray paint
- Artificial cobwebs
- Plastic insects or spiders
How to Create Dripping Candles
Use hot glue to create raised drips around the top edges of the candles. Allow the glue to run down the sides naturally. Once dry, paint the drips red for a dramatic look or leave them white for an old melted-wax effect.
Place the candles at different heights using candlesticks, bottles, jars, or stacked books. Paint old candle holders black to create a more gothic appearance.
Surround the display with cobwebs, dried leaves, tiny skulls, ravens, or plastic spiders. The uneven heights and flickering lights will instantly make the arrangement more atmospheric.
9. Milk Jug Ghosts
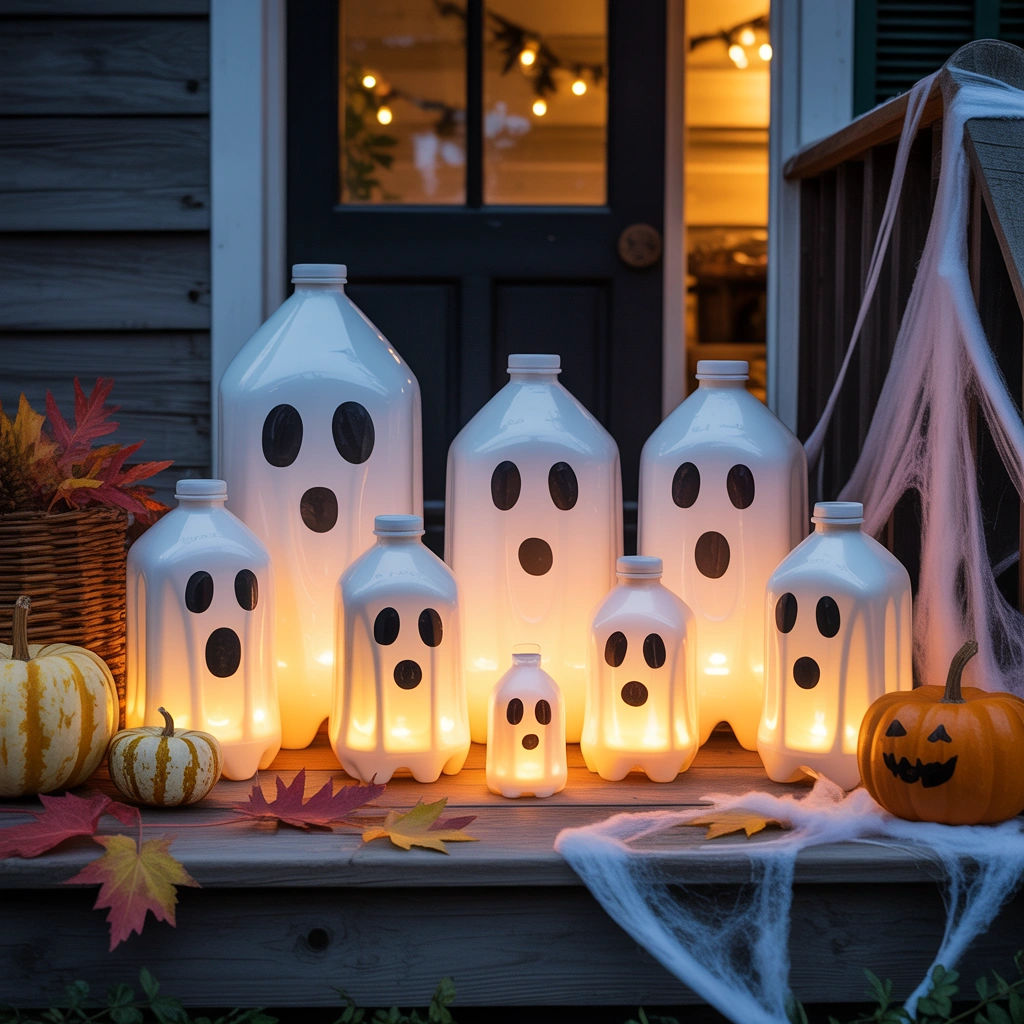
Milk jug ghosts are easy, inexpensive, and perfect for lining a pathway.
Materials You Will Need
- Empty plastic milk jugs
- Black permanent marker
- Battery-operated lights
- Scissors
- Small stones or sand
How to Make the Ghosts
Wash the jugs thoroughly and remove the labels. Draw a different ghost face on the front of each jug using a black marker.
Cut a small opening in the back or bottom. Place battery-operated lights inside. You can also add a small amount of sand or a few stones to keep each jug stable.
Arrange the glowing ghosts along a driveway, garden path, porch, or staircase.
Try giving each ghost a different expression. Some can look frightened, while others can appear silly, surprised, or mischievous. A group of glowing faces looks especially charming after dark.
10. Cardboard Haunted House Silhouette
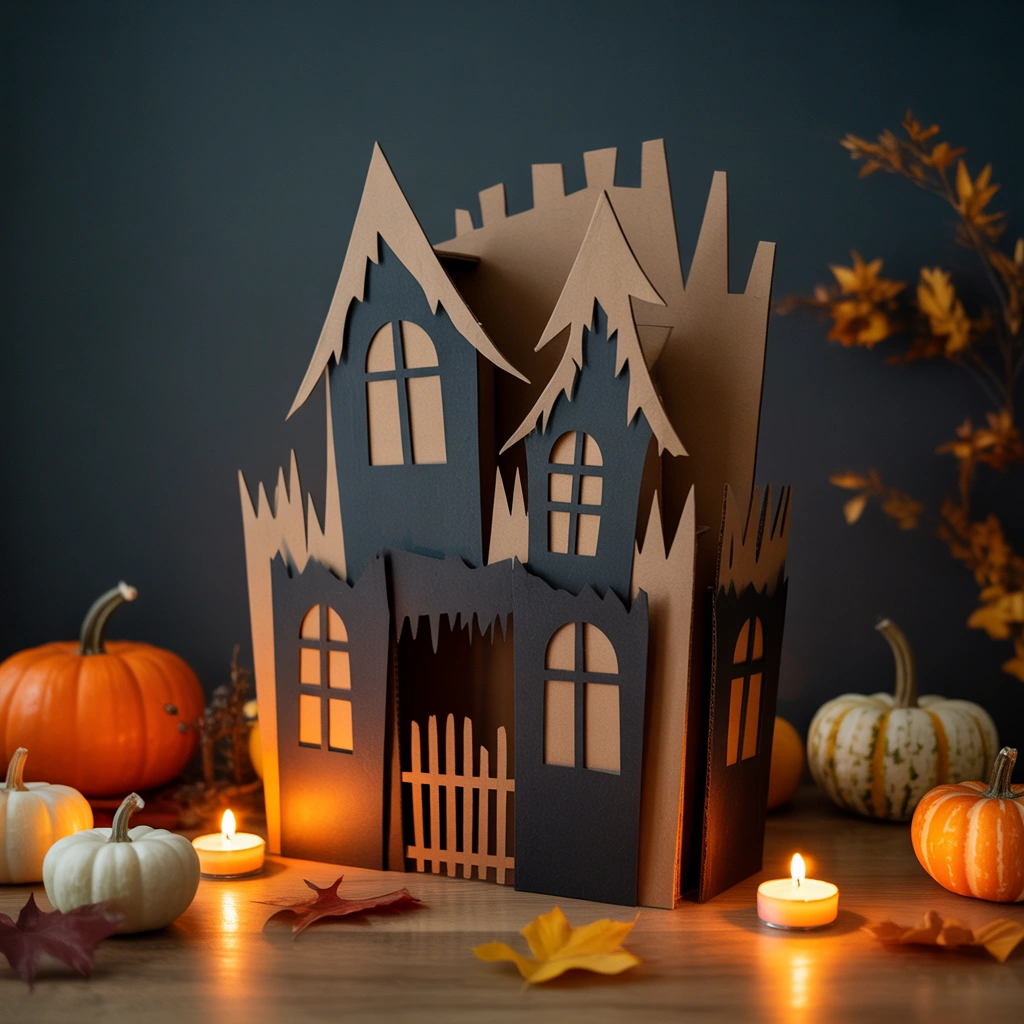
A haunted house silhouette can turn an ordinary window into a spooky scene visible from outside.
Materials You Will Need
- Large cardboard sheets
- Pencil
- Craft knife
- Black paint
- Tape
- Yellow or orange tissue paper
- String lights
How to Create the Silhouette
Draw the outline of a crooked haunted house onto cardboard. Include towers, chimneys, broken windows, crooked rooftops, and bare trees.
Cut out the silhouette carefully, then paint the cardboard black. Cut openings for windows and place yellow or orange tissue paper behind them.
Position warm string lights behind the cardboard so the windows glow. Place the finished silhouette inside a large window.
From the street, it will look like a mysterious haunted mansion. You can add silhouettes of ghosts, cats, bats, or witches to complete the scene.
11. Mummy Door Decoration
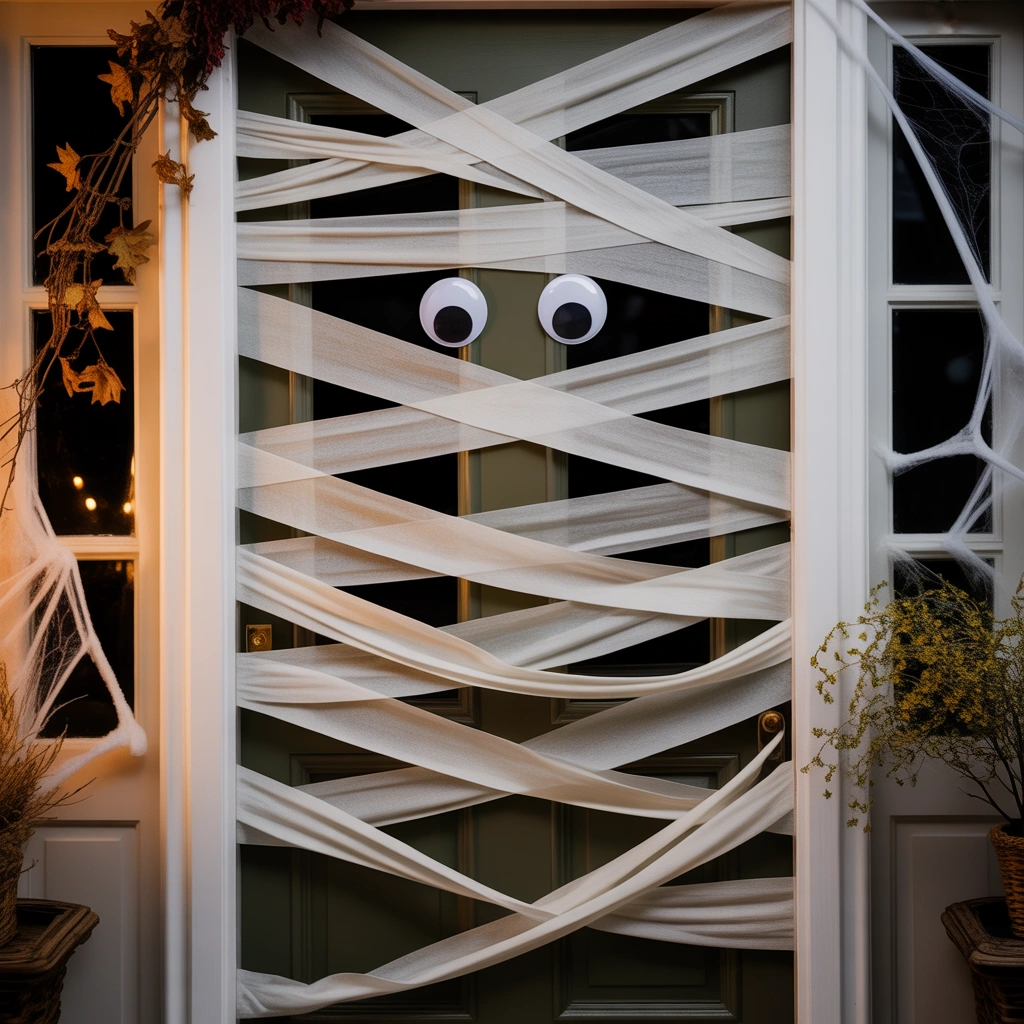
Turn your front door into a giant mummy using only paper and tape.
Materials You Will Need
- White crepe paper, toilet paper, or fabric strips
- Large white paper plates
- Black and yellow construction paper
- Removable tape
How to Decorate the Door
Tape white strips diagonally across the entire door, allowing them to overlap like mummy bandages. Leave a small open area near the top for the eyes.
Create two large eyes using paper plates or circles cut from cardstock. Add black pupils and yellow or green irises.
Attach the eyes between the bandages so they appear to be peeking out.
This is one of the most family-friendly ideas in this article. It looks playful rather than frightening and is simple enough for children to help create.
You can use the same method on a refrigerator, classroom door, cabinet, or large window.
12. Hanging Witch Hats with Lights
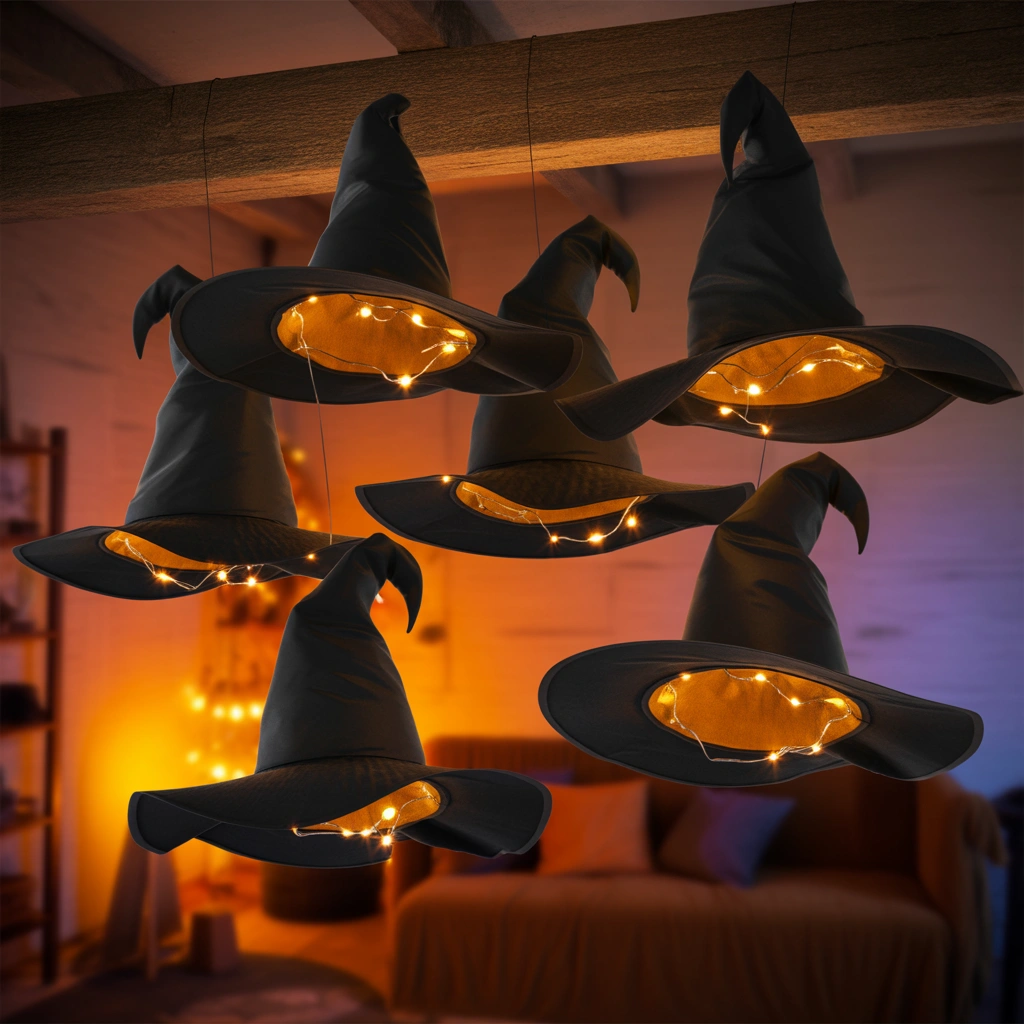
Floating witch hats look beautiful hanging over a porch, hallway, or party table.
Materials You Will Need
- Lightweight witch hats
- Fishing line
- Removable ceiling hooks
- Battery-operated tea lights
- Safety pins or small clips
How to Make Floating Witch Hats
Attach transparent fishing line to the top of each hat. Hang the hats at different heights to create depth.
Place a battery-operated tea light inside each hat. You can attach the light with a clip, pin, or small piece of string, depending on the hat’s structure.
When the lights are turned on, they will glow beneath the hats and make them appear enchanted.
For a more dramatic arrangement, hang several hats in a long hallway or above an outdoor dining table. Keep the spacing uneven so the display feels magical and natural.
13. Skeleton Hand Flower Arrangement
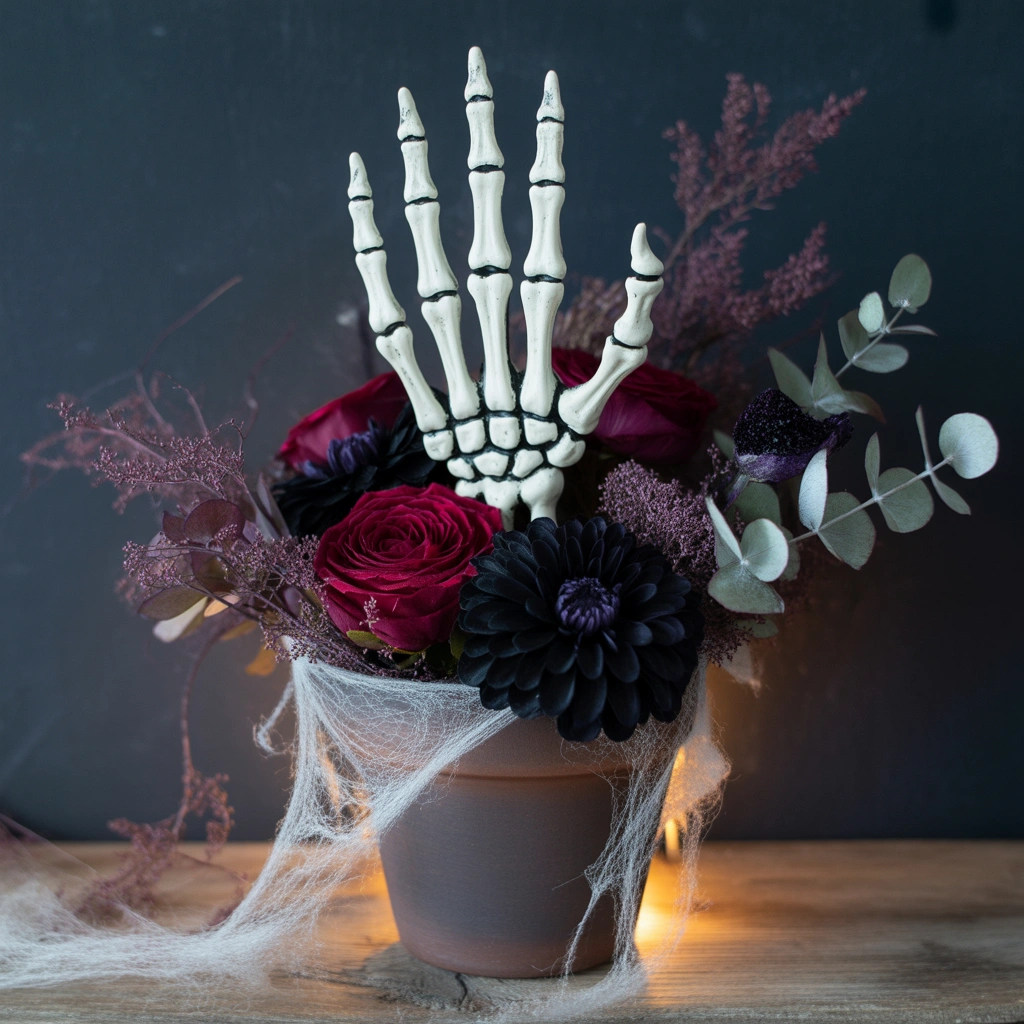
This decoration combines beauty with a touch of creepiness. It works well as a dining table centerpiece, entryway arrangement, or Halloween party display.
Materials You Will Need
- Artificial flowers
- Plastic skeleton hands
- Vase or painted jar
- Black branches
- Floral foam
- Ribbon
- Artificial moss
How to Make the Arrangement
Choose dark or autumn-inspired flowers, such as black roses, deep red flowers, orange chrysanthemums, or faded purple blooms.
Place floral foam inside the vase and arrange the flowers and branches. Add plastic skeleton hands so they appear to be reaching out from between the flowers.
Cover the base with artificial moss, shredded paper, or cobweb material. Tie black lace or ribbon around the vase.
You can make the arrangement elegant by using only black, white, and deep red. For a playful version, add eyeballs, miniature pumpkins, and brightly colored flowers.
14. Bloody Handprint Window Clings
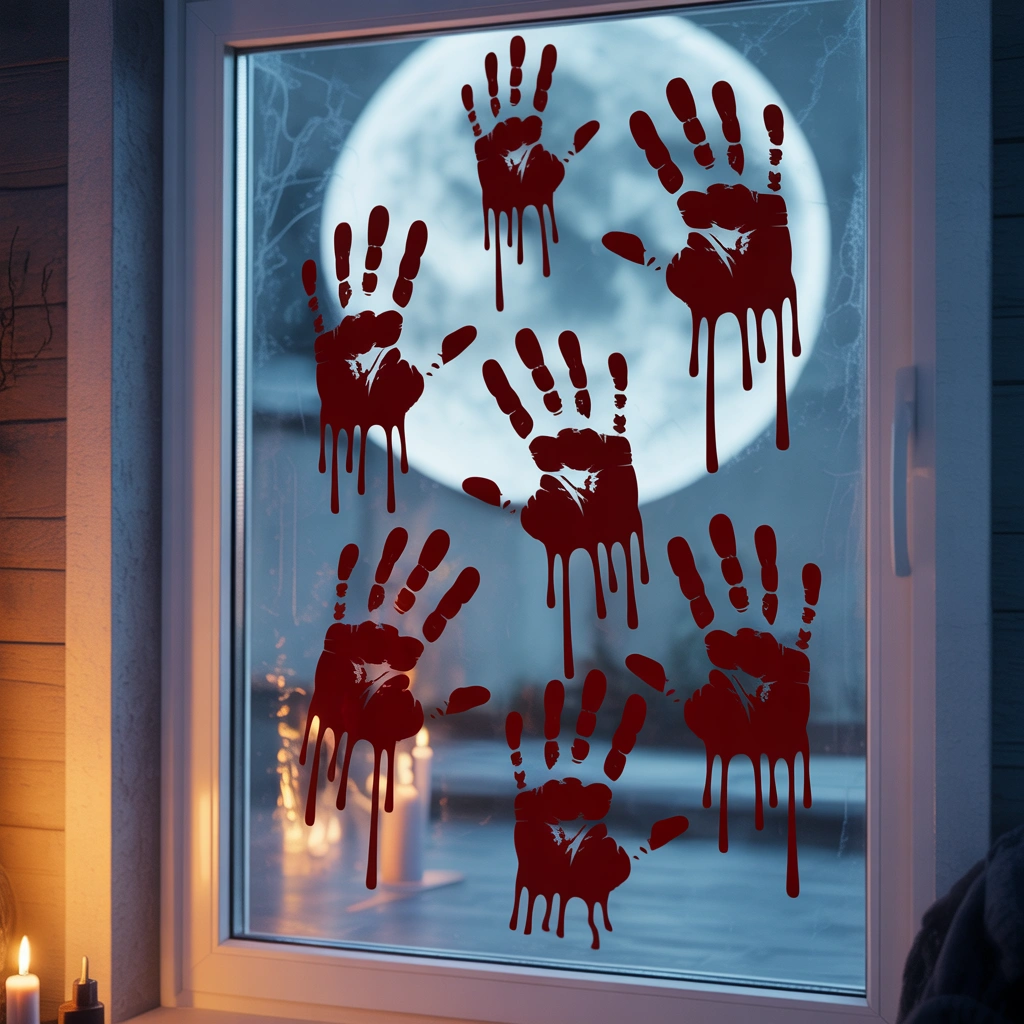
Fake bloody handprints can create a dramatic haunted-house effect on windows and mirrors.
Materials You Will Need
- Washable red craft paint or window paint
- Clear plastic sheet
- Paintbrush
- Optional fake blood gel
How to Make Removable Handprints
Rather than applying paint directly to your windows, paint handprints onto a clear plastic sheet. Allow the paint to dry completely.
Peel the dried handprint carefully from the plastic and press it onto a window or mirror. Depending on the paint, it may cling naturally.
You can also use washable window paint directly, but always test a small area first.
Add dripping marks beneath the handprints for a scarier effect. Place them on bathroom mirrors, patio doors, or front windows.
This decoration is better suited to adult Halloween parties or genuinely spooky themes. For younger children, replace the red handprints with green monster prints or white ghostly handprints.
15. Spooky Potion Bottle Collection
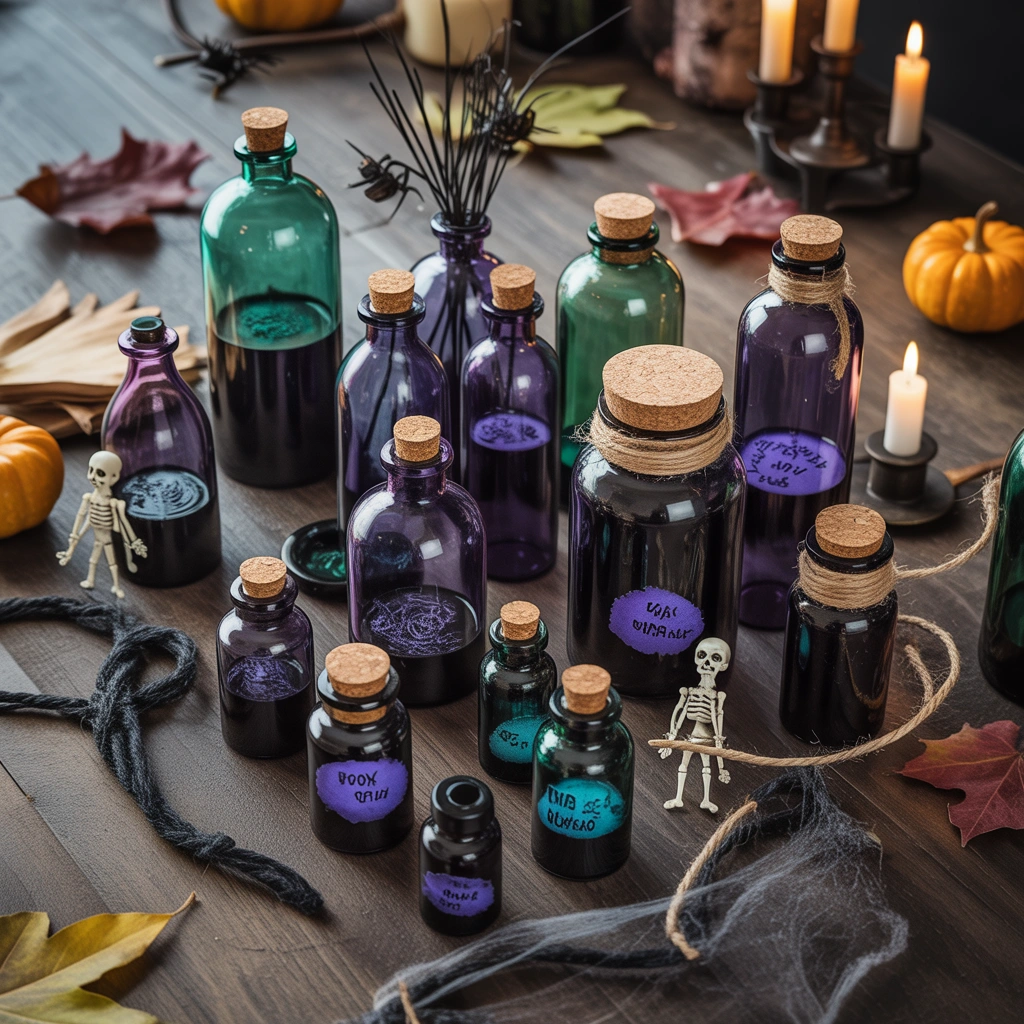
A collection of mysterious potion bottles is one of the most versatile Halloween decorations. You can display them on shelves, a bar cart, dining table, mantel, or party drinks station.
Materials You Will Need
- Empty glass bottles and jars
- Black, brown, green, or metallic paint
- Printable or handmade labels
- Twine
- Wax or hot glue
- Food coloring
- Water
- Plastic insects, eyeballs, or herbs
How to Create Potion Bottles
Remove the labels from old bottles and wash them thoroughly. Paint some bottles in dark colors while leaving others transparent.
Create aged labels with names such as:
- Witch’s Brew
- Vampire Blood
- Spider Venom
- Dragon Scales
- Ghost Tears
- Bat Wings
- Poison
- Moon Dust
- Zombie Tonic
To age the labels, lightly stain the paper with diluted coffee or tea. Allow it to dry, then tear or darken the edges.
Fill transparent bottles with colored water. Add herbs, plastic insects, glitter, beads, or fake eyeballs. Seal the lids properly, especially if children will be nearby.
Wrap twine around the bottle necks and add hot glue drips or faux wax seals. Group bottles of different sizes together for a convincing apothecary display.
How to Choose a Halloween Decorating Theme
When trying several of these 15 DIY Halloween decorations ideas, it helps to choose a theme before you begin. A consistent theme will make your decorations look intentional rather than random.
Classic Orange and Black
Use pumpkins, black cats, bats, spiders, orange lights, and traditional jack-o’-lanterns. This theme feels cheerful and works well for families.
Haunted Mansion
Choose black candles, antique frames, skulls, ravens, dusty books, faded flowers, and cobwebs. Use warm, dim lighting to create an old haunted-house atmosphere.
Witch’s Cottage
Decorate with potion bottles, hanging witch hats, broomsticks, cauldrons, dried herbs, spell books, and green lighting.
Ghostly White
Use white pumpkins, cheesecloth ghosts, pale candles, white branches, and transparent decorations. This theme looks elegant and slightly mysterious.
Monster Party
Create colorful painted pumpkins, silly monster faces, giant eyes, green slime, and playful door decorations. It is a great choice for children.
Budget-Friendly Materials for DIY Halloween Decorations
You do not need specialty supplies for every project. Many useful materials can be found around your home or purchased inexpensively.
Save the following items throughout the year:
- Glass jars
- Cardboard boxes
- Plastic bottles
- Milk jugs
- Newspaper
- Paper bags
- Old picture frames
- Fabric scraps
- Tin cans
- Empty food containers
- Wine bottles
- Broken artificial flowers
- Ribbons
- Gift wrap
- Packing paper
Nature also provides excellent seasonal materials. Fallen branches, dried leaves, pinecones, stones, and dead flowers can add texture and realism to Halloween arrangements.
A coat of black, white, orange, or metallic paint can completely transform ordinary recycled objects.
Safety Tips for Homemade Halloween Decorations
Creativity is important, but safety should always come first.
Use battery-operated lights instead of open flames whenever possible. Keep candles away from fabric, tissue paper, dried leaves, cobweb material, and children’s costumes.
Secure outdoor decorations properly so they do not blow into roads or walkways. Avoid placing ropes, wires, or low decorations where visitors could trip.
When cutting cardboard or plastic, use a sharp craft knife carefully and work on a protected surface. Children should use safety scissors and have adult supervision.
Make sure pathways, stairs, and entrances remain well lit. Halloween decorations can create a dark atmosphere without making it difficult for guests or trick-or-treaters to walk safely.
How to Make DIY Halloween Decorations Look More Professional
Small finishing touches can make homemade projects look much more polished.
Limit Your Color Palette
Choose two to four main colors and repeat them throughout your decorations. Black, white, orange, purple, green, and deep red are popular Halloween choices.
Use Decorations in Groups
One jar or candle may look unfinished, but a collection of three, five, or seven objects often creates a stronger display.
Vary the Heights
Use stacked books, crates, cake stands, boxes, and candle holders to create different heights. This makes table displays more visually interesting.
Add Lighting
String lights, tea lights, spotlights, and lanterns can completely change the appearance of your decorations after dark.
Include Different Textures
Combine smooth pumpkins with rough branches, soft fabric, shiny glass, faded paper, and artificial cobwebs. Mixing textures adds depth.
Decorate in Layers
Start with larger background decorations, then add medium-sized items and small details. For example, begin with a large web, add a spider, and finish with smaller insects and lights.
Frequently Asked Questions
What are the easiest DIY Halloween decorations to make?
Paper bats, milk jug ghosts, painted pumpkins, mummy doors, and glowing mason jars are among the easiest projects. They require simple supplies and do not demand advanced crafting skills.
How can I decorate for Halloween on a small budget?
Use recycled materials such as cardboard, glass jars, plastic bottles, old fabric, and paper bags. Focus on a few high-impact displays rather than decorating every corner. Lighting, paper silhouettes, and homemade webs can cover large areas without costing much.
What Halloween decorations can children help make?
Children can help paint pumpkins, draw ghost faces on milk jugs, cut paper bats with supervision, decorate jars, create monster faces, and assemble simple wreaths.
How early should I put up Halloween decorations?
Many people begin decorating in late September or early October. Indoor decorations can be displayed earlier, while delicate outdoor items may be better added closer to Halloween.
How can I make my house look spooky without using frightening decorations?
Use warm lanterns, pumpkins, paper bats, floating witch hats, white ghosts, autumn leaves, and mysterious potion bottles. These items create a Halloween atmosphere without graphic or overly scary details.
Final Thoughts
Creating your own Halloween décor is not only a way to save money. It is an opportunity to make your celebration feel personal. Every handmade ghost, painted pumpkin, potion bottle, or paper bat adds character that mass-produced decorations often cannot provide.
The best part about these 15 DIY Halloween decorations ideas is that they can be adjusted to suit almost any home, budget, skill level, or decorating theme. You can make a few simple projects for a subtle seasonal touch or combine several ideas to transform your entire home into a haunted attraction.
Personally, I would begin with floating cheesecloth ghosts, glowing mason jar lanterns, and a large paper bat display. These three projects are affordable, easy to customize, and create a strong effect both during the day and at night.
Do not worry about making every decoration perfect. Crooked lines, uneven paint, torn edges, and unusual shapes often make Halloween crafts look even more charming. Let yourself experiment, reuse materials, and enjoy the creative process.
Gather your supplies, choose your favorite project, and start decorating. Your homemade Halloween display may soon become the most memorable one in the neighborhood.
