Okay, let’s talk about breaking Christmas decorating rules. You know how everyone says Christmas has to be traditional red and green? Well, I discovered something magical three years ago when I accidentally bought pink ribbon instead of red – mixing pink into the classic Christmas palette creates pure magic!
I’ve spent the last few holiday seasons perfecting this pink, red, and green color combo, and let me tell you, it transforms everything from basic to brilliant. These aren’t your grandmother’s Christmas decorations (though she’d probably love them too).
We’re talking about elegant, modern takes that make your home look like it belongs in a magazine spread.
Ready to make your neighbors wonder how you got so stylish? Let’s explore these 12 ideas that’ll completely change how you decorate this year.
Table of Contents
- 1 Candy Cane Inspired Table Setting
- 2 Pink and Red Ornament Tree
- 3 Festive Wreath with Pink Accents
- 4 Red and Green Garland with Pink Flowers
- 5 DIY Pink Christmas Stockings
- 6 Holiday Mantel with Colorful Candles
- 7 Pink, Red, and Green Gift Wrapping Station
- 8 Color-Blocked Christmas Tree Skirt
- 9 Pink and Red Holiday Centerpiece
- 10 Festive Window Display with Ribbons
- 11 Christmas Dessert Table with Matching Colors
- 12 DIY Pink, Red, and Green Mason Jar Lights
- 13 Wrapping Up Your Holiday Style
Candy Cane Inspired Table Setting
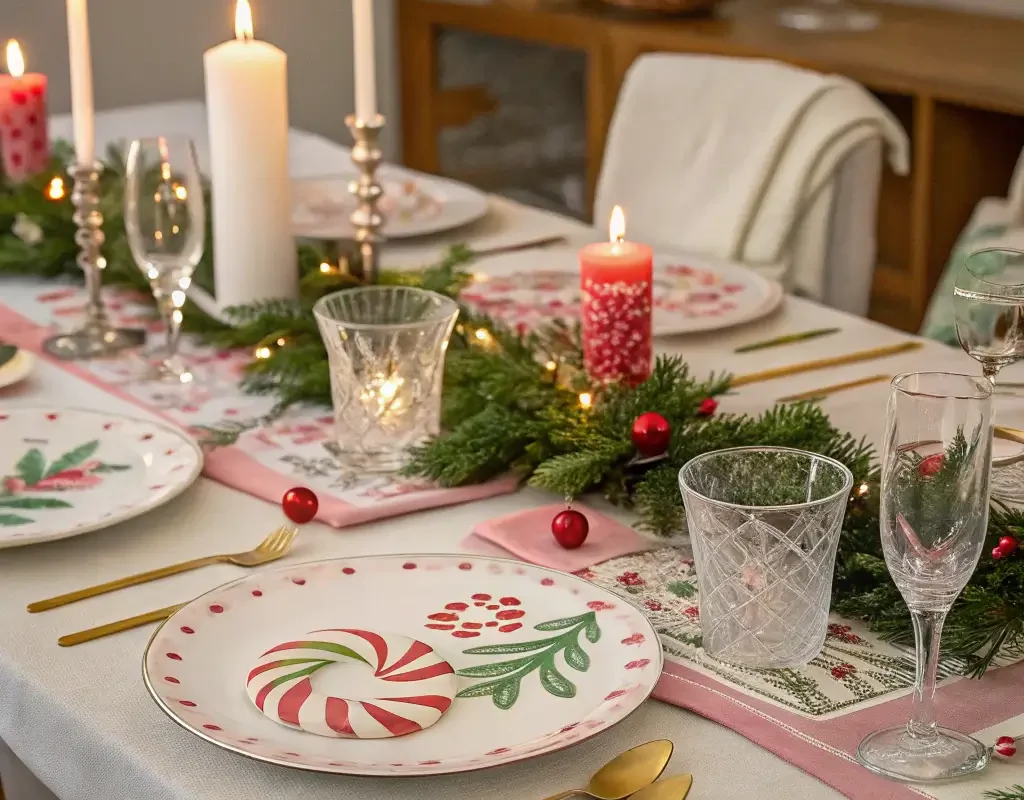
This table setting makes every dinner feel like a celebration. I started doing this after watching my kids’ faces light up when they saw candy canes incorporated into “fancy” dinner settings. Who says elegance can’t be playful?
Start with a crisp white tablecloth as your base – it makes all the colors pop. Layer pink and red charger plates alternately around the table. I found gorgeous ones at HomeGoods for like $4 each, so don’t think you need to break the bank here.
For napkins, I fold white linen napkins and tie them with red velvet ribbon, then slip a mini candy cane through the bow. Place these on top of green salad plates for that perfect color trio. The contrast looks absolutely stunning, and guests always comment on how festive yet sophisticated it feels.
Centerpiece Magic
Create a runner down the table’s center using fresh greenery – cedar or pine works beautifully. Weave pink and white striped ribbon through it, mimicking candy cane stripes. Add real candy canes standing in small glass vases filled with cranberries and pink ornaments.
For lighting, use white pillar candles in clear glass hurricanes surrounded by pink and red glass beads. The candlelight reflecting off the beads creates this dreamy, romantic glow that makes everyone look amazing in photos.
Pink and Red Ornament Tree

Last year, I convinced my skeptical husband to let me do a pink and red ornament tree in our living room. Now he brags about it to everyone who visits – men included!
Start with a green tree (real or artificial, no judgment here). Begin with your lights – I prefer warm white LEDs because they make the colors glow without competing. String them deep into the branches first, then work outward.
Ornament Strategy
Here’s my foolproof formula for ornament placement:
- 40% red ornaments (mix matte, glitter, and shiny finishes)
- 35% pink ornaments (various shades from blush to hot pink)
- 15% green ornaments (emerald and sage work best)
- 10% metallics (gold or rose gold, never silver with this palette)
Start with your largest ornaments deep in the tree, then medium ones in the middle layer, and smallest on the tips. This creates depth and makes your tree look fuller. Mix textures too – velvet balls, glass drops, wooden stars, and beaded ornaments all play nicely together.
Don’t forget the tree topper! A large pink velvet bow or a rose gold star makes the perfect finishing touch. Skip the traditional angel unless you can find one in your color scheme.
Festive Wreath with Pink Accents
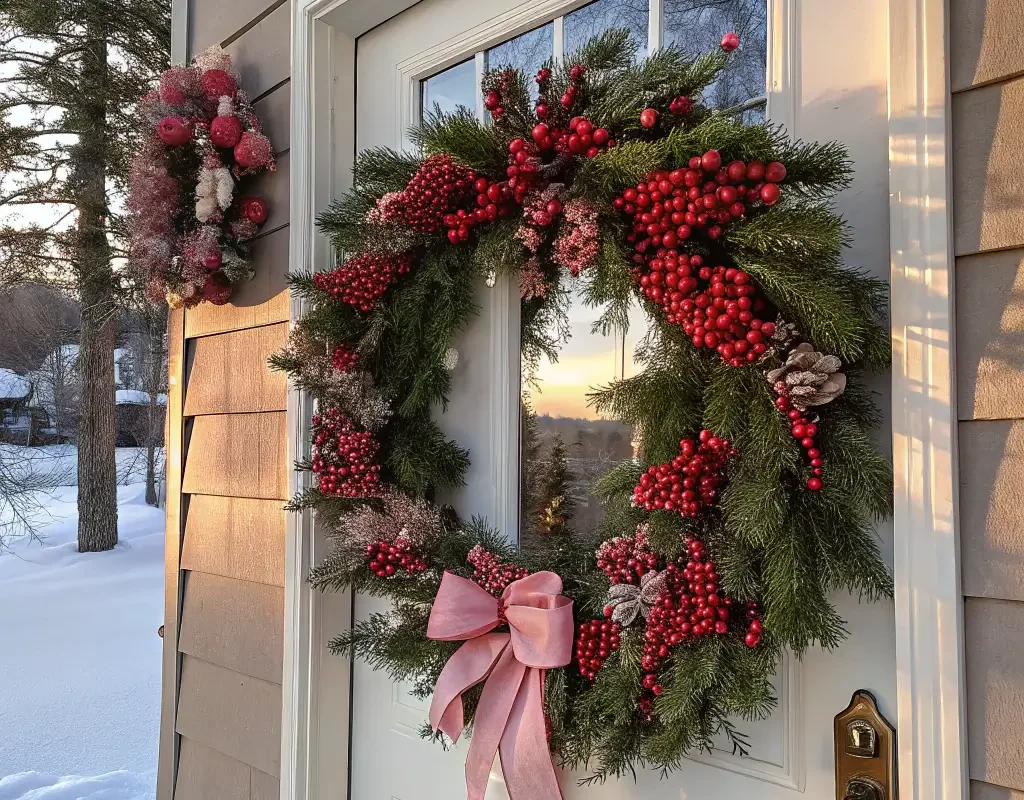
Making wreaths became my therapy during 2020, and this pink-accented version gets more compliments than any other decoration I hang. Plus, it costs way less than those fancy store-bought ones that fall apart after one season.
Get a plain evergreen wreath as your base – even the cheap ones from craft stores work. The key is building it up with layers of color and texture.
Building Your Wreath
Start by tucking pink magnolia stems or peonies (silk ones work perfectly) evenly around the wreath. I usually use 5-7 depending on the wreath size. These create your main focal points.
Next, add clusters of red berries between the pink flowers. Hot glue small pink and red ornaments throughout, varying the sizes. Weave a wide pink satin ribbon through the greenery, letting it peek out here and there.
My secret weapon? Spray-painted pinecones! Lightly dust some pinecones with pink or red spray paint and tuck them in for texture. The natural brown showing through the paint adds sophistication.
Finish with a gorgeous bow at the bottom using wired ribbon in all three colors. Make it big and dramatic – this isn’t the time to be subtle!
Also Read: 15 Simple Wood Christmas Trees DIY Ideas for Holiday Magic
Red and Green Garland with Pink Flowers
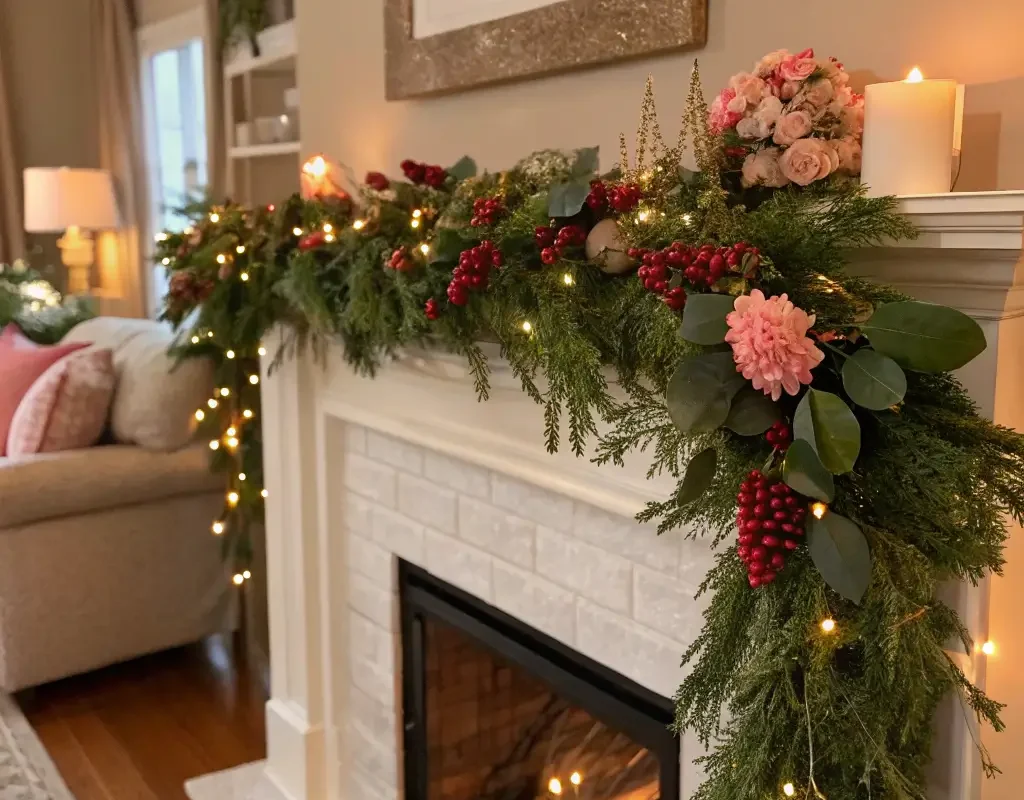
Garland transforms any space instantly, but most people just throw it up and call it done. We’re going for something way more special here.
I discovered that adding pink flowers to traditional garland creates this romantic Christmas vibe that works everywhere from mantels to staircases. Start with a good quality green garland – the fuller, the better.
Decorating Your Garland
First, string battery-operated fairy lights through the garland. Trust me, dealing with cords is a nightmare, and battery ones last the whole season. Weave them in and out for even coverage.
Add pink silk flowers every 12-18 inches. I like roses, ranunculus, or carnations because they hold their shape well. Secure them with floral wire, twisting it around the garland’s frame.
Between the flowers, add clusters of red berries and small red ornaments. The key is creating a rhythm – pink flower, red berries, green space, repeat. This pattern makes everything look intentional and balanced.
For the finishing touch, spiral a sheer pink ribbon loosely through the entire length. It adds movement and ties all the elements together beautifully.
DIY Pink Christmas Stockings

Store-bought stockings never quite match your vision, right? Making your own means getting exactly what you want, and honestly, they’re easier to make than you’d think.
I learned to make these after paying $30 for ONE stocking at a boutique. Now I make them for about $8 each, and they look even better IMO 🙂
Materials You’ll Need:
- Pink velvet or fleece fabric (½ yard per stocking)
- Red ribbon for trim
- Green embroidery thread
- White faux fur for the cuff
- Basic sewing supplies
Cut out your stocking pieces using a template (tons available online for free). Sew the main pieces together, leaving the top open. The trick for professional-looking stockings? Press your seams flat with an iron – it makes such a difference!
Personalization Ideas
Embroider names in green thread on the white fur cuff before attaching it. Can’t embroider? Use fabric glue and glitter letters – nobody will know the difference.
Add red rickrack trim along the cuff’s bottom edge. Sew on small green buttons in a tree shape, or glue on tiny red pom-poms for a playful touch. The personalization makes these feel special and definitely not store-bought.
Attach a loop of matching ribbon for hanging, and boom – custom stockings that’ll last for years!
Holiday Mantel with Colorful Candles
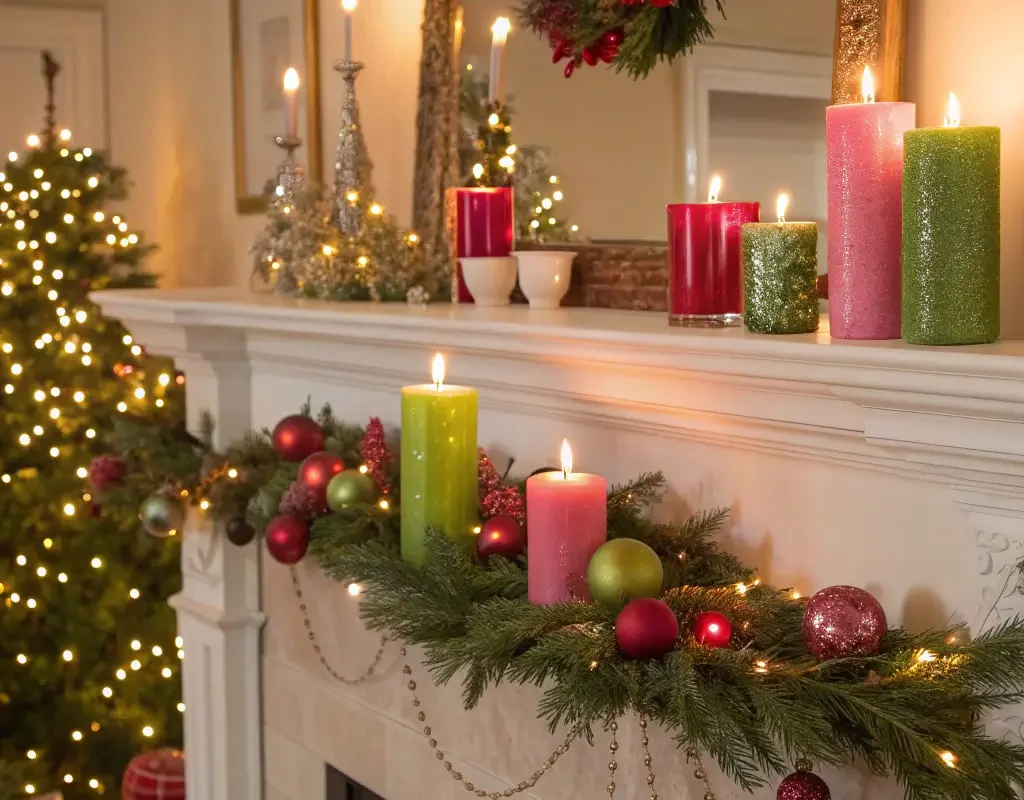
Your mantel sets the tone for the entire room, so this needs to be spectacular. I change mine up every year, but this color combination always stays because it just works so perfectly.
Start with a base of greenery – either garland or individual branches arranged to look natural. Don’t make it perfectly symmetrical; a little asymmetry looks more organic and expensive.
Candle Arrangement Strategy
Here’s where the magic happens. Use pillar candles in varying heights:
- 3 pink candles (different shades if possible)
- 2 red candles
- 2 green candles
- Several white candles to balance everything
Arrange them at different heights using candle holders, stacked books wrapped in Christmas paper, or decorative boxes. The varying heights create visual interest and prevent that flat, boring look.
Never light all the candles at once unless you’re actively watching them. But when you do light them for parties? Pure enchantment! The pink candles especially create this warm, flattering light that makes everyone feel festive.
Finishing Touches
Weave battery-operated lights through everything for constant glow. Add pink and red ornaments nestled in the greenery. Lean a mirror or artwork wrapped in pink ribbon against the wall for height.
My favorite detail? Hanging pink, red, and green ornaments from the mantel edge using fishing line at varying lengths. They catch the light and add movement when people walk by.
Also Read: 15 Lovely Rustic Christmas Decor Ideas: Woodsy Festive Details
Pink, Red, and Green Gift Wrapping Station
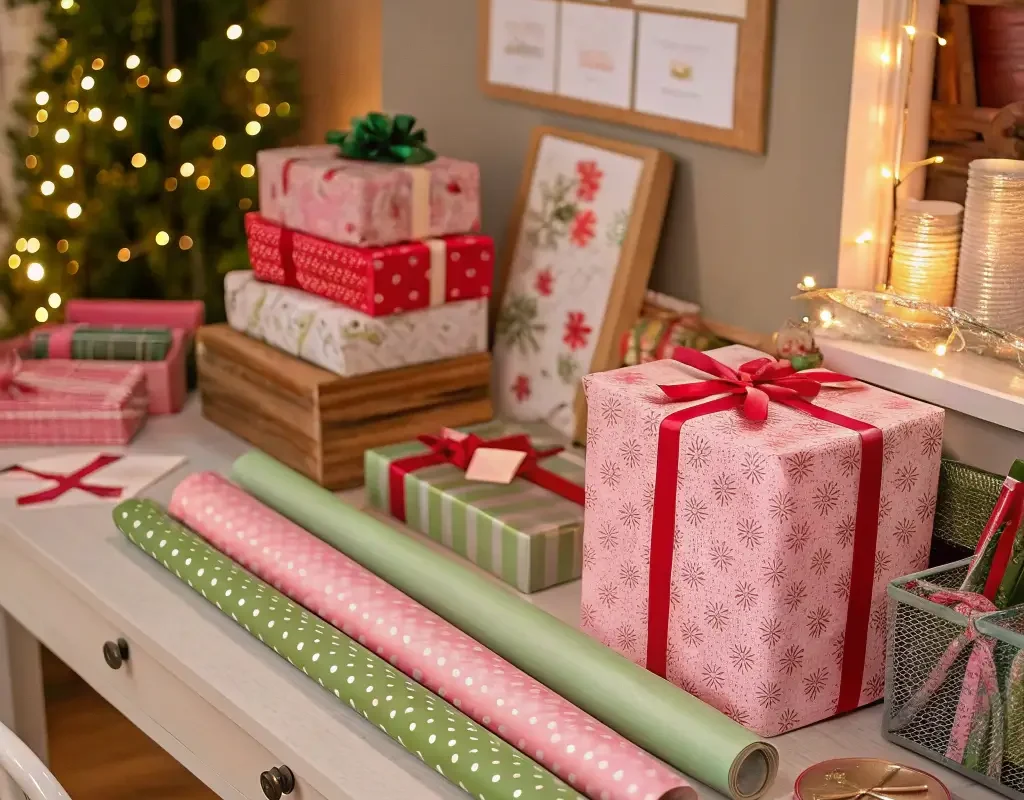
Setting up a dedicated wrapping station changed my holiday game completely. No more searching for scissors or tape, and everything looks cohesive under the tree.
Transform a corner of your dining room or spare bedroom into wrapping central. Use a folding table if needed – cover it with a festive tablecloth to make it feel special.
Organization is Everything
Install a simple dowel rod on the wall to hold wrapping paper rolls. Organize them by color – all pinks together, reds together, greens together. This visual organization makes choosing combinations super easy.
Keep supplies in clear containers:
- Scissors (have multiple pairs, they always disappear)
- Tape dispensers (splurge on the good weighted ones)
- Ribbon spools on a paper towel holder
- Gift tags in a small basket
- Tissue paper sorted by color in a magazine holder
Wrapping Hack Arsenal
My favorite trick? Use pink tissue paper as a base layer under clear cellophane for small gifts. It creates this gorgeous cloudy effect that looks incredibly expensive.
Double-sided tape becomes your best friend for clean edges. Place it under paper folds so no tape shows – this one detail makes gifts look professionally wrapped.
For ribbon, combine all three colors on one package. Start with a green base ribbon, add a thinner red ribbon on top, and finish with pink baker’s twine. The layering creates depth and interest that single ribbons can’t achieve.
Color-Blocked Christmas Tree Skirt
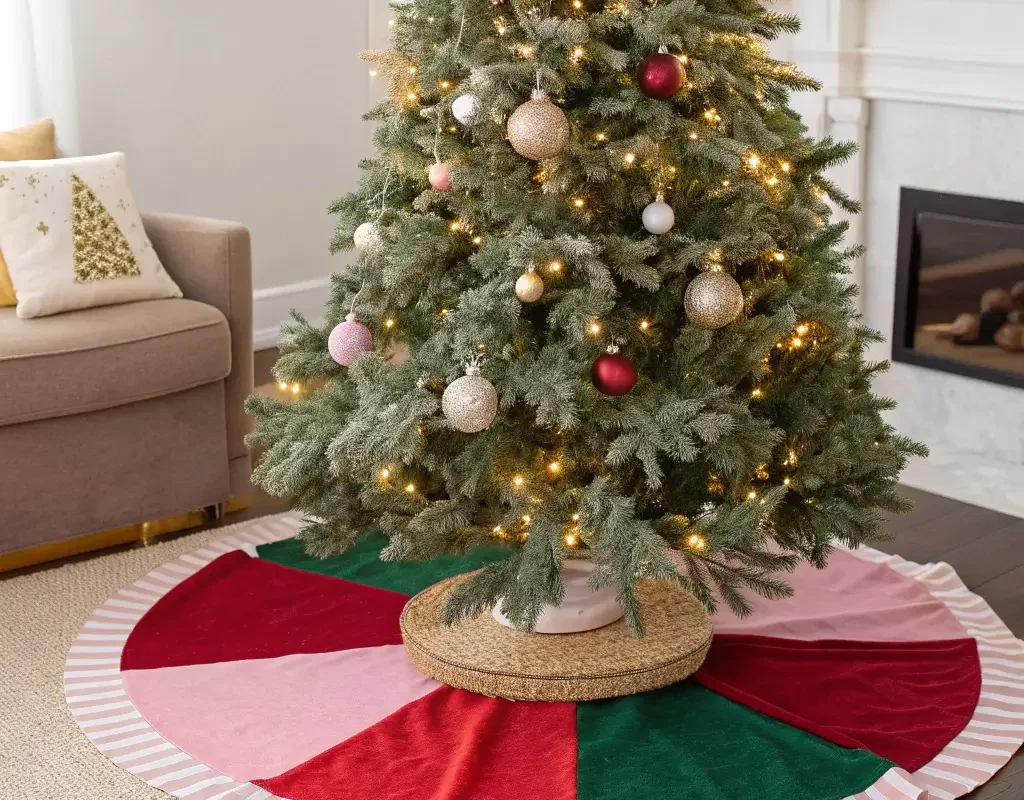
Tree skirts always seem like an afterthought, but they shouldn’t be! This color-blocked version becomes a statement piece that ties your whole tree look together.
I made mine after seeing a $200 version in a high-end store. Mine cost $30 and looks just as good, if not better.
DIY Color-Block Design
Cut a circle from pink felt or fleece (usually need about 2 yards for a standard tree). Cut a smaller circle in the center for the trunk and a straight line from outer edge to center.
Divide the skirt into three sections mentally. Use fabric glue or sewing to attach green velvet to one section and red velvet to another, leaving one section pink. The geometric color blocking looks modern and intentional.
Add trim where the colors meet – gold rickrack or white pom-pom trim works beautifully. This hides any imperfect edges and adds a finished look.
For extra pizzazz, sew or glue large sequins randomly across all three sections. They’ll catch the tree lights and create magical sparkles on your floor.
Pink and Red Holiday Centerpiece
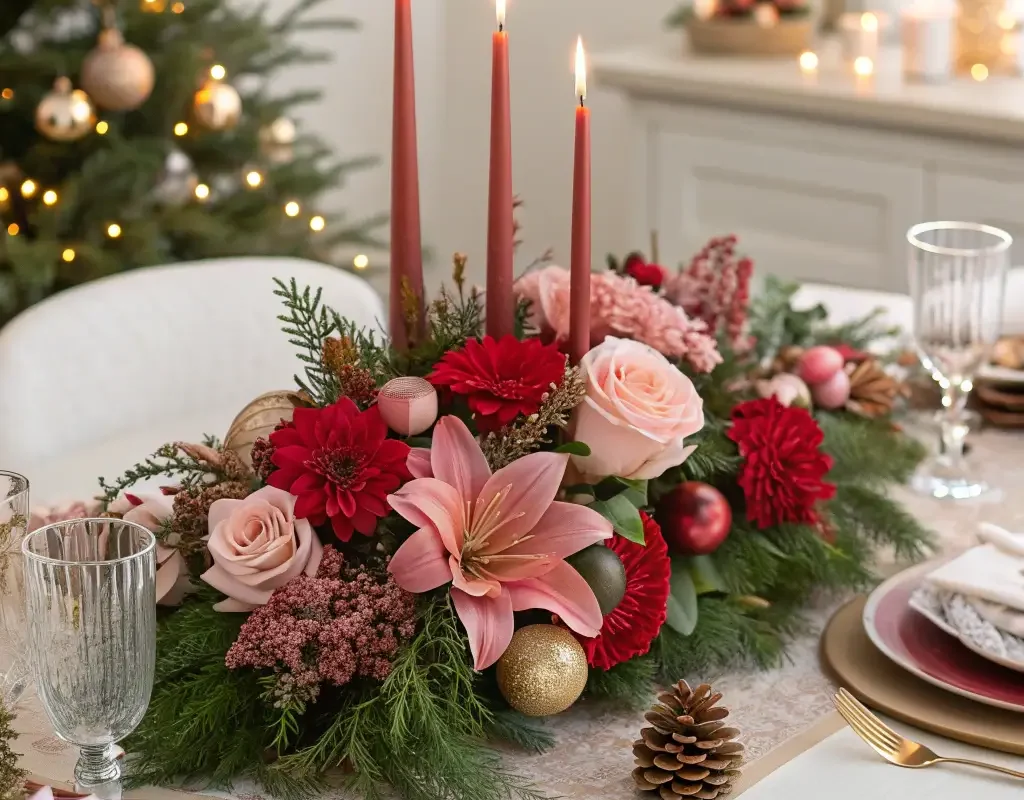
This centerpiece works for everything from casual dinners to formal parties. I make variations of this all December long, and it never gets old.
Start with a low, wide container – a silver or white bowl, wooden box, or even a cake stand works. The key is keeping it low enough for people to talk over during dinner.
Building the Base
Fill your container with floral foam soaked in water. Start by inserting greenery around the edges, angling it outward to create width. Use a mix of pine, cedar, and eucalyptus for varied textures and shades of green.
Add your flowers next. Pink roses, red carnations, and white mums create a perfect balance. Don’t make it perfectly symmetrical – slight irregularity looks more natural and expensive.
Tuck in unexpected elements like pink-painted pinecones, red berries on stems, or even candy canes for whimsy. Small battery-operated lights woven through add magic for evening dinners.
Pro Centerpiece Tips
Spray everything with water daily to keep it fresh. Replace flowers as needed – carnations last forever, but roses might need swapping after a week.
Make it conversation-worthy by adding something unexpected like vintage pink ornaments or mini wrapped presents in your color scheme tucked among the greenery.
Also Read: 10 Magical Earth Tone Christmas Tree Ideas for Holiday Cheer
Festive Window Display with Ribbons
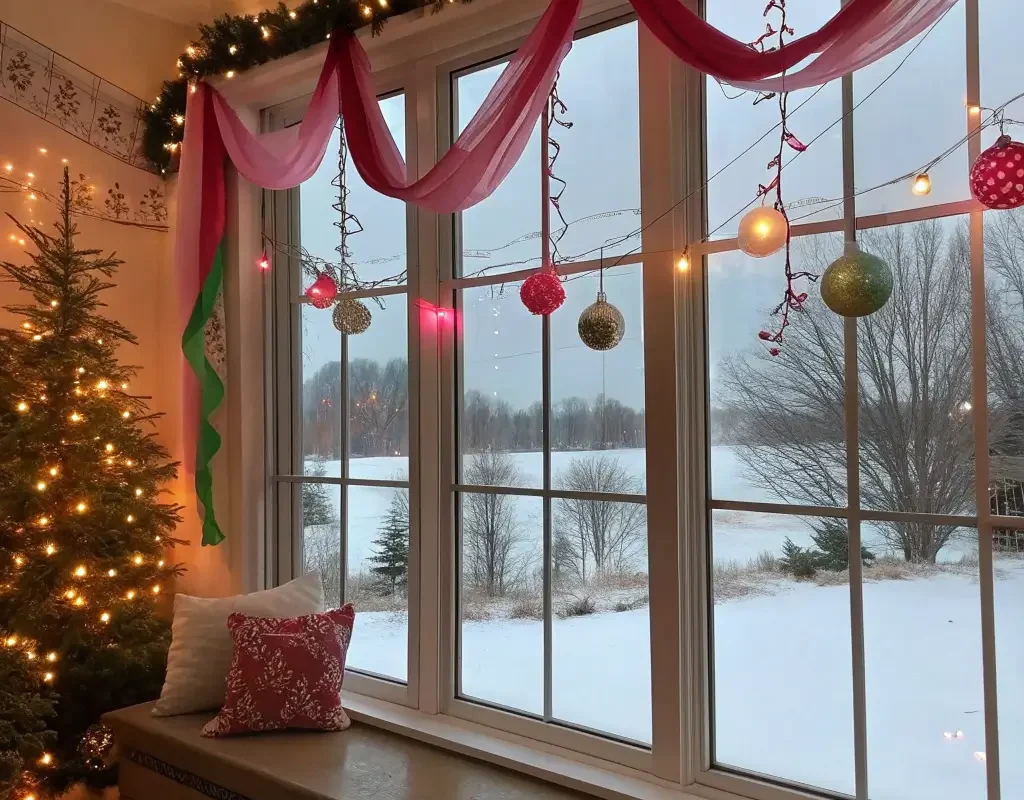
Windows become magical frames during the holidays, and most people totally waste this opportunity! These ribbon displays make your house look amazing from both inside and outside.
Measure your windows first (learned this the hard way). You’ll need ribbon lengths about 1.5 times your window height for the perfect drape.
Creating Ribbon Magic
Use removable adhesive hooks at the top corners of each window frame. Hang ribbons in alternating colors – pink, red, green, repeat. Let them cascade down naturally with gentle curves.
At varying heights, tie small ornaments or bells to some ribbons. The movement and sound when windows are opened adds sensory delight. Just don’t overdo it – one ornament per every third ribbon is plenty.
For picture windows, create a swag effect by gathering ribbons in the center with a large bow. Add battery-operated lights woven through the ribbons for nighttime impact.
FYI, velvet ribbons photograph beautifully but show every fingerprint. Satin ribbons catch light gorgeously but can look cheap if they’re too thin. Wire-edged ribbons hold their shape best but cost more.
Christmas Dessert Table with Matching Colors
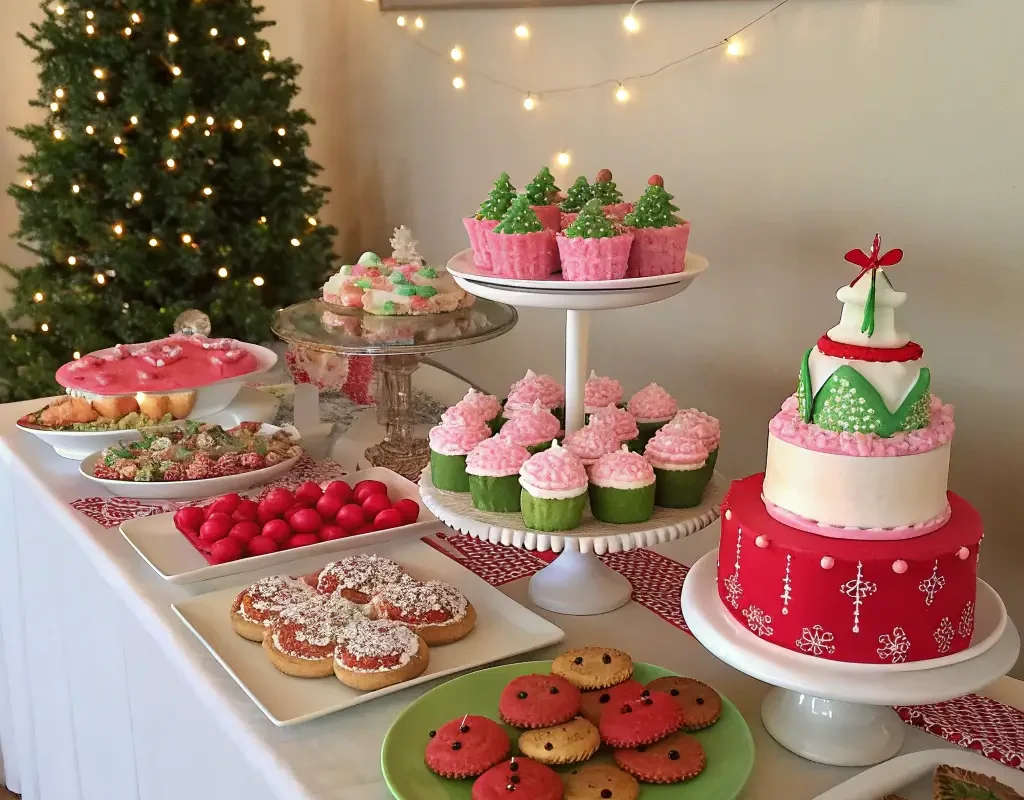
Nothing impresses guests quite like a coordinated dessert table. This becomes the Instagram moment of every party, guaranteed.
Cover your table with a pink tablecloth and overlay white lace for vintage charm. Use cake stands at varying heights – mix materials like glass, wood, and metal for interest.
Dessert Styling Strategy
Plan desserts that naturally fit your color scheme:
- Pink: Strawberry cupcakes, pink macarons, peppermint bark with pink chocolate
- Red: Red velvet cake, cherry tarts, candy apple slices
- Green: Matcha cookies, pistchio brownies, Christmas tree sugar cookies
- White: Vanilla cake pops, white chocolate pretzels, meringues
Label each dessert with coordinating tags. I make mine using cardstock and a metallic pen – fancy but easy. Prop them in mini candy canes for themed holders.
Scatter coordinating candies like pink and red M&Ms between platters. Add height with tall glass cylinders filled with layers of colored candies. Place battery-operated candles (real ones near food = disaster) for ambiance.
Don’t forget the backdrop! Hang a garland or paper fans in your colors behind the table. This creates a photo-worthy moment and makes the spread look intentional.
DIY Pink, Red, and Green Mason Jar Lights

These lights work everywhere – mantels, tables, porches, anywhere you need magical ambiance. Plus, they’re stupid easy to make and cost almost nothing.
Collect mason jars in various sizes (thrift stores are goldmines for these). Clean them thoroughly – any residue will show when lit.
Creating the Lights
Paint the insides of jars with translucent glass paint in your colors. The trick? Water down the paint slightly and swirl it around inside, then turn upside down to drain excess. This creates a soft, clouded glass effect rather than solid color.
Once dry, wrap the jar rims with ribbon, securing with hot glue. Add embellishments like mini ornaments, bells, or artificial berries to the ribbon for extra charm.
Insert battery-operated fairy lights or tea lights. For hanging versions, wrap wire around the rim to create a handle. Group them in odd numbers for the best visual impact.
Display Ideas
Line them along your porch railing or steps. Cluster them on your mantel with greenery woven between. Hang them from shepherd’s hooks along your walkway. The soft colored glow creates instant holiday magic without the fire hazard of real candles.
Wrapping Up Your Holiday Style
These 12 ideas transform your standard Christmas into something special and memorable. The pink, red, and green combination brings freshness to traditional holiday decorating without losing that festive feel we all love.
Start with one or two projects and build from there. Maybe begin with the wreath and centerpiece, then add more elements each year. Before you know it, you’ll have a cohesive, magazine-worthy holiday look that didn’t cost a fortune.
Remember, the best decorations tell your story. Don’t stress about perfection – the slightly crooked bow or uneven garland adds character. Your guests remember the feeling of your home, not whether every ornament hung perfectly.
Now excuse me while I go add more pink to my decorations. Once you start with this color palette, you’ll find yourself wanting to pink-ify everything. Don’t say I didn’t warn you.