These Christmas window painting ideas will turn plain glass into the prettiest part of your holiday home. A painted window costs almost nothing, takes an afternoon, and stops passersby in their tracks — and when January comes, the paint washes right off. From frosted snowflakes and jolly Santas to glowing winter villages, there is a design here for every skill level, including complete beginners.
You only need washable tempera paint or window markers, a few brushes, and a stencil or a printed template to get started. Every idea below explains which paints to use, how to lay the design out on the glass, and how to clean it off afterwards. Pick one window, pick one design, and start painting.
1. Frosted Snowflakes and Ice Crystals
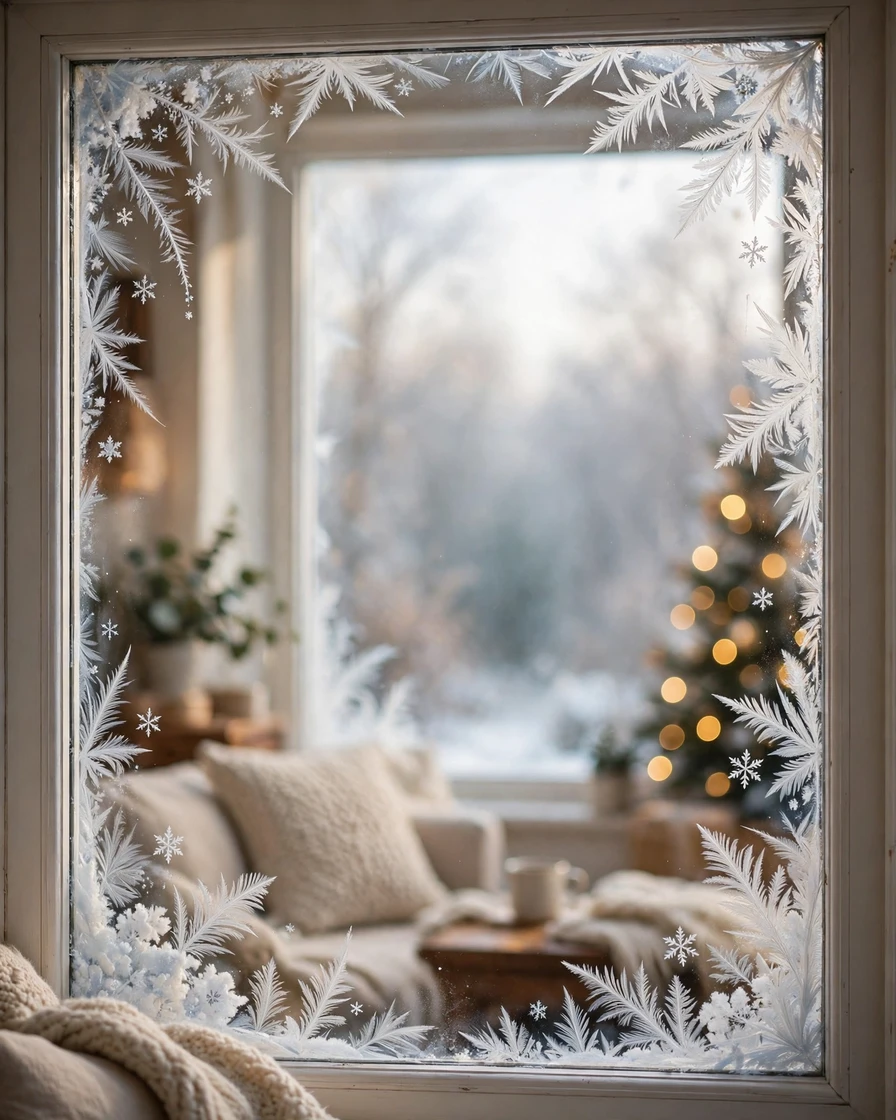
Delicate white snowflakes scattered across the glass, with feathery ice crystals creeping in from the corners, give a window the look of a real winter morning. This is the easiest design in the list and the best one to start with if you have never painted glass before. Clean the window with glass cleaner first, then work from the inside so the paint stays protected from rain. Use white washable tempera paint thinned with a little water, or a white chalk marker for crisper lines. Tape a snowflake stencil to the glass and dab the paint through with a sponge, or draw freehand by crossing three lines through one point and adding small branches to each arm. Build up the corners with jagged crystal shapes, then add tiny white dots for falling snow. Let each layer dry before adding the next so the white stays bright and opaque.
Quick tip: Spray the finished snowflakes with a light coat of fake snow spray to add frosty texture and hide any wobbly edges.
2. Jolly Santa Claus Waving Hello
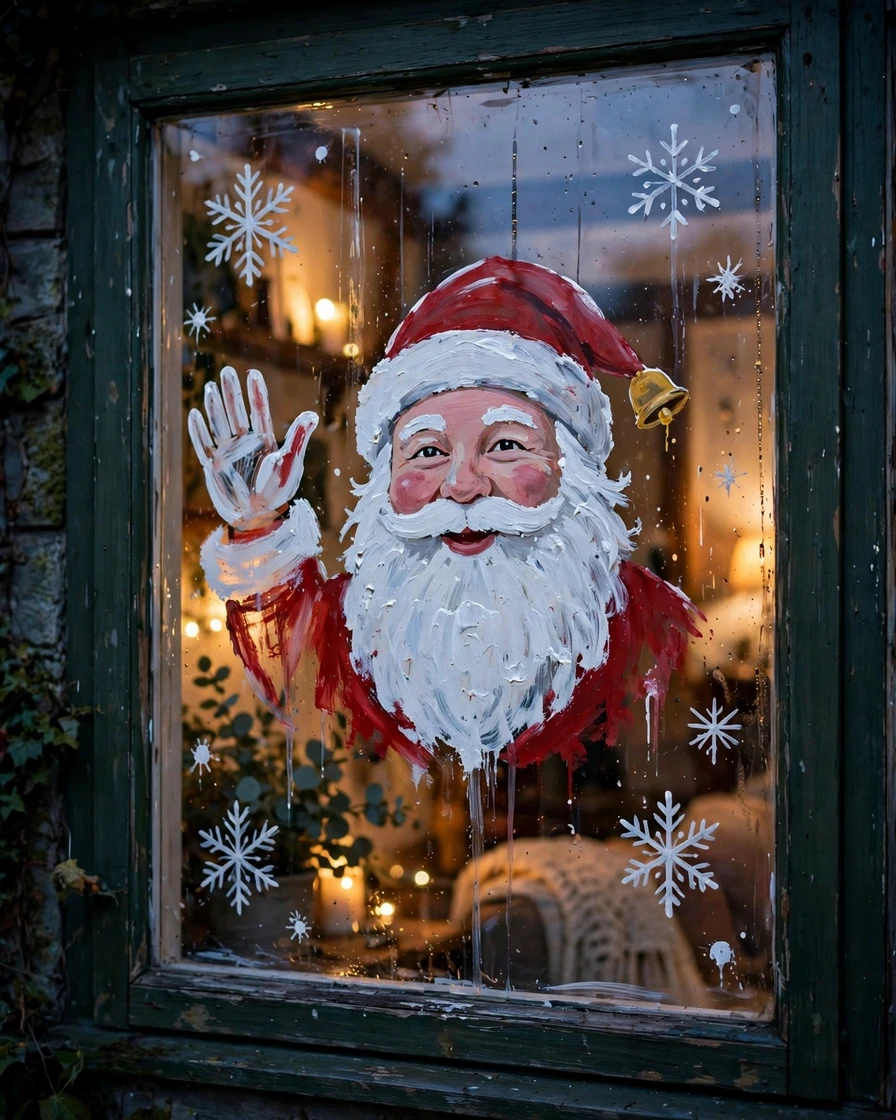
A cheerful Santa waving from the window is the friendliest welcome a house can give at Christmas. The image shows Santa’s rosy face, white beard and red hat filling the center pane, with one gloved hand raised in a wave. Start by printing a large Santa template and taping it to the outside of the glass so you can trace it from inside with a white chalk marker. Paint the biggest areas first: the red hat and suit, then the white beard and trim, then the face in a soft peach. Use washable tempera paint and a flat brush for the large shapes, and a fine round brush for the eyes, smile and beard curls. Add rosy cheeks with a dab of pink and a dot of white in each eye to make Santa look alive. Finish with a few painted snowflakes around him and a gold bell at the corner of his hat.
Quick tip: Paint Santa on the inside of the glass in reverse if you want him to read correctly to people outside — or trace the template on the outside and paint from outside.
3. Reindeer and Sleigh Silhouette
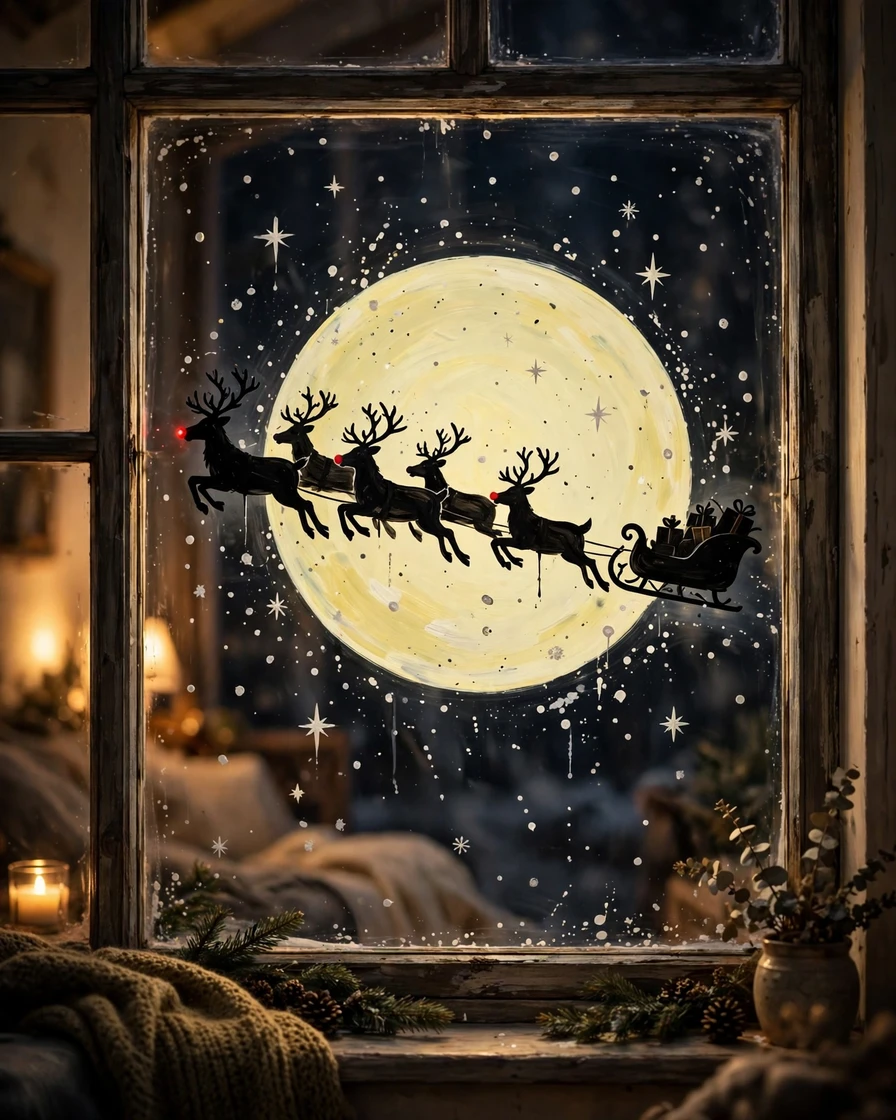
A dark silhouette of Santa’s sleigh pulled by flying reindeer, crossing a big painted moon, looks magical after dark when the room light glows behind it. This design is all about contrast, so choose a window that gets lit from inside in the evening. Paint a large pale yellow moon first using a plate as a guide, then tape a reindeer-and-sleigh template to the outside of the glass and trace the outline with a black chalk marker. Fill the silhouette with black or dark brown tempera paint, using two thin coats for a solid, even finish. Leave the reindeer legs and antlers until last, painting them with a fine brush for clean lines. Add a red nose on the lead reindeer for Rudolph, then scatter small white stars and dots of snow around the moon.
Quick tip: Mix a little dish soap into the black tempera paint — it helps the paint grip the glass and makes January cleanup much easier.
4. Winter Village with Glowing Windows
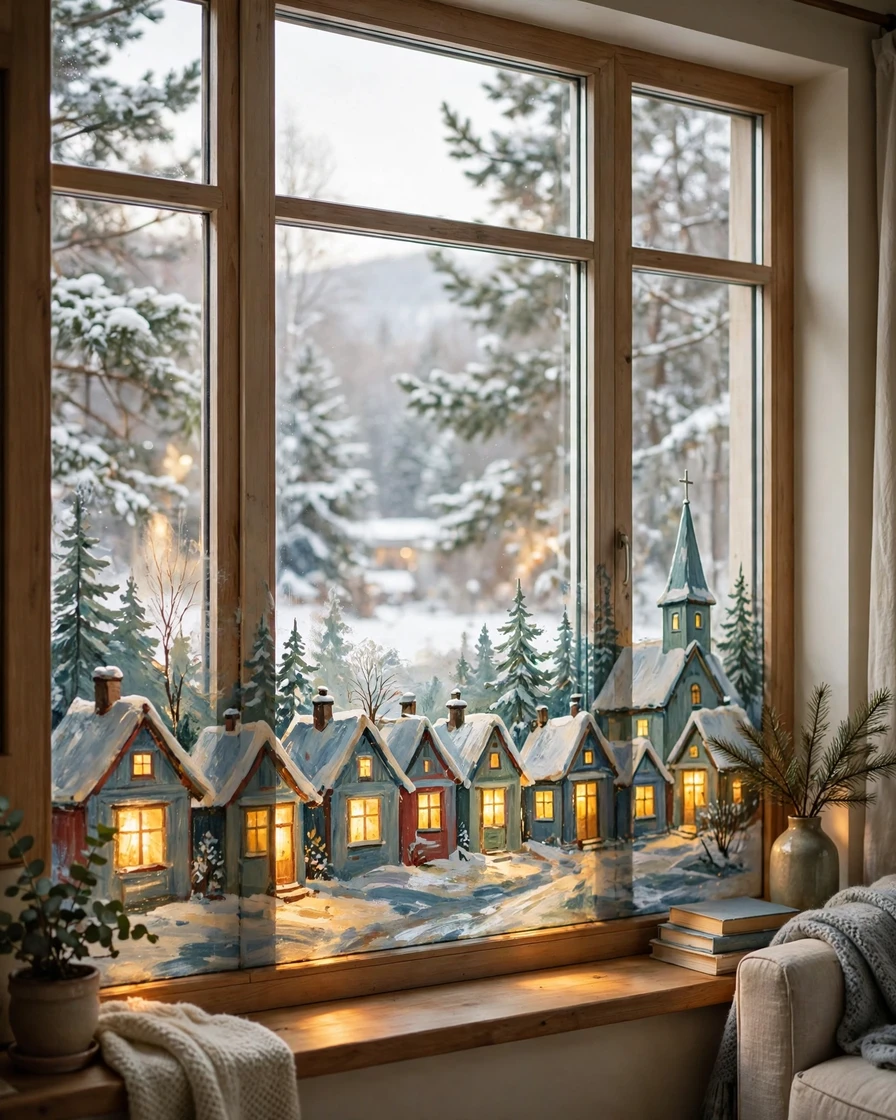
A row of little cottages with snowy roofs and warm glowing windows, painted along the bottom of a large window, turns the glass into a miniature Christmas town. The trick is the glow: paint the cottage windows in bright yellow and leave the glass bare behind them, so real daylight or room light shines through and the windows truly light up. Sketch the village first with a white chalk marker, starting with simple house shapes of different heights, then add triangular roofs, chimneys and a church steeple. Paint the houses in muted red, blue and green tempera, and cap every roof and ledge with thick white snow. Add a pine tree between the houses and a snowy path in front. When the paint dries, outline the windows and doors with a fine black marker for a crisp storybook finish.
Quick tip: Paint the village on the lower half of the window only, leaving the top clear for light — it looks like a real snowy horizon.
5. Decorated Christmas Tree Scene
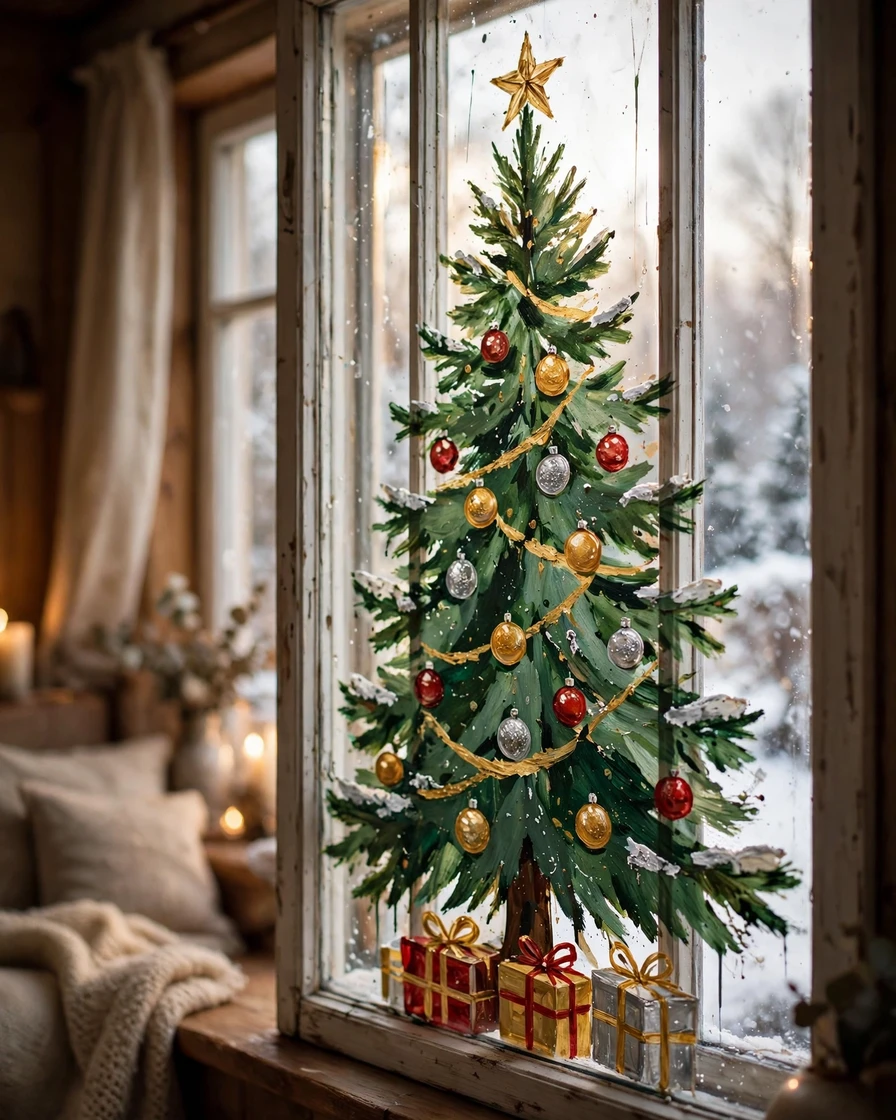
A tall green Christmas tree covered in painted baubles, garland and a golden star makes a wonderful centerpiece for a front window, especially in a home without room for a real tree. Draw the tree outline first with a chalk marker: a tall triangle with gently curved, layered branches and a small trunk at the bottom. Fill it in with green tempera paint, using two shades of green — a darker green for the shadowed side and a lighter green on the other — to give the branches depth. While the green is still slightly tacky, press on round baubles in red, gold and silver using the end of a cork or a round sponge dabber. Drape a wavy garland across the branches in gold or silver paint, then top the tree with a yellow star. Finish with wrapped presents at the base and a dusting of white snow on the branch tips.
Quick tip: Use a cork dipped in paint to stamp perfectly round ornaments — it is faster and neater than painting circles by hand.
6. Snowman Family in a Falling Snowfall
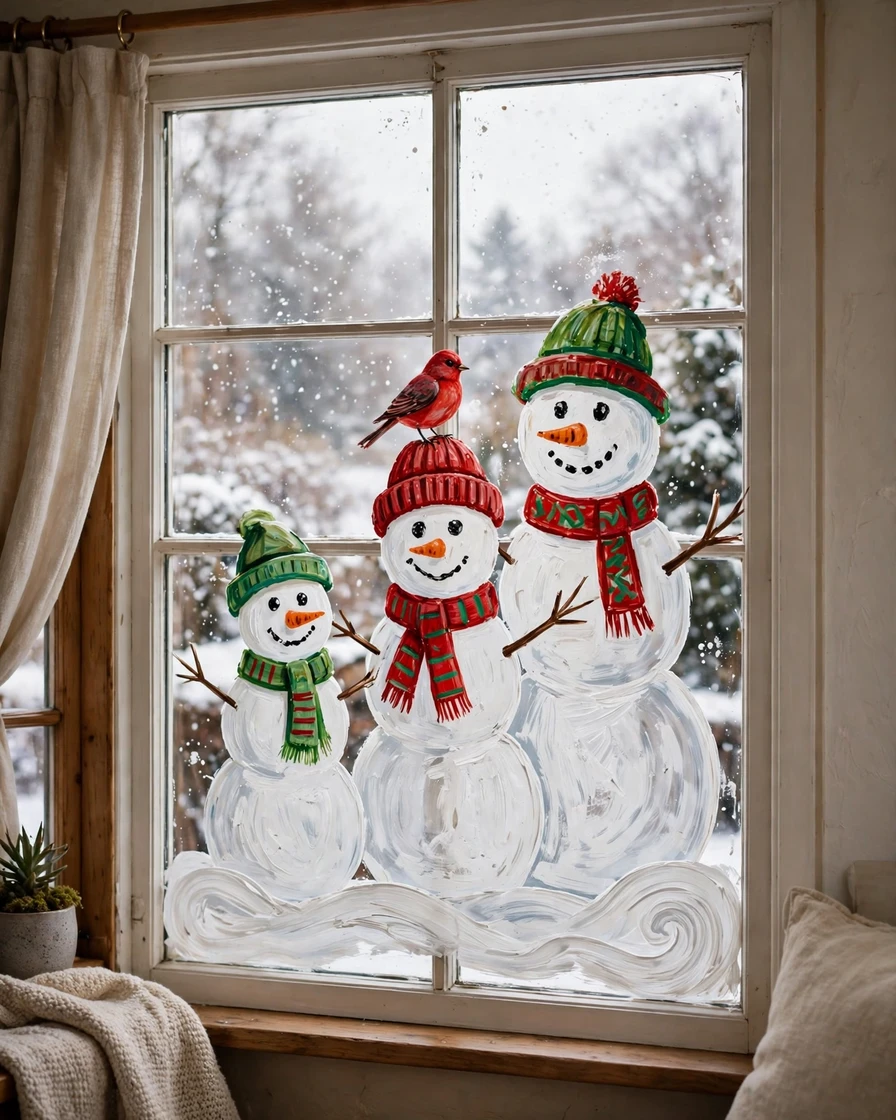
Three snowmen of different sizes — a tall dad, a mum with a scarf, and a little snow child — stand together in a flurry of painted snow, and this design is a favorite with families because children can help paint it. Start with the snow ground: a wavy white band along the bottom of the window. Then paint each snowman from three stacked circles, using a plate and two smaller lids as guides for the body, middle and head. White tempera on glass can look thin, so add two or three coats and let each one dry. Paint coal eyes and smiles with a black marker, orange carrot noses, and bright scarves and hats in red and green. Give each snowman stick arms and a few buttons, then flick white paint from a toothbrush all over the window for a snowfall effect. A red bird perched on one hat is a sweet finishing touch.
Quick tip: Let kids paint the snow dots and scarves — the simple shapes are forgiving and the result still looks charming.
7. Angel with Golden Wings
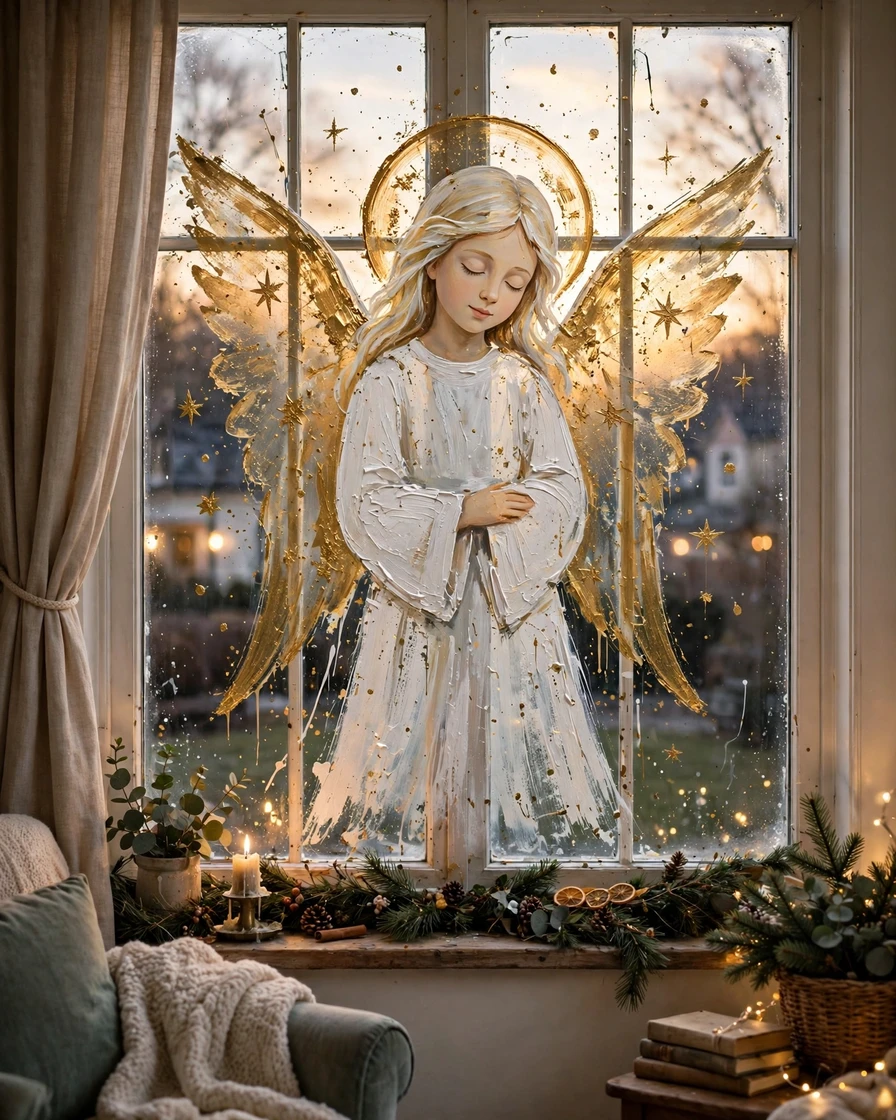
An elegant angel with wide golden wings and a flowing white robe brings a calm, classic feeling to a Christmas window, and it suits a living room or hallway window beautifully. This design needs a template more than most, so print a large angel outline, tape it to the outside of the glass, and trace the main shapes with a white chalk marker. Paint the robe in white tempera mixed with a little pale blue for shading, then fill the wings with gold metallic tempera or gold window paint, working in long strokes that follow the feather shapes. Add a soft halo above the head in gold, and use a fine brush for the face — simple closed eyes and a gentle smile read better than detailed features at window size. Finish with small gold stars scattered around the wings and a dusting of white glitter paint on the robe hem.
Quick tip: Metallic gold tempera looks best in two thin coats; one thick coat dries patchy and dull on glass.
8. Candy Cane and Peppermint Border
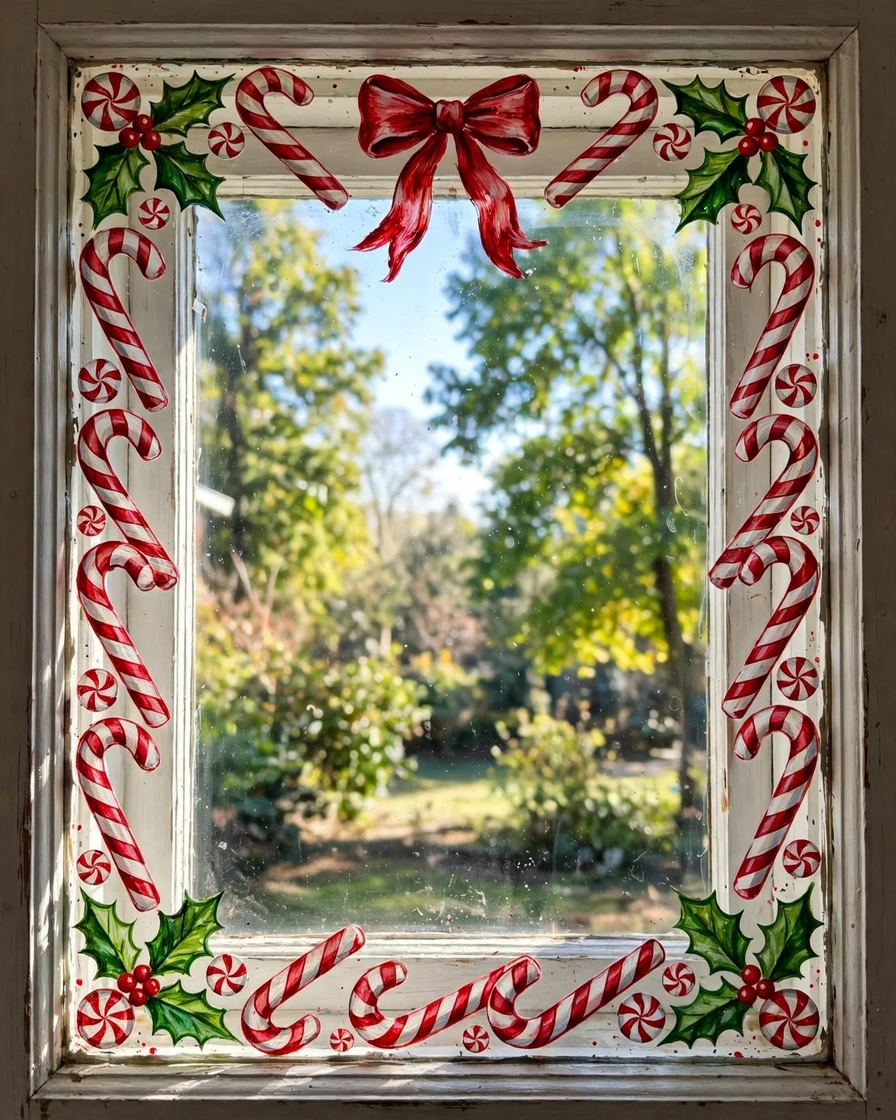
A candy cane border frames the whole window like a giant sweet shop display, and it is one of the fastest designs to paint because it is made of simple repeated shapes. Run the border around all four edges of the glass, leaving the middle clear so light still floods in. Paint red and white striped candy canes in the corners and along the sides, alternating their direction so they lean toward each other like a frame. Use painter’s tape on the glass to mark straight edges for the cane shafts, then paint the red stripes freehand in diagonal bands. Fill the gaps between canes with peppermint swirls — white circles with a red spiral painted in with a fine brush — and add green holly leaves and red berries at the corners. A red bow at the top center ties the whole frame together.
Quick tip: Stick painter’s tape along the window frame first to keep the border neat and protect the wood or uPVC from paint.
9. Pine Branches, Holly and Red Berries
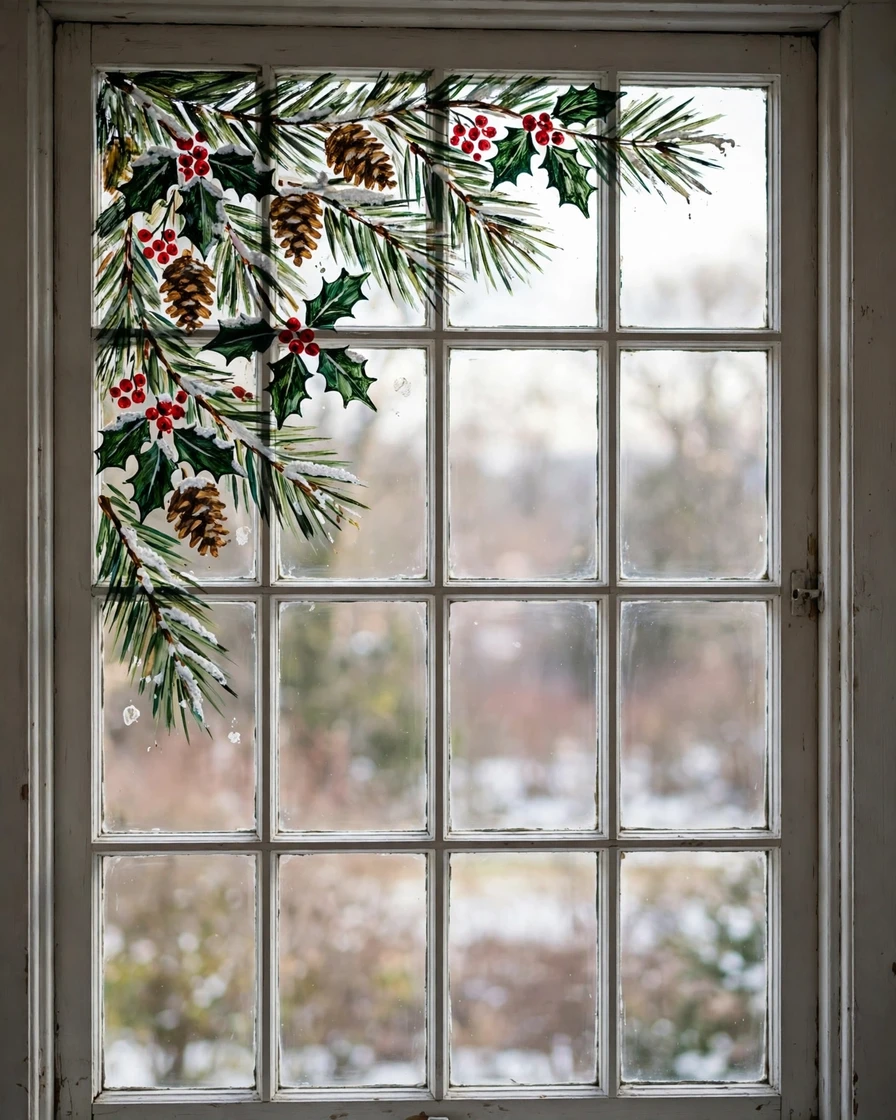
Overlapping pine branches with holly leaves and clusters of red berries give a window a natural, woodland Christmas look that works from early December right through to New Year. This is a corner design, so it suits windows where you want most of the glass left clear. Start in one top corner and work diagonally inward, painting long pine branches first with a fan brush or a dry-brush technique — load the brush lightly and drag it outward so the needles look feathery. Layer a second branch over the first in a slightly different green for depth. Then add holly leaves in dark green with a pointed oval shape, and stamp red berries in clusters of three using the tip of a cotton swab or a round brush handle. Add a few pinecones in brown with darker strokes for texture, and finish with a dusting of white snow on the branch tips.
Quick tip: A fan brush is the secret to realistic pine needles — one cheap fan brush will transform this whole design.
10. Nativity Silhouette Scene
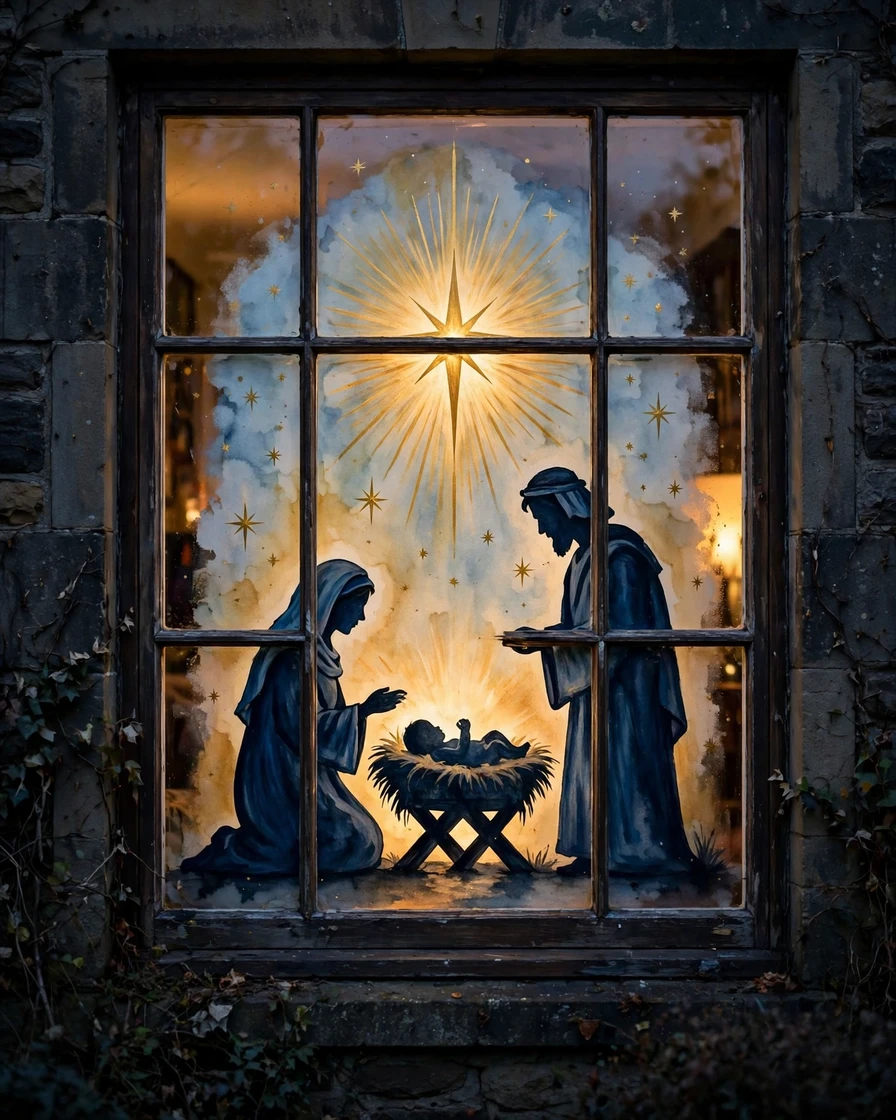
A nativity silhouette — Mary, Joseph and the manger under a bright star — painted in deep blue and gold is a reverent, beautiful choice for a front window. The design works best as a single dark shape against a lighter background, so start by painting a soft wash of pale blue and gold across the whole pane to suggest a night sky. Once it dries, tape a nativity template to the outside of the glass and trace the figures with a dark blue or black marker. Fill the stable, figures and animals with a deep navy tempera paint, keeping the edges clean with a fine brush. Paint the star of Bethlehem above the stable in bright gold, with rays spreading outward, and add small gold stars across the sky. Leave the manger area slightly lighter, or paint a small warm glow around it, so the eye goes straight to the heart of the scene.
Quick tip: Keep the silhouette one solid color with no internal detail — the simple shapes read more clearly from the street.
11. Gingerbread House with Candy Details
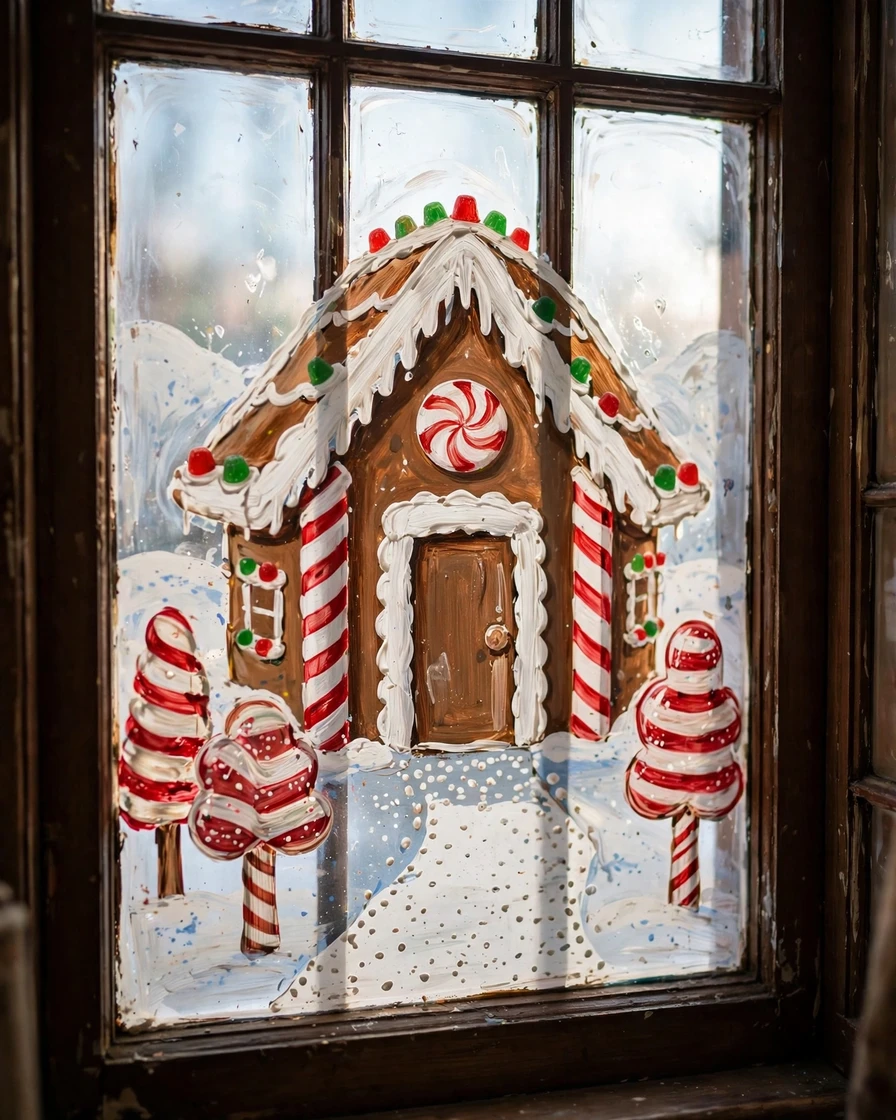
A gingerbread house with white icing trim, candy cane pillars and gumdrop decorations is a sweet, playful design that children love — and it is surprisingly easy because the shapes are all simple and bold. Draw the house outline with a chalk marker: a square body, a steep triangular roof, a round door and two square windows. Fill the walls with warm brown tempera paint, then add thick white “icing” along the roof edges, the door frame and the window frames, using a squeeze bottle or a piping-style nozzle for a real icing effect. Paint candy canes as pillars on either side of the door, red and green gumdrops along the roofline, and a peppermint swirl above the door. Add a snowy path of white dots leading up to the house, and a few candy-striped trees beside it.
Quick tip: Squeeze bottles from a craft store give you piped-icing control on glass — far easier than a brush for the white trim.
12. Woodland Animals in the Snow
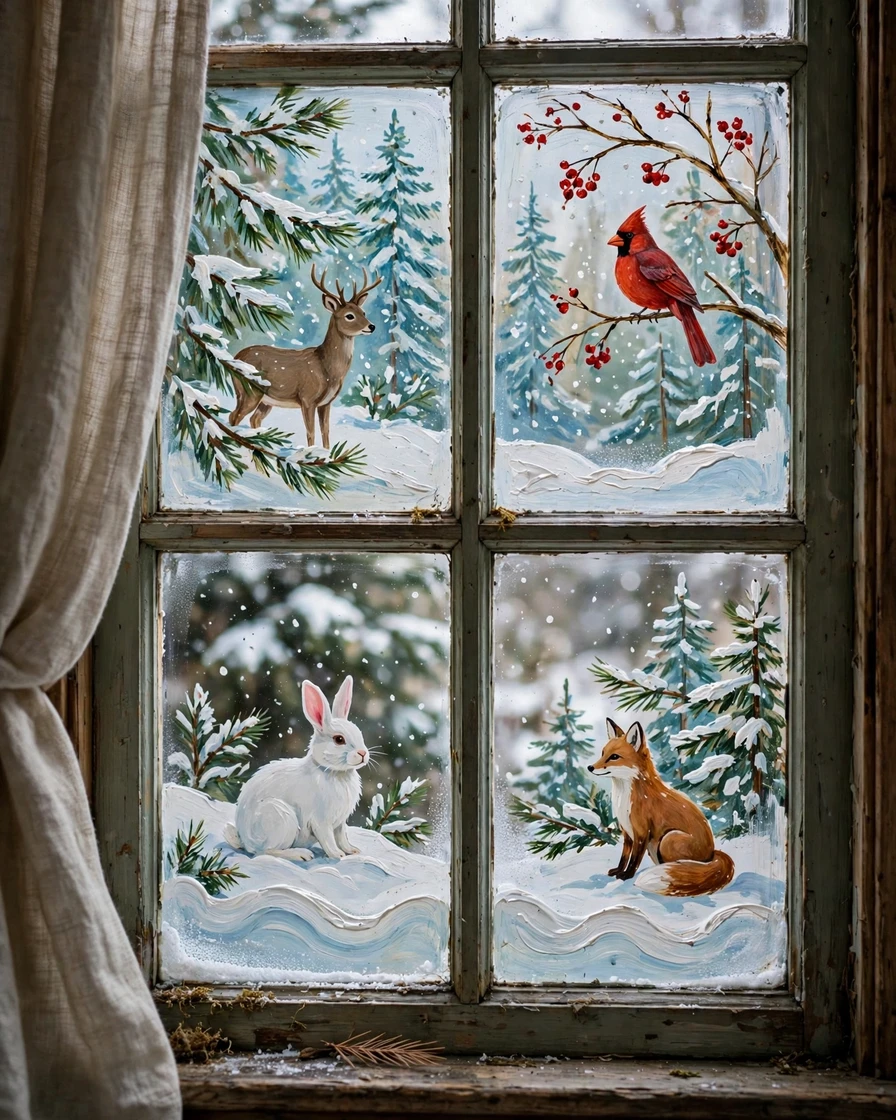
A deer, a red cardinal, a rabbit and a fox gathered among snowy pine trees make a window feel like a page from a storybook, and this nature-inspired scene suits a garden-facing window perfectly. Plan the layout first: tall pine trees at the back, a wavy snowdrift along the bottom, and the animals spaced out across the middle so each one has room to breathe. Paint the trees and snow first, then add the animals using printed templates taped to the outside of the glass. Use brown tempera for the deer and fox, white for the rabbit, and a vivid red for the cardinal so it pops against the green trees. Keep the animals simple and slightly stylized rather than realistic — clean shapes read better on glass. Add falling snow with a toothbrush flick and a few red berries on a branch near the cardinal.
Quick tip: Paint the biggest animal first and the smallest last — it is easier to judge spacing when the anchor animal is already in place.
13. Poinsettia and Holly Corner Spray
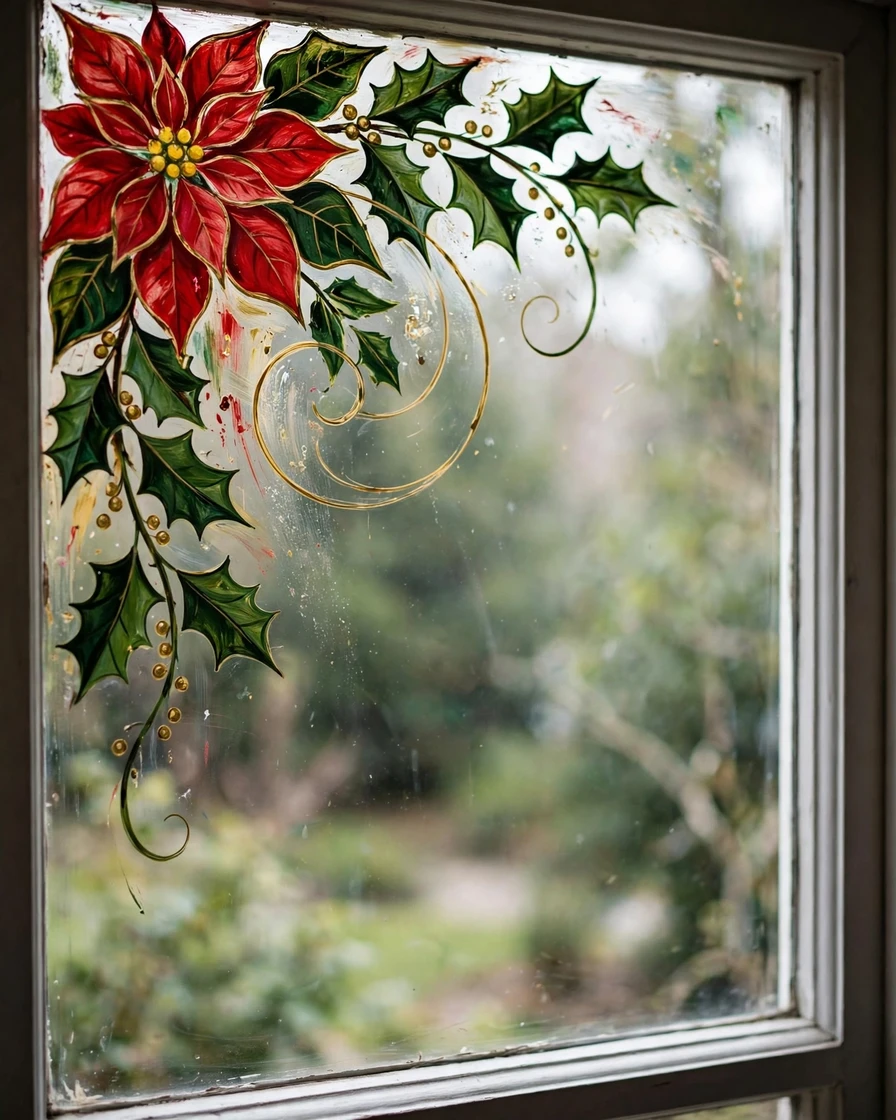
A lush spray of red poinsettias, holly leaves and gold berries sweeping across one corner of the window adds instant Christmas color without covering the glass. This design is all about the flower shapes, so practice the poinsettia first on paper: five or six pointed petals radiating from a center, with a second smaller layer on top for depth. Paint the petals in a rich red tempera, then add a darker red line down the center of each petal and a cluster of small yellow dots in the middle for the flower’s center. Surround the blooms with dark green holly leaves and long trailing stems, then add gold berries stamped with a cotton swab. Work from the corner outward in a fan shape, placing the largest bloom at the corner and smaller buds toward the edges. A thin gold swirl line through the spray ties it together.
Quick tip: Outline each petal with a fine gold marker once the red paint dries — the gold edge makes the flowers look hand-painted and expensive.
14. Starry Night Sky with Northern Lights
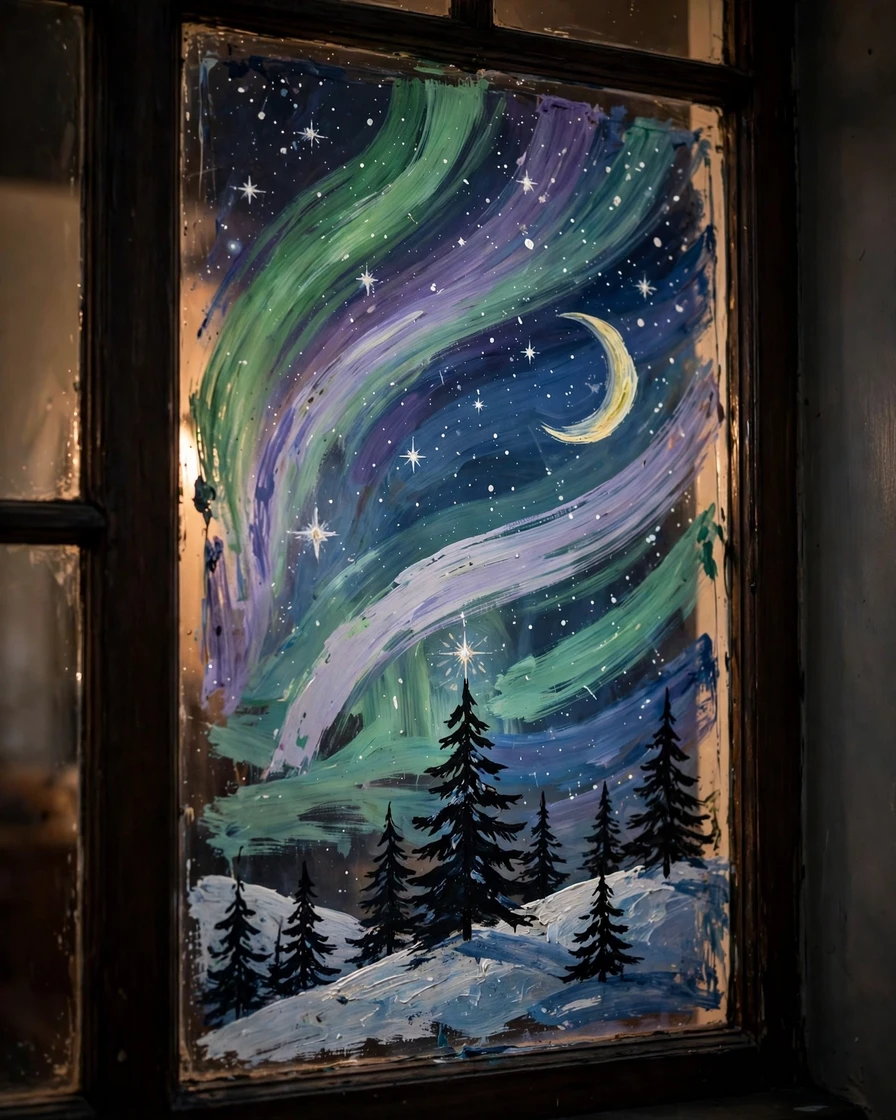
Sweeping ribbons of green and purple northern lights across a starry night sky turn a window into a magical winter display, and it looks extraordinary after dark with the room lights low. Start by painting a deep blue night sky across the whole pane using a large sponge for a smooth, even wash, leaving some patches lighter for depth. While the blue is still damp, blend in sweeping arcs of green and purple tempera with a wide dry brush, dragging the colors upward in long curves to suggest the aurora. Add a crescent moon in pale yellow, then flick white paint from a toothbrush for stars of different sizes. Paint a simple snowy hill and a few black pine tree silhouettes along the bottom to ground the scene, and add one bright star above the tallest tree.
Quick tip: Blend the aurora colors while the blue base is still damp — the soft edges are what make the lights look real.
15. Hand-Lettered “Merry Christmas” with a Wreath

Big hand-painted lettering framed by a green wreath is the classic Christmas window, and it is the design every passerby will read and remember. The image shows “Merry Christmas” in bold white and gold script across the center of the glass, ringed by a full wreath of pine, holly and red berries with a red bow at the bottom. Print the words in a large script font, tape the printout to the outside of the glass, and trace each letter from inside with a white chalk marker. Fill the letters with white tempera, then add a gold outline or gold shadow on one side of each letter for a professional look. Paint the wreath as a thick green ring around the words, layering pine branches, holly leaves and berry clusters, and finish with a big red bow at the bottom. Let the letters dry fully before painting the wreath so the colors stay clean.
Quick tip: If you paint from inside, the words will read backwards from the street — tape the template on the outside and paint the letters from outside, or mirror the printout first.
Final Thoughts
Window painting is one of the simplest and most joyful ways to decorate for Christmas. It costs very little, takes only an afternoon, and turns a plain pane of glass into something your whole street will enjoy. Start with the easiest design — the frosted snowflakes — and work your way up to the scenes that take a little more patience. Use washable tempera paint or window markers, keep a damp cloth nearby for mistakes, and remember that every design washes off in January with warm soapy water. Pick your favorite idea, gather your paints, and make this the Christmas your windows shine.
Frequently Asked Questions
What is the best paint for painting on windows at Christmas?
Washable tempera paint is the best choice for Christmas window painting. It is cheap, comes in bright colors, goes on smoothly with a brush or sponge, and washes off glass easily with warm soapy water. Chalk markers and window paint pens are great for outlines and lettering. Avoid acrylic paint and oil-based paint, which bond to glass and are very hard to remove.
How do I remove Christmas window paint after the holidays?
Warm soapy water and a soft cloth remove most tempera paint in minutes. For stubborn patches, spray the glass with a little white vinegar, let it sit for a minute, then wipe and scrape gently with a plastic scraper or an old credit card. Finish with glass cleaner for a streak-free shine. Never use a metal scraper, which can scratch the glass.
Should I paint my Christmas window design from inside or outside?
Paint from the inside whenever you can — the design stays protected from rain and frost, and you can work in comfort. The catch is that lettering reads backwards from the street, so paint words from the outside or use a mirrored template. For designs without text, inside is almost always the better choice.
How can I get clean lines and shapes when painting on glass?
Use stencils, printed templates taped to the far side of the glass, and painter’s tape for straight edges. Trace outlines first with a chalk marker, then fill in with paint. Keep a damp cotton swab nearby to fix wobbles while the paint is wet, and let each layer dry before adding detail on top.
Will window paint damage my glass or window frames?
No, as long as you use washable tempera paint or chalk markers and keep paint off the frames. Protect wooden frames with painter’s tape before you start, and never use oil-based paint, spray paint or acrylics on glass. Washable tempera wipes off cleanly and leaves no residue behind.