
Halloween has always been one of my favorite times of the year for decorating. There is something incredibly fun about turning an ordinary home into a spooky, mysterious, and slightly magical place using simple materials you may already have lying around.
The best part is that Halloween decorating does not have to mean spending a small fortune on store-bought skeletons, oversized inflatables, or expensive light-up displays. Some of the most memorable decorations I have made were created from cardboard boxes, old jars, paper, fabric scraps, branches from the yard, and a little imagination.
That is why I love homemade Halloween decoration ideas. They give you complete freedom to choose your style. You can make your decorations creepy and dramatic, cute and family-friendly, rustic and vintage, or even elegant and sophisticated.
DIY decorations are also a great way to spend an autumn afternoon with family or friends. Children can help with simpler projects, while adults can experiment with more detailed designs for the porch, living room, dining table, windows, or backyard.
If you are ready to make your home look Halloween-ready without relying entirely on expensive decorations, here are 15 homemade Halloween decoration ideas that are creative, affordable, and surprisingly easy to make.
1. Create Floating Cheesecloth Ghosts
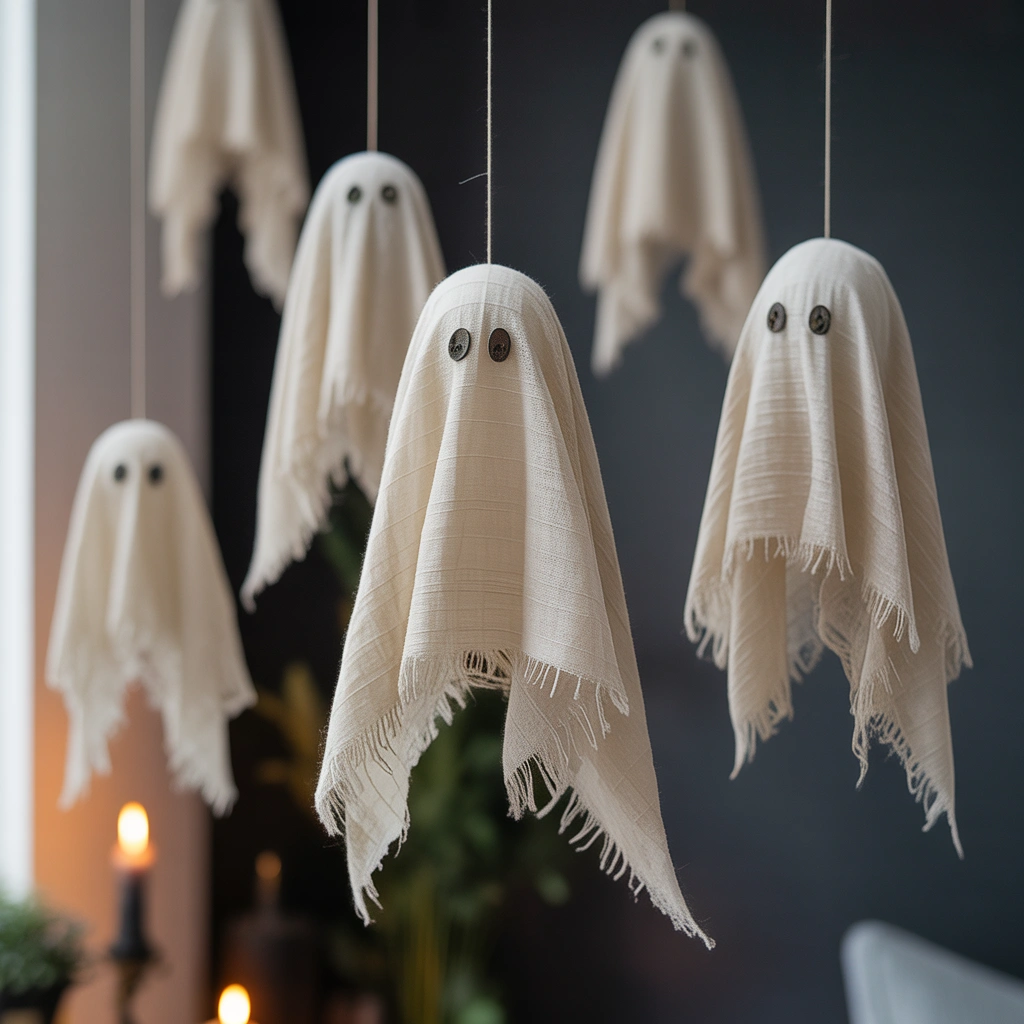
Floating ghosts are one of those classic homemade Halloween decorations that look far more complicated than they actually are.
I especially like them because they can be customized according to the mood you want to create. Small ghosts can look playful and cute, while larger ones hanging in a dark hallway can be genuinely spooky.
To make them, you will need cheesecloth, liquid starch or a homemade fabric-stiffening mixture, balloons, bottles, and something to create the arms.
Inflate a balloon and place it over the top of a bottle. The balloon forms the ghost’s head, while the bottle gives the decoration height. Bend pieces of wire or pipe cleaners on either side to create arms.
Soak the cheesecloth in fabric stiffener and drape it over your form. Arrange the fabric so that some sections spread across the surface beneath it. These areas will eventually support the ghost when the bottle and balloon are removed.
Allow everything to dry completely.
Once the fabric has hardened, carefully remove the balloon and bottle. The cheesecloth should retain its ghostly shape.
You can leave the face completely blank for an eerie appearance or glue on small black felt eyes.
For an even more dramatic effect, place battery-powered LED lights underneath or behind several ghosts.
I love displaying these on a console table surrounded by miniature pumpkins. They also look fantastic hanging from tree branches, porch ceilings, or stair railings.
If you create several ghosts in different sizes, you can make an entire ghost family for your Halloween display.
2. Turn Mason Jars Into Glowing Halloween Lanterns
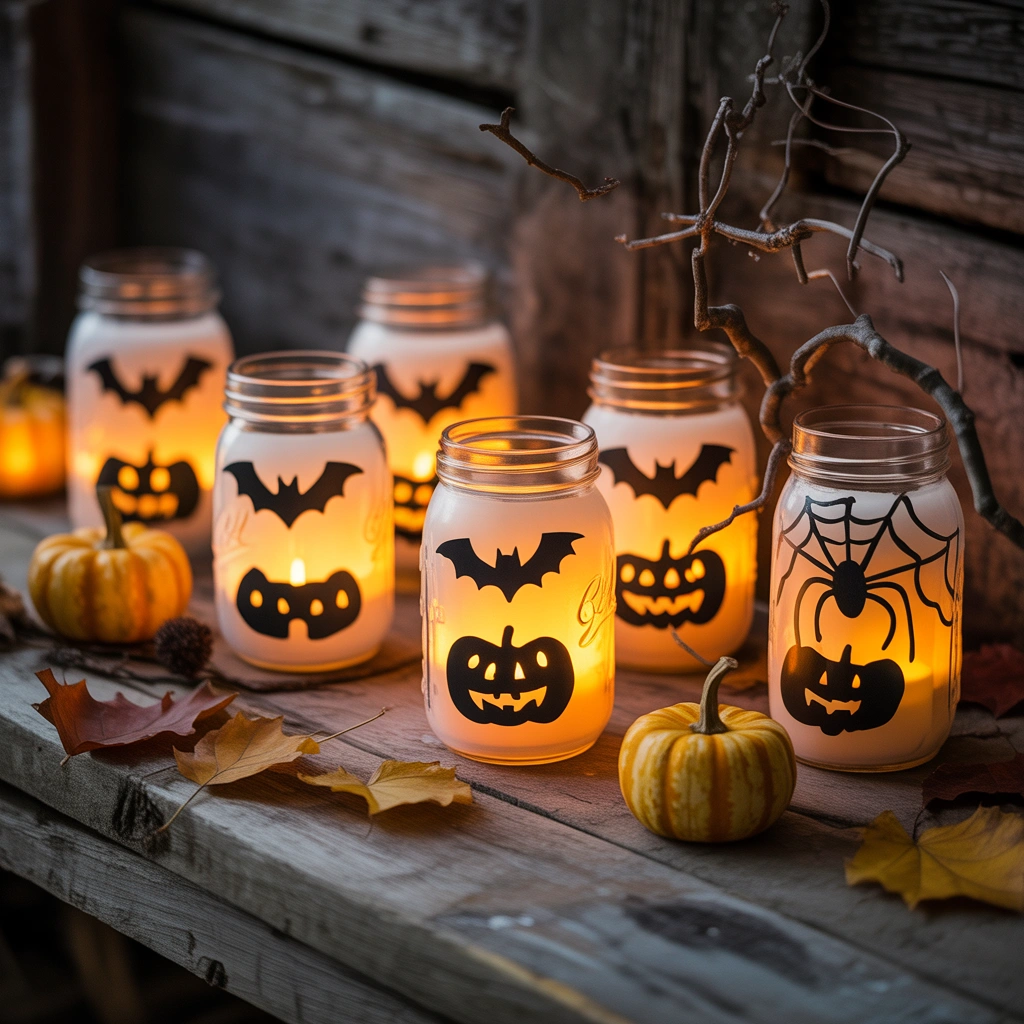
Old glass jars are incredibly useful for homemade Halloween decorations.
Instead of throwing away pasta sauce jars, jam jars, or mason jars, I like transforming them into glowing Halloween lanterns.
Start by cleaning the jars thoroughly and removing the labels.
Then decide what characters you want to create.
Some easy possibilities include:
- Jack-o’-lanterns
- Ghosts
- Frankenstein monsters
- Mummies
- Black cats
- Spiderweb lanterns
For a pumpkin lantern, paint the outside of the jar with translucent orange paint and add a black jack-o’-lantern face.
For a ghost, use white paint and add simple black eyes and a mouth.
A Frankenstein jar can be painted green with black hair, stitches, and a crooked smile.
One of my favorite versions is the mummy lantern. Wrap the jar loosely with strips of white gauze and glue two googly eyes underneath.
When the jars are finished, place battery-operated tea lights inside.
I strongly prefer battery-powered candles instead of real flames, especially if children or pets will be nearby.
Arrange several Halloween lanterns together along your porch steps, fireplace mantel, dining table, or windowsill.
Once the room gets dark, the glowing jars instantly create that cozy-but-spooky Halloween atmosphere.
3. Make Creepy Silhouettes for Your Windows
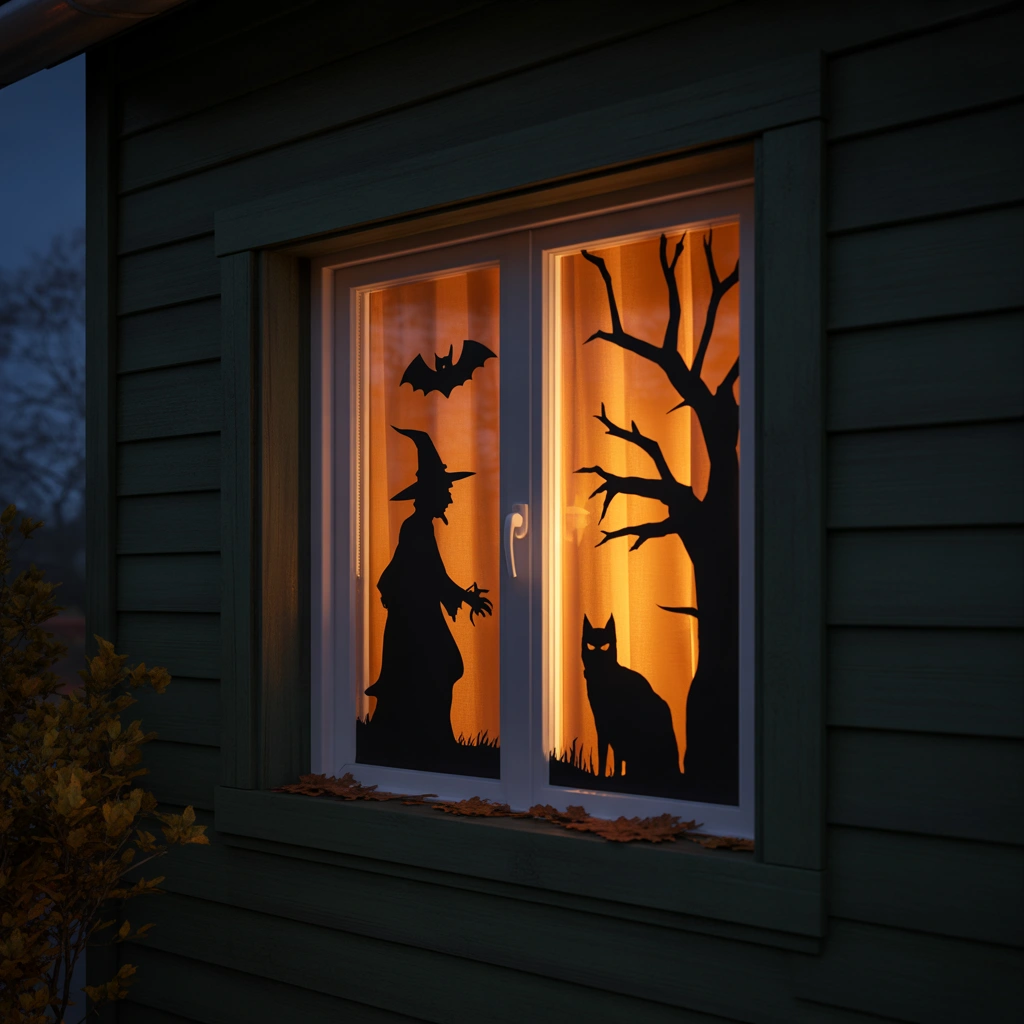
Window silhouettes are one of the easiest ways to make your house look dramatically different on Halloween night.
From outside, they can create the illusion that mysterious creatures are standing inside your home.
All you need is black cardstock, poster board, or thick black paper.
Choose your shapes depending on how scary you want the display to appear.
You could make silhouettes of:
- Witches
- Bats
- Black cats
- Ghosts
- Zombies
- Skeletons
- Ravens
- Haunted trees
Trace or draw your design onto black paper and carefully cut it out.
Then attach the silhouette to the inside of your window using clear tape.
When the room behind the window is illuminated, the dark shape becomes clearly visible from outside.
For larger windows, I like creating complete scenes rather than using individual shapes.
For example, you could make a witch standing beside a bubbling cauldron with several bats flying overhead.
Another fun option is creating two large monster hands that appear to be pressed against the glass.
This project costs very little, but it can make a huge visual impact from the street.
4. Build a DIY Halloween Cemetery in Your Yard
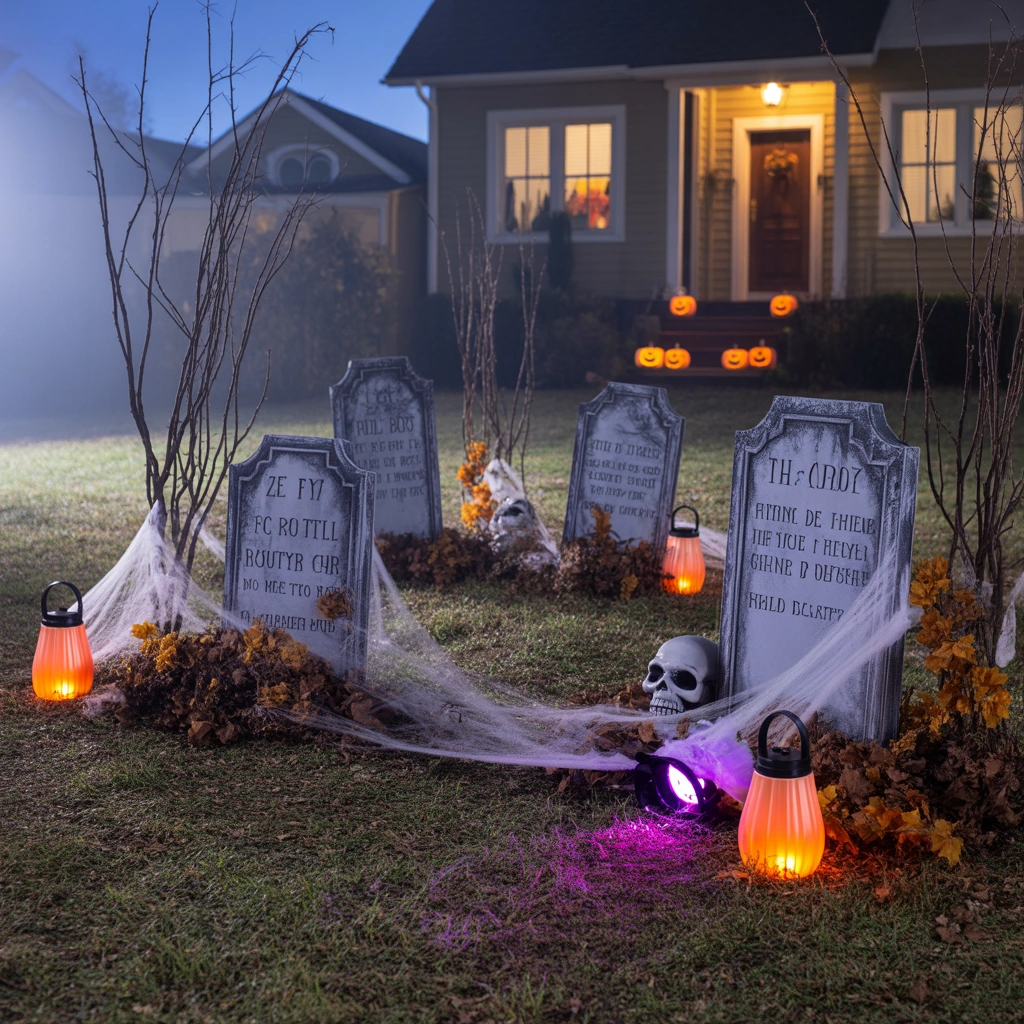
Nothing transforms an ordinary front yard into a Halloween display faster than a miniature graveyard.
Fortunately, homemade tombstones are relatively easy to make.
You can use thick cardboard, foam board, or insulation foam depending on how durable you want them to be.
Cut the material into different tombstone shapes. Avoid making every gravestone identical because variation makes the cemetery look more realistic.
Paint each piece gray.
Once the base coat dries, lightly sponge darker gray and black paint around the edges to create an aged stone effect.
Then add funny or spooky names.
You could write traditional phrases such as:
“Rest in Peace”
or invent fictional names for your haunted cemetery.
For a more weathered appearance, paint small cracks across the stones and add patches of artificial moss.
Position your tombstones at slightly different angles in the yard rather than creating perfectly straight rows.
Scatter dry leaves around them and place a few plastic bones partially beneath the soil.
At night, illuminate the cemetery with low outdoor lights.
I also like adding a homemade wooden sign near the entrance that says something like “Haunted Cemetery” or “Enter If You Dare.”
It creates a complete Halloween scene rather than simply placing random decorations across the lawn.
5. Make a Giant Spiderweb From Rope
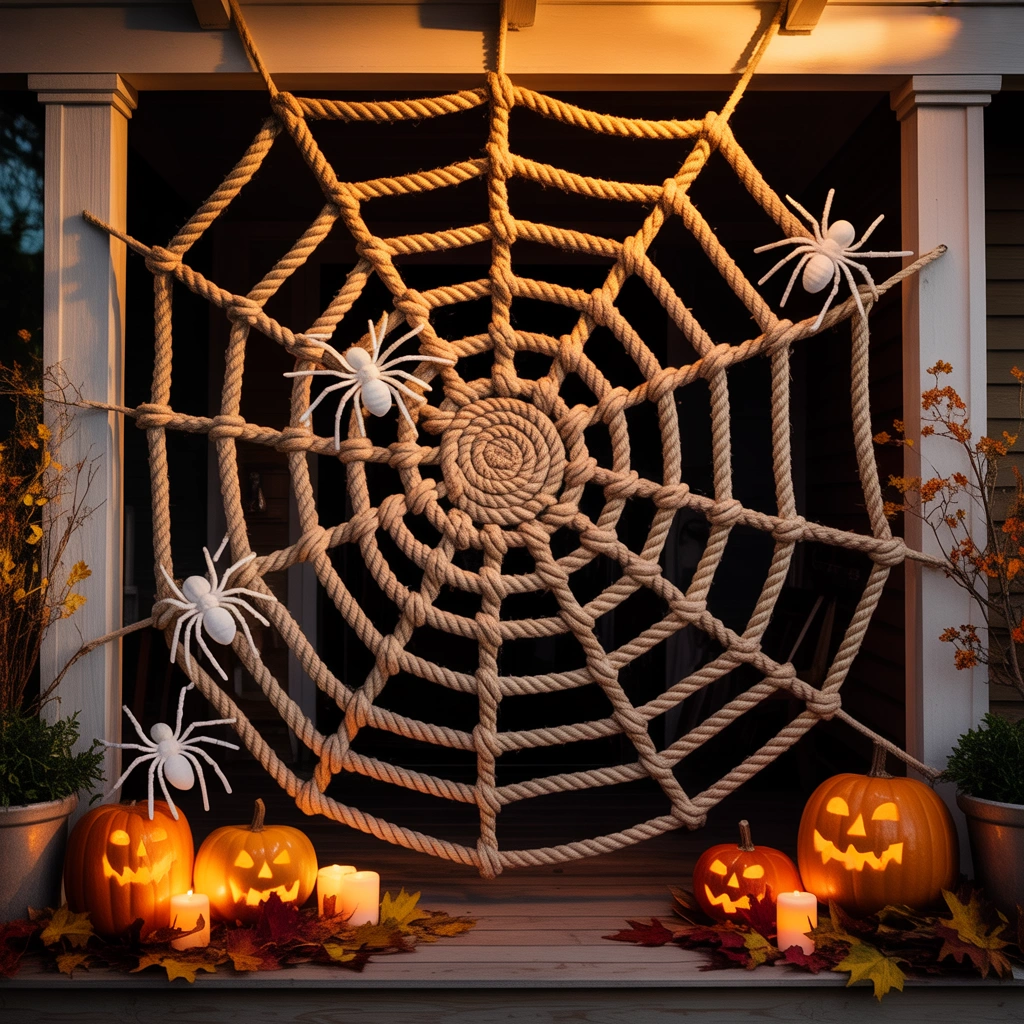
If you have a large porch, fence, tree, or empty exterior wall, a giant spiderweb can fill the space beautifully.
It is also one of the easiest DIY Halloween decorations to create on a large scale.
Use white clothesline, yarn, or rope.
Start by creating several long lines crossing through one central point. These will form the main structure of the web.
Next, attach additional pieces of rope in circular or slightly irregular patterns moving outward from the center.
Do not worry about making every section perfectly symmetrical. Natural spiderwebs are not always perfectly even, and slightly irregular lines often make homemade decorations look more interesting.
Once your web is complete, add one or two oversized spiders.
You can purchase plastic spiders, but making your own giant spider is even more fun.
Try using a black balloon, foam ball, or painted plastic container for the body. Attach long legs made from pool noodles, wire, cardboard tubes, or black pipe insulation.
Place the spider in the center or slightly off to one side.
The combination of the huge web and oversized spider looks especially impressive across a garage door or porch railing.
6. Craft a Spooky Halloween Wreath
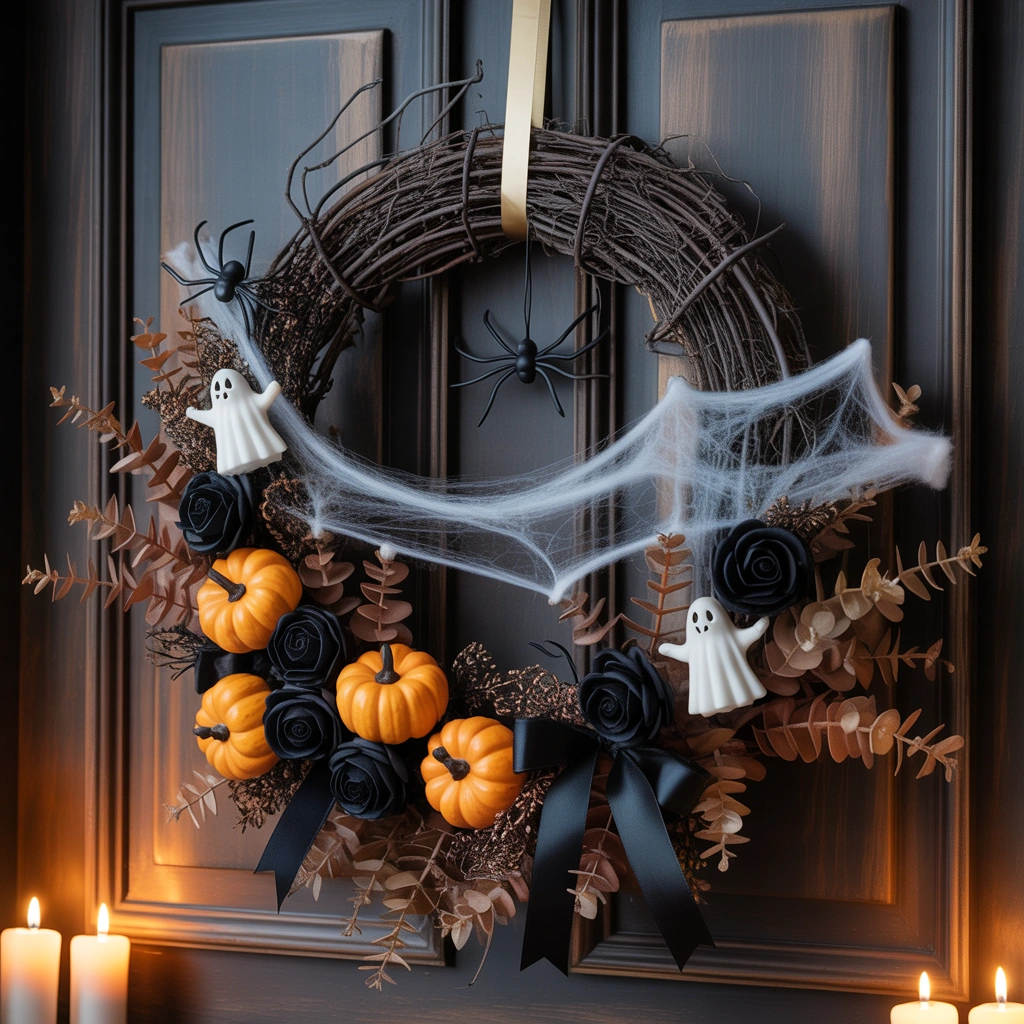
A Halloween wreath is a great way to decorate your front door without covering the entire porch.
I like homemade Halloween wreaths because they can match almost any decorating style.
For a traditional spooky wreath, start with a grapevine or foam wreath base.
Wrap it with black ribbon, dark fabric, or black mesh.
Then decorate it with Halloween elements such as:
- Artificial ravens
- Miniature skulls
- Black roses
- Plastic spiders
- Small pumpkins
- Fake cobwebs
- Orange berries
- Black feathers
You do not need to use every element. In fact, I usually think wreaths look better when they have one clear theme.
For example, you could make an elegant black rose wreath decorated with a single raven.
For something more playful, use orange ribbon, miniature pumpkins, and a smiling ghost.
Another inexpensive idea is making a wreath entirely from black paper bats. Cut dozens of bats in different sizes and glue them around a cardboard ring.
Fold the wings slightly upward before attaching them so the bats appear three-dimensional.
Hang your finished wreath on the front door and you instantly have a welcoming Halloween focal point.
7. Create Paper Bats Flying Across the Wall
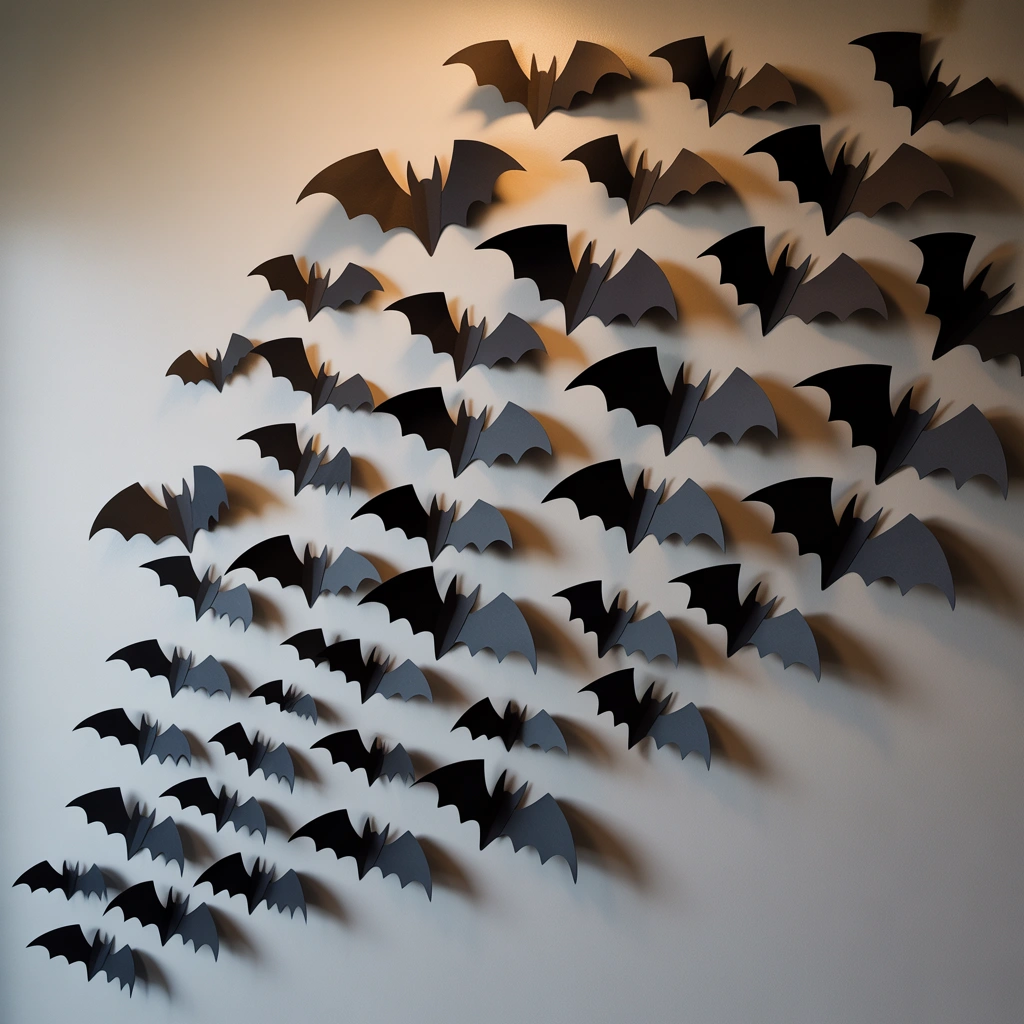
Whenever I need a quick Halloween decorating idea, paper bats are one of the first projects I consider.
They are cheap, simple, and incredibly effective.
All you need is black cardstock, scissors, and removable wall adhesive.
Create several bat templates in different sizes.
Trace the templates onto black paper and cut out as many bats as you need.
Instead of leaving them completely flat, gently fold each bat down the center so the wings lift away from the wall.
This tiny detail makes them look much more realistic.
Arrange your bats in a flowing pattern rather than attaching them randomly.
I like starting with a few large bats near the bottom and gradually using smaller bats as the group moves upward.
It creates the illusion that a swarm is flying across the room.
You can display them above your fireplace, around a mirror, near a staircase, across kitchen cabinets, or around the front door.
For a dramatic Halloween wall, combine dozens of bats with an antique-style mirror or framed artwork.
It is one of the simplest DIY Halloween decorating ideas, yet it photographs beautifully.
8. Make Haunted Portraits From Old Picture Frames
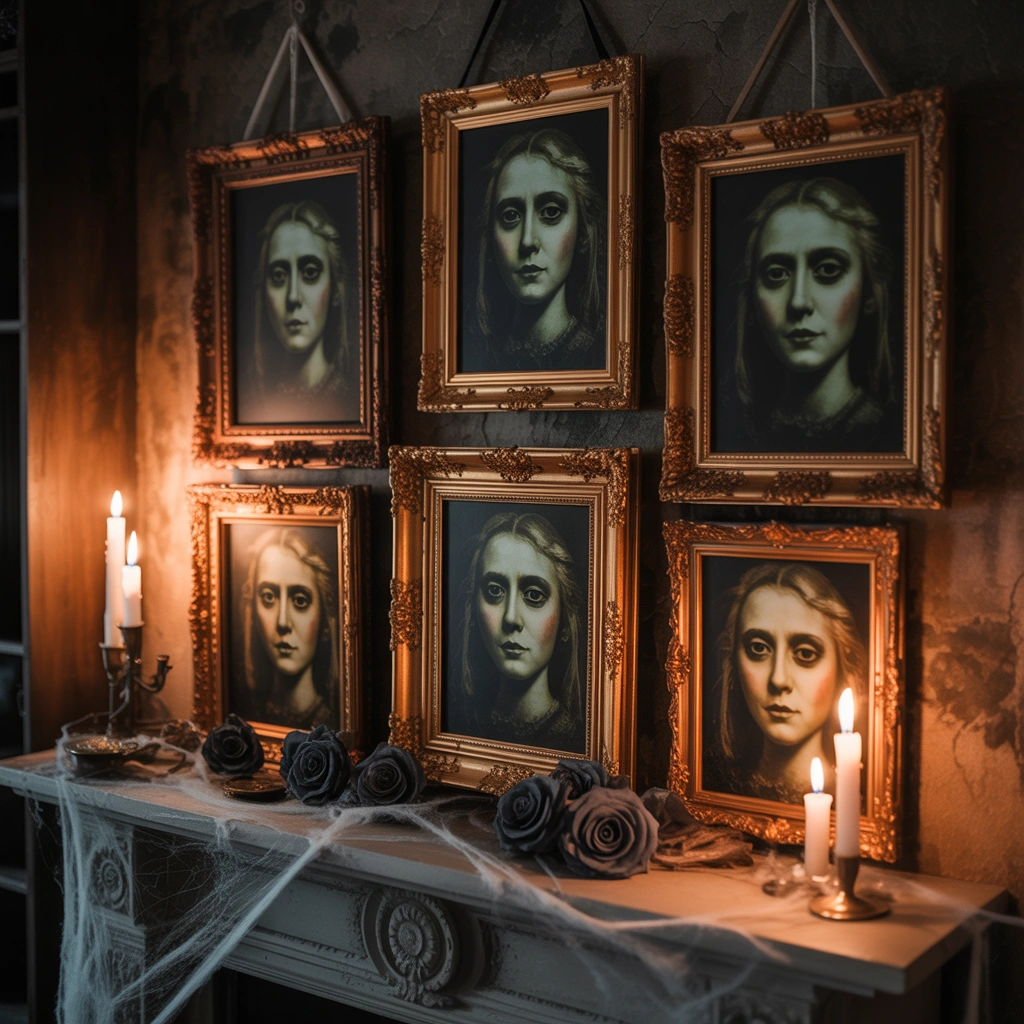
This homemade Halloween decoration is perfect if you want your home to feel like an old haunted mansion.
Start by collecting inexpensive picture frames from around your home, thrift stores, or discount shops.
They do not have to match.
In fact, mismatched frames often look better because they create an old-fashioned gallery wall effect.
Print spooky vintage-style portraits, skeleton illustrations, mysterious silhouettes, or creepy fictional family photographs.
Place them inside your frames.
You can lightly brush the frames with black, bronze, or dark brown paint to make them look aged.
For an additional haunted effect, stretch fake spiderweb material across several corners.
Display the frames together on one wall or arrange them across your mantel.
You could even create names and short fictional histories for the people in each portrait.
When guests ask about them, you can tell them they are former residents of the house.
It is a small storytelling detail that makes Halloween decorating much more entertaining.
9. Turn Pumpkins Into a No-Carve Halloween Display
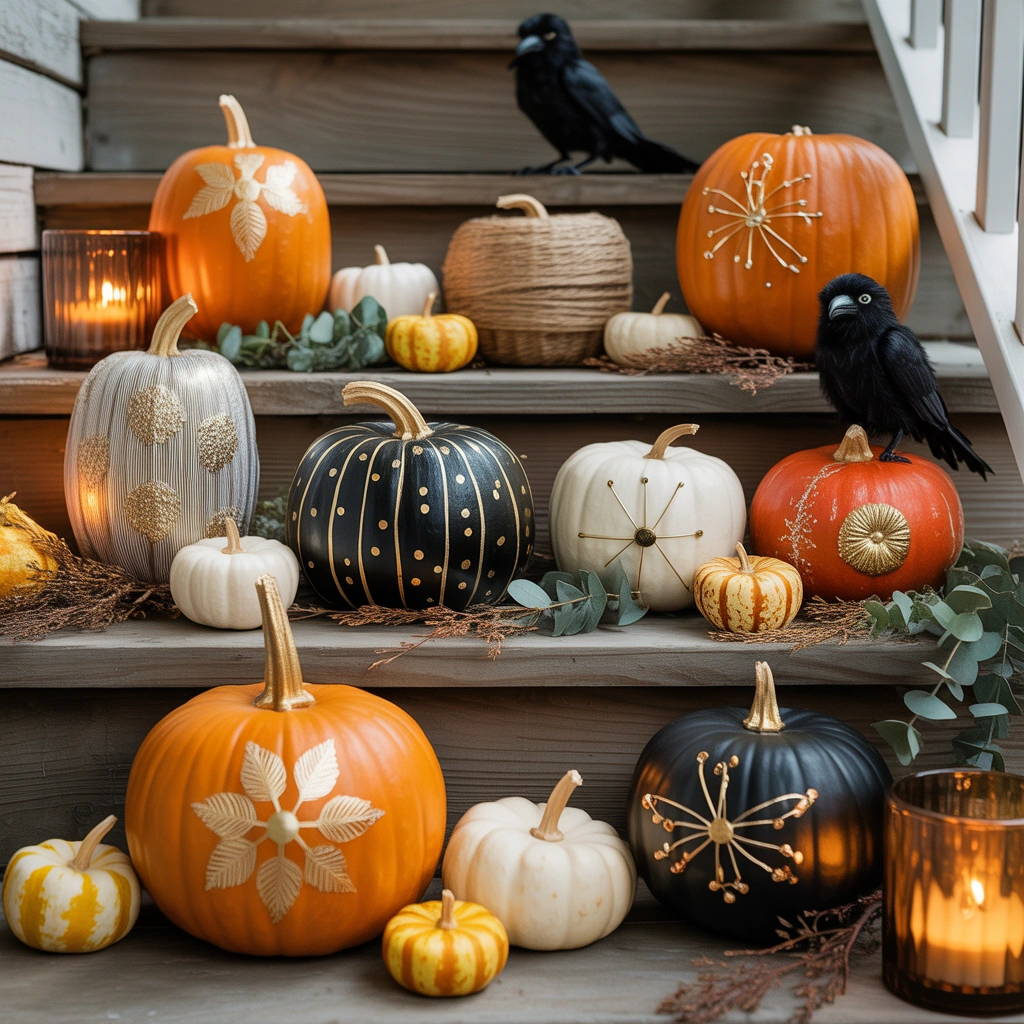
Carved pumpkins are a Halloween classic, but sometimes I prefer decorating pumpkins without cutting them.
No-carve pumpkins last longer and usually create less mess.
They are also easier for younger children to decorate.
You can transform ordinary pumpkins using paint, ribbon, fabric, markers, or adhesive decorations.
For a modern Halloween look, paint several pumpkins black, white, or metallic shades.
Add simple designs such as stars, moons, spiderwebs, ghosts, or bats.
For a mummy pumpkin, wrap white gauze around the pumpkin and leave a small opening for googly eyes.
You can also turn pumpkins into Halloween characters.
A green pumpkin can become Frankenstein, while a white pumpkin can become a ghost.
Another idea I really like is creating a family of black cat pumpkins. Paint the pumpkins black, cut triangular ears from cardstock, and add yellow paper eyes.
Arrange your decorated pumpkins on porch steps or around the front entrance.
Combining different sizes gives the display more depth and makes it look professionally styled.
10. Make Hanging Ghosts From Old White Fabric
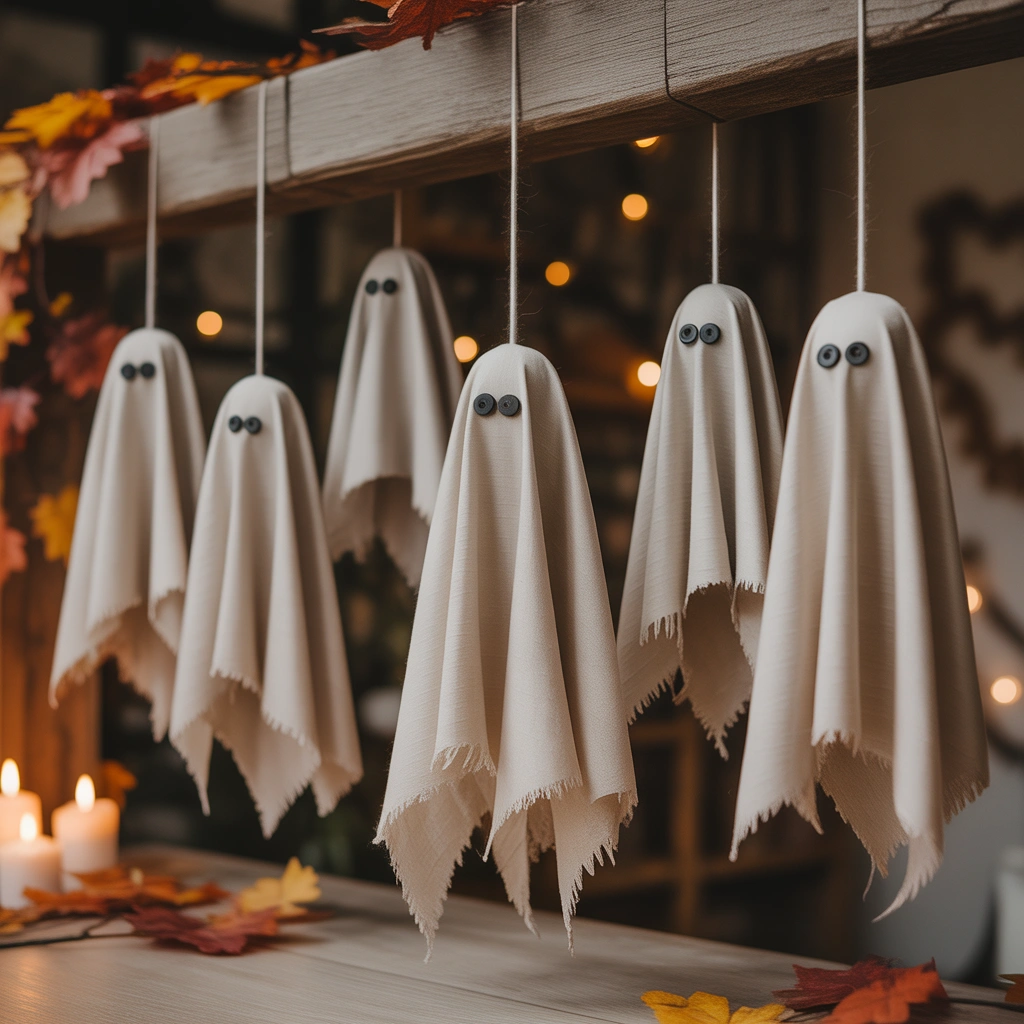
If you have old white sheets, pillowcases, tablecloths, or fabric scraps, do not throw them away before Halloween.
They can become simple hanging ghosts.
Place a foam ball, crumpled newspaper, or lightweight plastic ball in the center of the fabric to form the head.
Wrap a rubber band or piece of string around the fabric beneath the ball.
Then allow the remaining fabric to hang loosely.
Draw or attach dark eyes and a mouth.
Tie clear fishing line around the top and suspend the ghost from a tree, porch ceiling, or doorway.
The best thing about these ghosts is how they move in the wind.
Even a gentle breeze can make them sway and spin, giving your yard an eerie animated effect without electricity or motors.
Try hanging several ghosts at different heights from the same tree.
At night, place an outdoor spotlight beneath them.
The moving fabric creates spooky shadows across the surrounding branches and ground.
11. Design a Witch’s Potion Bottle Collection
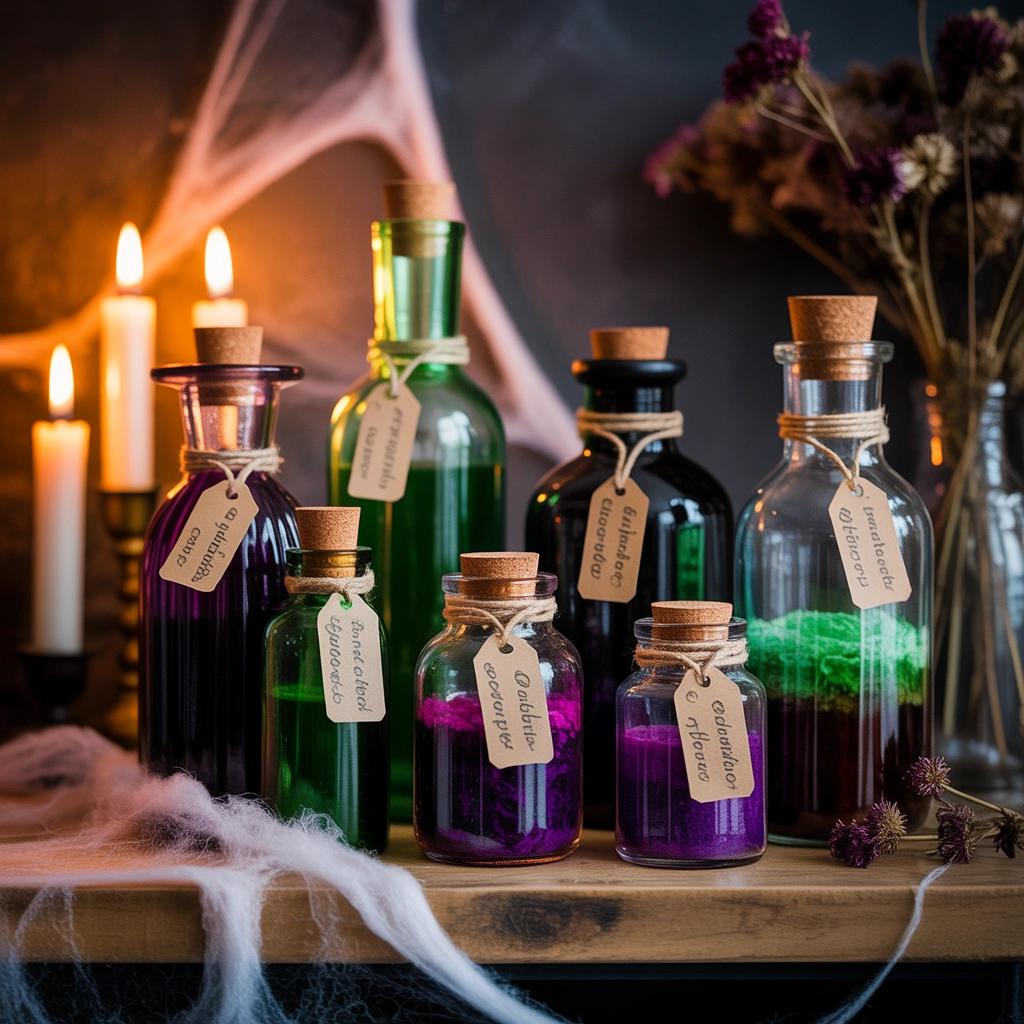
A collection of mysterious potion bottles can turn an ordinary shelf into a miniature witch’s laboratory.
I love this project because almost any empty glass bottle can be used.
Save bottles from sauces, drinks, oils, or condiments.
Remove the labels and wash everything carefully.
Create your own Halloween labels using names such as:
“Witch’s Brew”
“Dragon Blood”
“Spider Venom”
“Zombie Tonic”
“Bat Wing Extract”
“Moonlight Potion”
“Ghost Essence”
Print the labels or make them by hand.
To create an aged appearance, lightly stain white paper with coffee or tea before attaching it to the bottles.
Fill clear bottles with colored water.
A few drops of food coloring can create deep red, green, purple, or blue potions.
For extra texture, add harmless objects such as dried herbs, plastic spiders, fake eyeballs, or small rubber snakes.
Place corks in the tops if possible.
Arrange your potion bottles together with old books, candles, miniature skulls, and dried branches.
This decoration works wonderfully on a fireplace mantel, kitchen shelf, entry table, or Halloween party buffet.
12. Create a Homemade Halloween Table Centerpiece
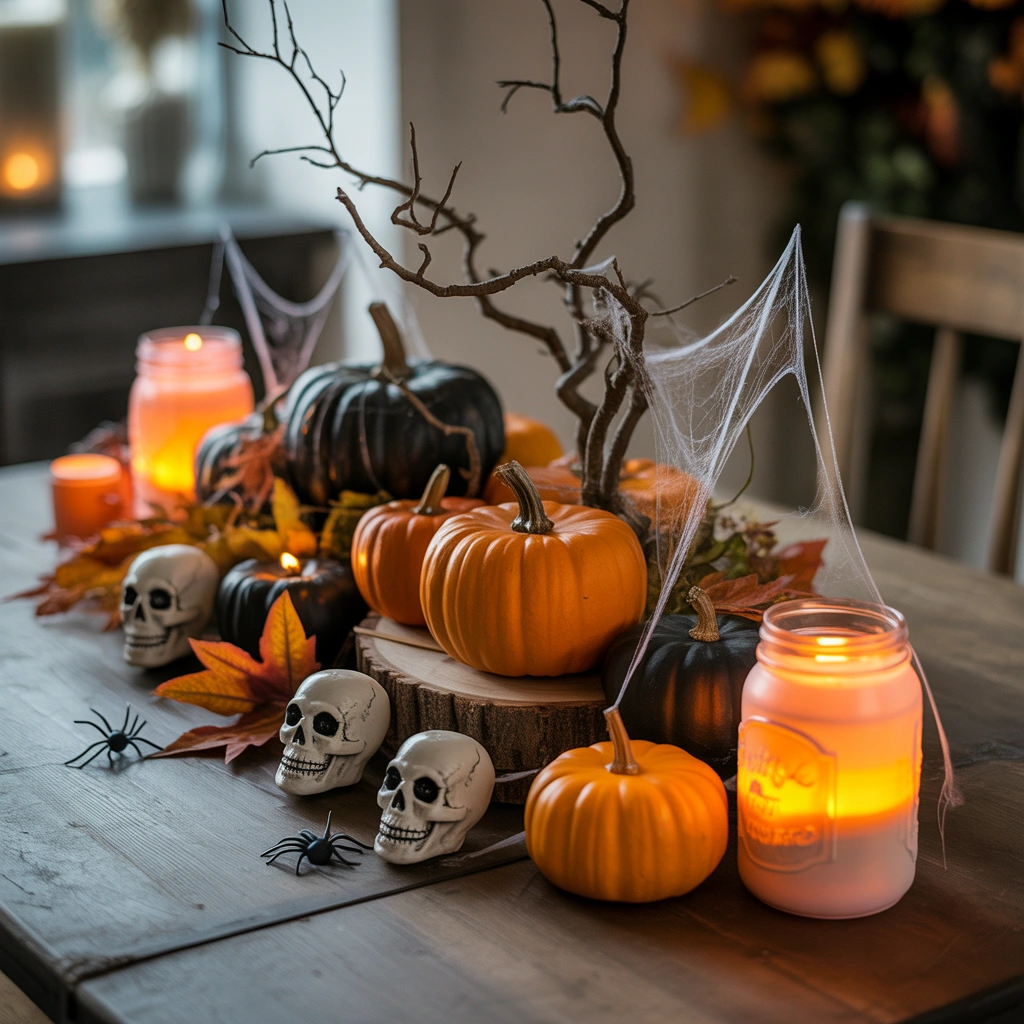
Halloween decorations are often focused on front yards and porches, but I think the dining table deserves attention too.
A homemade Halloween centerpiece can completely change the atmosphere of a dinner or party.
Start with one main focal object.
This could be a pumpkin, black lantern, decorative skull, cauldron, or tall candle holder.
Then build around it with smaller seasonal items.
I like combining miniature pumpkins with dried leaves, pinecones, branches, candles, and black decorative accents.
If you want a darker Gothic look, use black candlesticks, dark red flowers, antique-looking bottles, and artificial ravens.
For a more family-friendly centerpiece, choose orange pumpkins, cheerful ghosts, candy corn colors, and small Halloween signs.
Keep the centerpiece low enough that guests can comfortably see one another across the table.
Battery-operated candles are useful because they provide warm lighting without creating the same fire risk as traditional candles.
Once the lights are dimmed, even a simple table arrangement can look incredibly atmospheric.
13. Make a Creepy Branch Tree
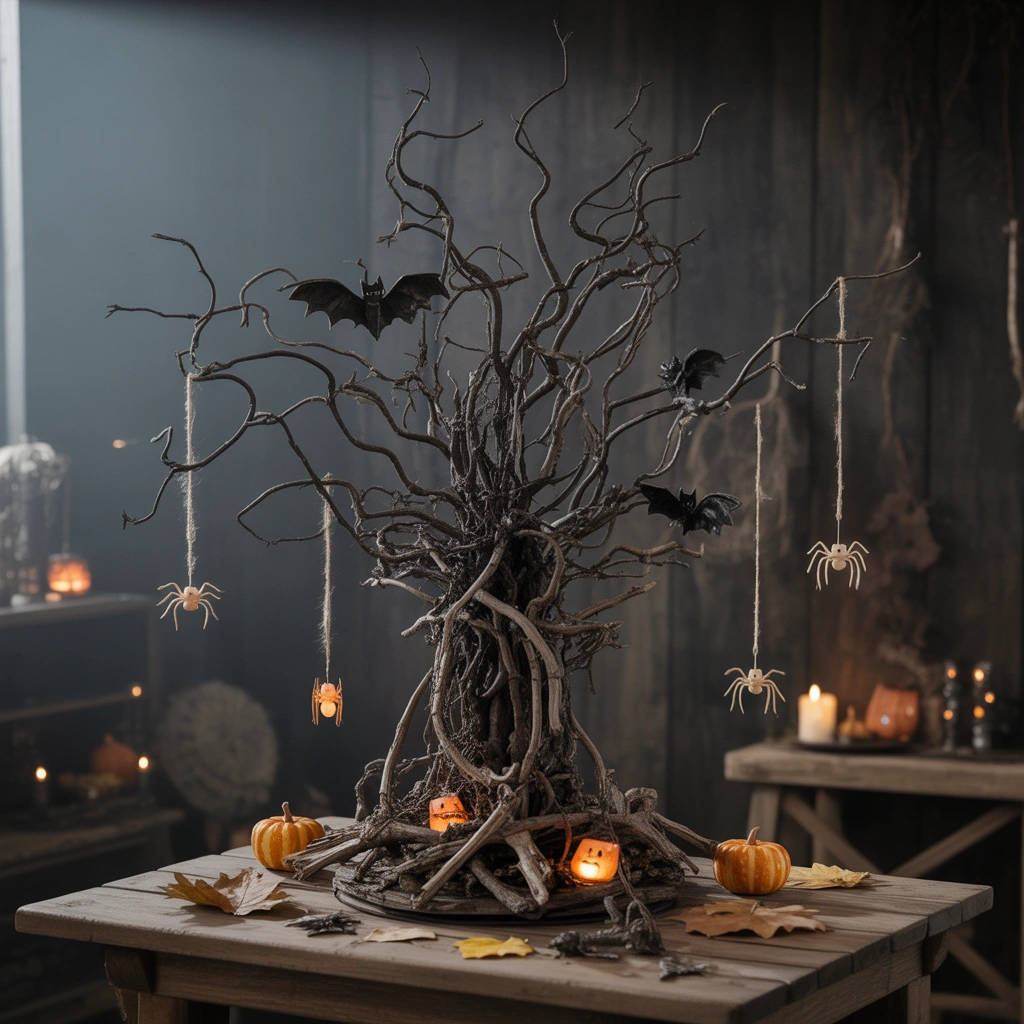
One of my favorite homemade Halloween decoration ideas uses something completely free: fallen branches.
Look around your garden or local outdoor space for dry branches that have already fallen naturally.
Choose branches with interesting twisted shapes.
Place them inside a heavy vase, bucket, or large jar.
You can leave them natural or paint them black.
Once your branch tree is arranged, decorate it with lightweight Halloween ornaments.
Hang paper bats, miniature ghosts, small skeletons, spiders, ravens, or tiny pumpkins from the branches.
You can also wrap thin battery-powered fairy lights around the branches.
The lights create beautiful shadows at night.
A small version makes an excellent tabletop centerpiece.
A larger branch arrangement can stand in an entryway or porch corner.
I particularly like this decoration because it feels seasonal without looking overly commercial.
It combines natural autumn materials with subtle Halloween details.
14. Build a Cardboard Haunted House
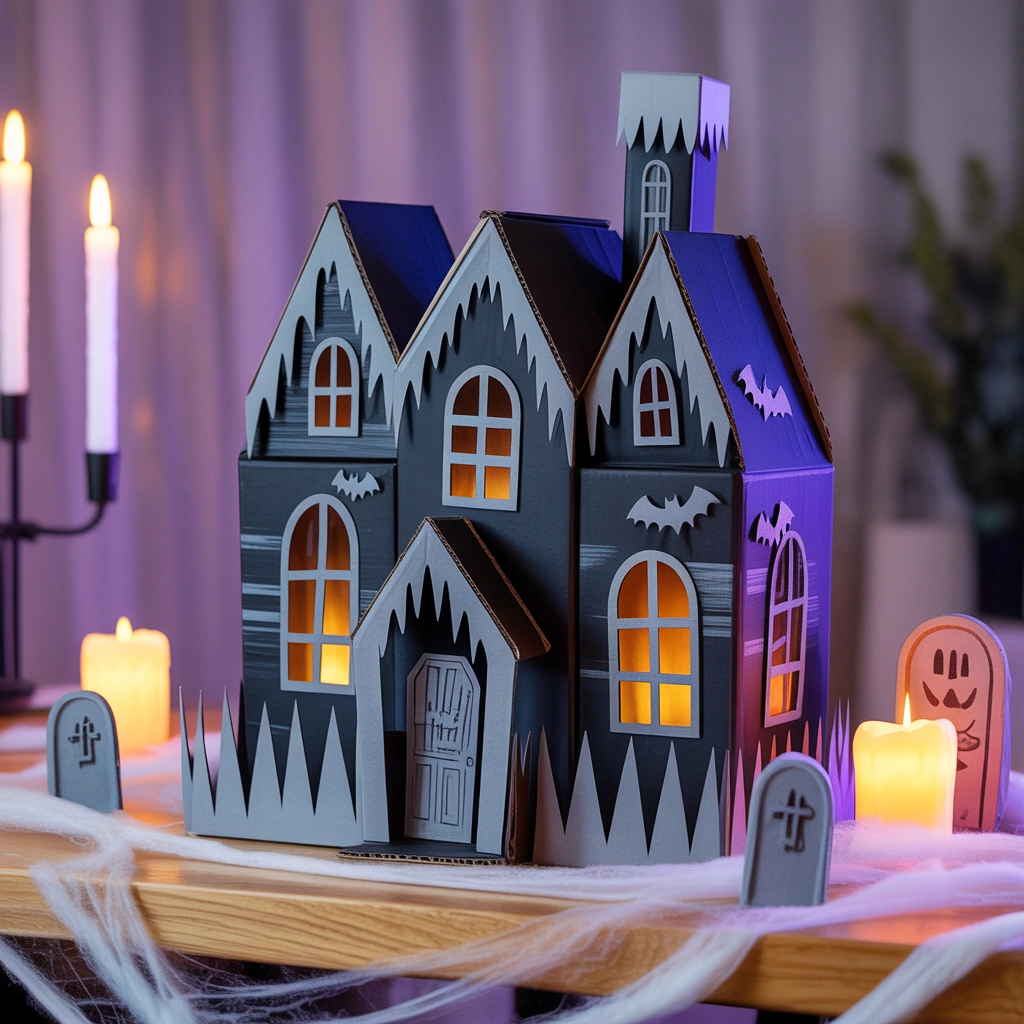
Cardboard boxes can become surprisingly impressive Halloween decorations.
Instead of throwing away delivery boxes, turn them into a miniature haunted house.
Draw the basic shape of the house onto cardboard and cut out walls, windows, doors, roof sections, and towers.
Do not worry about creating perfect architecture.
Crooked windows, uneven roofs, and unusual angles actually make the house look more haunted.
Paint everything in dark shades such as black, gray, brown, or deep purple.
Add details with a lighter paint color.
You can draw roof tiles, cracked walls, wooden doors, and stone patterns.
Cut openings for windows and place yellow or orange tissue paper behind them.
Then position battery-powered lights inside the house.
When illuminated, the windows appear to glow.
Add tiny paper bats around the roof, cotton spiderwebs near the doorway, and miniature pumpkins along the entrance.
A homemade haunted house makes an excellent centerpiece for a Halloween party table or fireplace mantel.
You can even create an entire cardboard Halloween village if you enjoy detailed craft projects.
15. Create a Spooky Halloween Porch Entrance
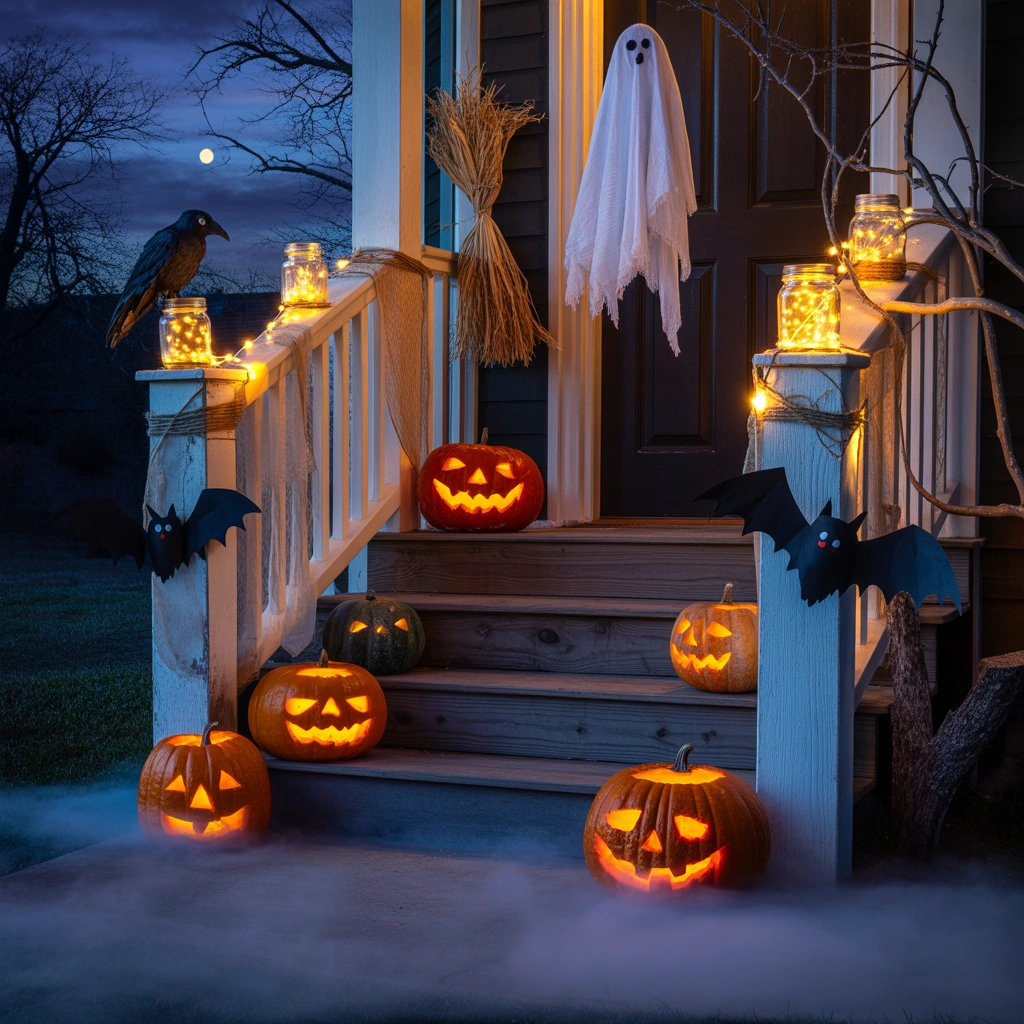
The final idea is less about one individual craft and more about combining several homemade Halloween decorations into one complete entrance.
Your porch is usually the first thing trick-or-treaters and visitors see, so creating a coordinated display can make a huge difference.
Start by choosing one main theme.
For example:
A haunted cemetery.
A witch’s cottage.
A ghost gathering.
A giant spider invasion.
A classic pumpkin porch.
Once you have a theme, choose a few large decorations rather than filling every space with unrelated objects.
For a witch-themed entrance, you could place an old broom beside the door, create homemade potion bottles, display a black cauldron, and add paper bats around the doorway.
For a haunted cemetery, combine cardboard tombstones with hanging ghosts, lanterns, branches, and artificial cobwebs.
For a pumpkin-themed entrance, arrange pumpkins in multiple sizes along both sides of the steps and add homemade jack-o’-lantern jars between them.
Lighting is especially important.
Battery-powered lanterns, string lights, and outdoor spotlights can transform decorations that look simple during the day into something much more dramatic after sunset.
Try to maintain balance rather than perfect symmetry.
For example, you might place a tall branch arrangement on one side and several pumpkins at different heights on the other.
When everything works together, your front porch begins to feel like a complete Halloween scene rather than a collection of separate decorations.
Tips for Making Homemade Halloween Decorations Look Better
One thing I have learned from making DIY Halloween decor is that inexpensive decorations do not have to look inexpensive.
Small styling choices can make a huge difference.
Stick to a Color Palette
Traditional Halloween colors include black, orange, white, purple, and green, but you do not need to use all of them.
Choosing two or three main colors usually creates a more coordinated look.
For an elegant Halloween theme, try black, white, and gold.
For a rustic look, combine orange, brown, cream, and natural wood tones.
For something Gothic, use black, dark red, deep purple, and antique metallic finishes.
Decorate at Different Heights
Avoid placing every decoration at the same level.
Use boxes, crates, stools, stacked pumpkins, branches, and lanterns to create different heights.
This simple technique makes displays feel fuller and more visually interesting.
Use Lighting Carefully
Halloween decorations become much more effective when lighting is included.
Warm string lights can create a cozy autumn feeling, while green, purple, or low white lighting can make an area feel mysterious.
Battery-operated candles are particularly useful for lanterns, pumpkins, jars, and table decorations.
Mix Homemade and Existing Items
You do not have to make absolutely everything yourself.
Sometimes the best Halloween displays combine homemade decorations with a few decorations you already own.
For example, homemade paper bats can be arranged around a store-bought skeleton.
DIY potion bottles can surround an existing Halloween cauldron.
Handmade ghosts can be displayed among real pumpkins.
The homemade pieces give the display personality while the existing decorations save time.
Reuse What You Already Have
Before buying craft supplies, look around your home.
You may already have materials that can be transformed.
Cardboard boxes can become tombstones.
Glass jars can become lanterns.
Old sheets can become ghosts.
Branches can become Halloween trees.
Black clothing or fabric scraps can become witch decorations.
Empty bottles can become potions.
This is one of the biggest reasons I enjoy homemade Halloween decorations: they encourage you to look at everyday objects differently.
How to Decorate for Halloween on a Small Budget
It is incredibly easy to overspend on seasonal decorations, especially when stores begin displaying Halloween products weeks in advance.
I try to decide on a decorating theme before buying anything.
That keeps me from purchasing random items simply because they look interesting.
Start with projects using materials you already own.
Then create a short list of craft supplies you genuinely need.
Cardstock, inexpensive paint, glue, gauze, rope, and battery-powered lights can usually be used across several different projects.
Natural materials are another great money-saving resource.
Fallen branches, dried leaves, pinecones, and real pumpkins can add texture and seasonal color without requiring elaborate decorations.
If you are decorating several rooms, do not feel that every space needs a large display.
A few paper bats in one room, glowing jars in another, and a Halloween centerpiece on the dining table may be enough to create a consistent theme throughout the home.
Indoor vs. Outdoor Homemade Halloween Decorations
When choosing DIY Halloween decorations, think about where each item will be displayed.
Paper decorations, cardboard haunted houses, potion bottles, and fabric wreaths generally work best indoors or in protected porch areas.
Outdoor decorations need to withstand wind, moisture, and changing temperatures.
If you are putting cardboard tombstones outside, consider sealing them or placing them where they will not be directly exposed to rain.
Lightweight decorations should also be secured properly.
Hanging ghosts, spiders, and signs can easily blow away if they are attached with weak string or tape.
Always consider safety as well.
Keep walking paths clear, especially if trick-or-treaters will be visiting after dark.
Avoid running cords across steps and pathways where someone could trip.
Lighting pathways with LED lanterns can make your display both safer and more attractive.
Frequently Asked Questions About Homemade Halloween Decorations
What are the easiest homemade Halloween decorations?
Some of the easiest projects include paper bats, hanging fabric ghosts, mason jar lanterns, decorated pumpkins, and window silhouettes. These ideas require very few materials and can usually be completed without advanced crafting skills.
How can I decorate my house for Halloween cheaply?
Reuse materials you already own, including cardboard, jars, fabric, bottles, branches, and old picture frames. Focus on one theme and create several coordinating decorations instead of buying many unrelated items.
What can I make for Halloween with household items?
Household items can be transformed into numerous Halloween decorations. Old sheets can become ghosts, jars can become lanterns, cardboard can become tombstones, bottles can become potion containers, and picture frames can become haunted portraits.
How can I make my Halloween decorations look scary?
Use shadows, low lighting, unusual silhouettes, distressed textures, dark colors, and strategically placed decorations. A simple ghost hanging in a brightly lit room may look harmless, but the same ghost moving beneath a tree with low lighting can feel completely different.
What homemade Halloween decorations are good for kids?
Children can help make paper bats, painted pumpkins, ghost jars, simple wreaths, paper spiders, and friendly fabric ghosts. Choose age-appropriate tools and supervise younger children when scissors, hot glue, or other craft equipment are involved.
Can homemade Halloween decorations be reused?
Absolutely. Many DIY decorations can be stored and used again the following year. Paper bats, wreaths, potion bottles, lanterns, fabric ghosts, and indoor cardboard decorations can all last for multiple Halloween seasons when stored carefully.
Final Thoughts
Creating your own Halloween decorations is one of the easiest ways to make the holiday feel more personal.
You do not need an enormous decorating budget or professional crafting skills to create something memorable. A few sheets of black paper can become a swarm of bats. An old white sheet can become a floating ghost. Empty glass jars can turn into glowing lanterns. Fallen branches can become the centerpiece of an eerie Halloween display.
What I enjoy most about these 15 homemade Halloween decoration ideas is how flexible they are.
You can take any idea and completely change the style.
A pumpkin can be funny or frightening.
A wreath can be playful or sophisticated.
A ghost can be cute enough for children or spooky enough to make someone hesitate before walking onto your porch.
Start with one or two projects that fit the materials you already have. Once those are finished, build the rest of your decorations around the same theme and color palette.
Before long, you may discover that making the decorations is almost as enjoyable as Halloween itself.
Whether you are preparing for trick-or-treaters, hosting a Halloween party, decorating with your children, or simply bringing a little spooky autumn charm into your home, homemade decorations give you the opportunity to create something that feels completely your own.
And that, for me, is exactly what makes DIY Halloween decorating so much fun.
